


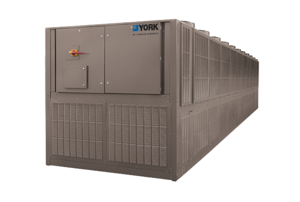
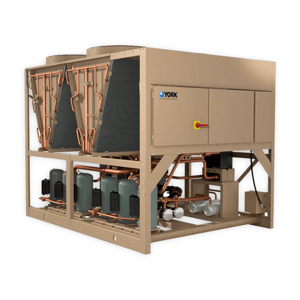
York Screw Chiller YCIV0287VA46
Need answers fast?
Explore the manual using AI.

Turn manuals into instant answers
with your AI-powered assistantTurn manuals into instant answers
with your AI-powered assistant
Manual for York Screw Chiller YCIV0287VA46
Complete asset maintenance, one click away
Get instant access to all the maintenance information you need. Empower technicians to perform preventive maintenance with asset packages, ready to use right out of the box.

Documents & Manuals
Find all the essential guides in one place.
 Tensioning Guide
- Belt-diagram
- C-120 pulleys
+ 13 more

Work Order Templates
Pre-built workflows to keep your asset running smoothly.
- Daily Electrical System Inspection
- Replace Roller and Pulley
- Install Engine B-120
+ 29 more

Procedures
Integrate maintenance plans directly into your work orders.
- Motion Industries
- Applied Industrial Technologies
- Electrical Brothers
+ 5 more

Parts
Access the parts list for your equipment in MaintainX.
- Drive Motor
- B2 Rollers
- Tensioning System
+ 40 more
York Screw Chiller YCIV0287VA46
Create an account to install this asset package.
Maintenance Plans for York Screw Chiller Model YCIV0287VA46
Integrate maintenance plans directly into your work orders in MaintainX.
1 Yearly Chiller Maintenance
This procedure must be performed at the specified time by an industry certified technician who has been trained and qualified to work on this type of equipment.
A record of this procedure being successfully carried out should be maintained on file by the equipment owner should proof of adequate maintenance be required at a later date for warranty purposes.
Sample compressor oil, check for acid, and replace if necessary.
Disconnect power source and lock out and check tightness of power wiring connections.
Check glycol concentration on low temperature or other applications where freezing may be a problem.
Technician's Signature

3 Monthly Chiller Check
Check programmable operating setpoints and safety cutouts and ensure they are correct for the application
Check compressor and evaporator heater operation
Check for dirt in the control panel and check door gasket sealing integrity
Chiller Refriegerant Charging
Warning: Ensure the vapor portion of the refrigerant container or cylinder has not been contaminated with other gases that are not R-134a, including air.
Is the appropriate saturation property for the correct refrigerant used?
Refer to Table 55 on page 314 for R-134a to determine if the saturation pressure and ambient temperature of the refrigerant in the container coincide.
Is only refrigerant vapor from the top of the drum or cylinder admitted to the system until system pressure is raised above the corresponding saturation pressure at the freezing point of the chilled liquids?
For all other liquids, establish the freeze point temperature and vapor charge to a pressure that is 5°F (2.78°C) higher than that freeze point.
Enter the pressure for water with R-134a at 32°F.
Before charging, establish the starting weight for the refrigerant cylinder.
Is a refrigerant pump used to draw vapor from the chiller and discharge it to the vapor connection of the refrigerant cylinder?
Is air prevented from entering the system during charging?
Chiller System Dehydration
Connect a high-capacity vacuum pump with indicator to the charging valves as shown in Figure 147 on page 306 and Figure 148 on page 306. Start the pump.
Ensure all the system valves including manual valves and EEVs are 100% open. Ensure that all valves to the atmosphere are closed with flare caps in place, if applicable.
Operate the vacuum pump until a pressure of 5,000 μm is reached. To avoid freezing any trapped moisture in the system, see Table 54 on page 310 for corresponding pressure and temperature values.
To start the 8-hour vacuum hold test, close the system charging valve connection to the vacuum pump. Note the time and pressure.
Hold the vacuum obtained in Step 4 in the system for 8 hours. Even a slight rise in pressure can indicate a leak, the presence of moisture, or both. Check for pressure change with the chiller at the same temperature. Pressure changes proportional to temperature and can affect results.
To determine if it is moisture or a leak, conduct a pressure rise test. Evacuate the system to 5,000 μm again and perform another hold test. If the pressure rise goes to 0 psig, it indicates that a leak is present. If moisture is present, the pressure stabilizes at some level below atmosphere and should correspond to the room ambient temperature or the heat being applied to the vessel. See Table 54 on page 310 for values.
An acceptable vacuum pressure rise is 150 μm for the first 60 minutes.
If the vacuum does not hold within the limits defined in Step 6, find and repair the leak. If leaks cannot be identified while pressurized but vacuum hold tests indicate a leak, this may be due to an elastomeric or O-ring sealing issue.
Result: When the 5,000 μm vacuum hold test is successful, perform a final evacuation.
Chiller Leak Testing
Warning: This procedure should only be performed by a qualified technician.
Leak Testing
Pressure test and evacuation performed at the factory?
Enter the leak rate (acceptable limit is 0.1 oz/year at DWP)
Any leaks indicated?
If leaks are indicated, they must be repaired immediately.
Leaks stopped by ensuring face seal nuts and flange bolts are correctly torqued?
For any major repair, the refrigerant charge must be removed and the system leak checked using reliable methods like a pressure test.
Leak Testing During Operation
Parts for York Screw Chiller YCIV0287VA46
Access the parts list for your equipment in MaintainX.
York Coolant, Approved Coolant
013-03344-000
Isolator One Inch Deflection Rated Capacity Up To 434 Lb Up To 197 Kg Color Black
029-25334-002
Isolator One Inch Deflection Rated Capacity 435–765 Lb 198–347 Kg Color Dk Green
029-25334-003
Isolator One Inch Deflection Rated Capacity 766–1020 Lb 348–463 Kg Color Gray
029-25334-004
Isolator One Inch Deflection Rated Capacity 1021–1156 Lb 464–524 Kg Color White
029-25334-005
Unlock efficiency
with MaintainX CoPilot
MaintainX CoPilot is your expert colleague, on call 24/7, helping your team find the answers they need to keep equipment running.
Reduce Unplanned Downtime
Ensure your team follows consistent procedures to minimize equipment failures and costly delays.
Maximize Asset Availability
Keep your assets running longer and more reliably, with standardized maintenance workflows from OEM manuals.
Lower Maintenance Costs
Turn any technician into an expert to streamline operations, maintain more assets, and reduce overall costs.
Thousands of companies manage their assets with MaintainX

'%3e%3cpath%20fill='url(%23b)'%20d='M66.008%2080.068c-5.084-.786-9.763-3.834-12.442-8.68a16.942%2016.942%200%200%201-1.87-5.18c1.096.19%202.203.476%203.298.87%206.525%202.333%2010.836%207.68%2011.014%2012.99ZM51.47%2061.576c.488-5.524%203.62-10.716%208.847-13.597a17.132%2017.132%200%200%201%2011.335-1.882c-.798%208.145-7.43%2014.848-16.038%2015.599-1.417.119-2.799.07-4.144-.12Zm28.564-11.478a17.513%2017.513%200%200%201%203.727%204.62c4.608%208.335%201.584%2018.813-6.75%2023.409a16.988%2016.988%200%200%201-4.359%201.679%2019.624%2019.624%200%200%201-3.977-12.776c.346-7.561%204.942-13.931%2011.36-16.932Z'/%3e%3cpath%20fill='%23110F0D'%20fill-rule='evenodd'%20d='M142.831%2048.324h4.977V77.03h-4.977V48.324Zm27.278%2013.002c.322%201.048.453%202.263.453%203.62v12.073h-4.787V66.208c0-.75-.047-1.572-.154-2.143-.453-2.382-1.822-3.572-4.215-3.572-2.31%200-3.882%201.274-4.43%203.476-.143.596-.226%201.405-.226%202.25v10.8h-4.787V56.623h4.477v2.989c1.536-2.5%203.906-3.43%206.371-3.43%203.488%200%206.263%201.68%207.298%205.144Zm24.636%207.323c0%203.882-2.358%206.525-5.763%207.727-1.298.453-2.632.643-4.62.643h-10.169V48.324h9.085c1.691%200%203.156.143%204.049.38%203.465.93%205.727%203.68%205.727%207.335%200%202.441-.81%204.156-2.762%205.644%202.905%201.417%204.453%203.727%204.453%206.966Zm-15.634-8.656h4.584c1.024%200%201.917-.143%202.536-.417%201.215-.548%201.905-1.608%201.905-3.167%200-1.548-.643-2.572-1.845-3.132-.691-.31-1.762-.452-2.763-.452h-4.417v7.168Zm10.716%208.465c0-1.536-.893-3.37-3.227-3.893-.428-.095-1.036-.143-1.571-.143h-5.918v8.085h5.501c.56%200%201.429-.048%201.953-.167%201.94-.453%203.262-1.846%203.262-3.882Zm47.747-11.847-8.097%2020.408h-4.429l-8.109-20.408h5.191l5.192%2014.574%205.108-14.574h5.144Zm-20.218%2010.002c0%20.69-.036%201.262-.155%201.94h-15.943c.631%202.87%202.714%204.728%205.882%204.728%202.131%200%203.607-.882%204.703-2.525h4.87c-1.762%204.144-5.204%206.692-9.657%206.692-6.084%200-10.537-4.858-10.537-10.49%200-6.108%204.524-10.776%2010.335-10.776%206.239%200%2010.442%204.954%2010.502%2010.43Zm-4.763-1.405c-.333-2.846-2.643-4.858-5.691-4.858-2.894%200-5.287%201.929-5.621%204.858h11.312Zm-72.667%203.44c0%204.787-3.287%208.371-9.419%208.371H119.363V64.66c-1.917.274-3.87.69-5.811%201.238l4.537%2011.121h-5.418l-3.596-9.585c-5.144%202.084-10.085%205.216-14.217%209.585h-4.786L101.8%2048.312h4.56l5.68%2013.883a44.112%2044.112%200%200%201%207.323-1.774V48.312h9.084c1.703%200%203.156.143%204.061.393%203.453.929%205.727%203.667%205.727%207.323%200%201.917-.738%204.179-2.81%205.691%203.06%201.56%204.501%204.025%204.501%206.93Zm-15.634-8.667a62.664%2062.664%200%200%201%202.06-.036c1.703.012%203.239.131%204.608.37%201.441-.549%202.357-1.727%202.357-3.537%200-1.941-.881-3.144-2.488-3.667-.548-.18-1.358-.286-2.322-.286h-4.215v7.156Zm-16.55%203.905-3.715-9.894-6.394%2016.502c2.833-2.595%206.263-4.858%2010.109-6.608Zm27.254%204.74c0-2.775-3.131-4.347-8.513-4.418-.715%200-1.441.011-2.191.047v8.252h5.918c2.548%200%204.786-1.37%204.786-3.882Z'%20clip-rule='evenodd'/%3e%3c/g%3e%3cdefs%3e%3clinearGradient%20id='b'%20x1='51.47'%20x2='85.916'%20y1='62.946'%20y2='62.946'%20gradientUnits='userSpaceOnUse'%3e%3cstop%20stop-color='%23CD9F28'/%3e%3cstop%20offset='1'%20stop-color='%23ECD80B'/%3e%3c/linearGradient%3e%3cclipPath%20id='a'%3e%3cpath%20fill='%23fff'%20d='M51.47%2045.728h186.104V80.14H51.47z'/%3e%3c/clipPath%3e%3c/defs%3e%3c/svg%3e)


More from York


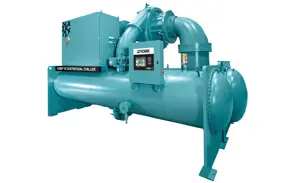
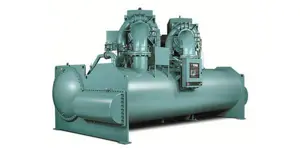
Explore Other Assets


© 2026 MaintainX. All rights reserved.