


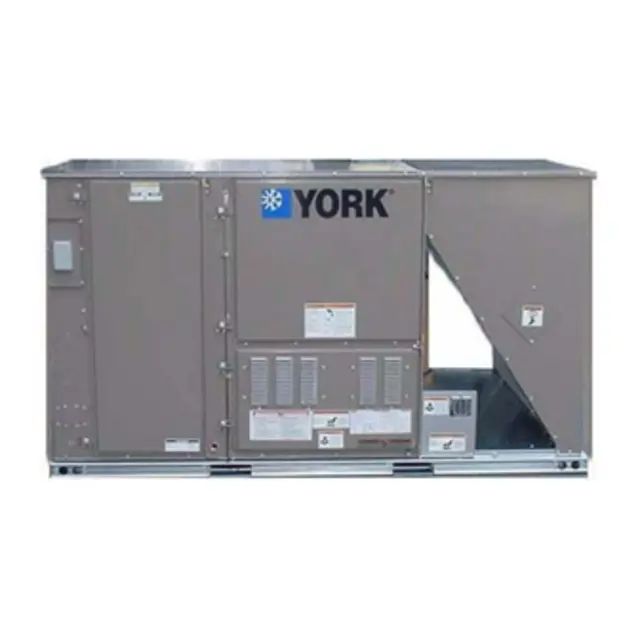
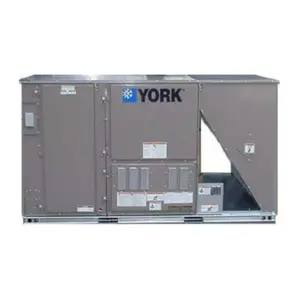
York Rooftop Unit ZH120E54R5B5BCA2A1
Need answers fast?
Explore the manual using AI.
Turn manuals into instant answers
with your AI-powered assistantTurn manuals into instant answers
with your AI-powered assistant
Manual for York Rooftop Unit ZH120E54R5B5BCA2A1
Complete asset maintenance, one click away
Get instant access to all the maintenance information you need. Empower technicians to perform preventive maintenance with asset packages, ready to use right out of the box.

Documents & Manuals
Find all the essential guides in one place.
 Tensioning Guide
- Belt-diagram
- C-120 pulleys
+ 13 more

Work Order Templates
Pre-built workflows to keep your asset running smoothly.
- Daily Electrical System Inspection
- Replace Roller and Pulley
- Install Engine B-120
+ 29 more

Procedures
Integrate maintenance plans directly into your work orders.
- Motion Industries
- Applied Industrial Technologies
- Electrical Brothers
+ 5 more

Parts
Access the parts list for your equipment in MaintainX.
- Drive Motor
- B2 Rollers
- Tensioning System
+ 40 more
York Rooftop Unit ZH120E54R5B5BCA2A1
Create an account to install this asset package.
Maintenance Plans for York Rooftop Unit Model ZH120E54R5B5BCA2A1
Integrate maintenance plans directly into your work orders in MaintainX.
Rooftop Unit Start-up Check
Start-Up (Cooling)
Prestart Check List
After installation has been completed
1. Check the electrical supply voltage being supplied
Be sure that it is the same as listed on the unit nameplate
2. Set the room thermostat to the off position
3. Turn unit electrical power on
4. Set the room thermostat fan switch to on
5. Check indoor blower rotation

Air Quantity Check
Checking Air Quantity
Method One
1. Remove the dot plugs from the duct panel (see Figures 12 and 13 for location)
2. Insert eight inches of 1/4 inch metal tubing into the airflow on both sides of the indoor coil
NOTE
The tubes must be inserted and held in a position perpendicular to the air flow so that velocity pressure will not affect the static pressure readings
3. Use an Inclined Manometer or Magnehelic to determine the pressure drop across a dry evaporator coil
Measuring the pressure drop across a wet coil under field conditions could be inaccurate
To assure a dry coil, the compressors should be de-activated while the test is being run
1 Yearly Smoke Detector Cleaning
Warning: Follow NFPA 72 requirements for smoke detector maintenance
Smoke detector tested?
Smoke detector cleaned?
Upload a photo of the cleaned smoke detector
Enter any issues found during the maintenance
Sign off on the smoke detector maintenance
Supply Air Drive Adjustment
CAUTION: Only qualified personnel should make blower speed changes, strictly adhering to the fan laws.
Before making any blower speed changes review the installation for any installation errors, leaks or undesirable systems effects that can result in loss of airflow.
Even small changes in blower speed can result in substantial changes in static pressure and BHP.
BHP and AMP draw of the blower motor will increase by the cube of the blower speed.
Static pressure will increase by the square of the blower speed.
Enter the measured CFM at unit start-up.
Enter the required CFM.
Enter the existing DD.
Enter the new DD calculated using the formula: Required CFM / Measured CFM × Existing DD = New DD.
Belt Tension Adjustment
CAUTION: This procedure requires trained personnel with PPE!
PROCEDURE FOR ADJUSTING BELT TENSION
Loosen the four bolts holding the motor base to the channels
Adjust the belt by turning nuts 'A' (see detail 'B')
Using a belt tension checker, apply a perpendicular force to one belt at the midpoint of the span until a specific deflection distance of 1/64 inch per inch of span length is obtained
To determine the deflection distance from the normal position, use a straight edge from sheave to sheave as a reference line. Use the recommended deflection force per the Belt Adjustment Table. Tension new belts at the maximum deflection force recommended.
Check the belt tension at least two times during the first 24 hours of operation. Any re-tensioning should fall between the minimum and maximum deflection force values.
After adjusting, retighten the bolts holding the motor base to the channel
Sign off on the belt tension adjustment
Parts for York Rooftop Unit ZH120E54R5B5BCA2A1
Access the parts list for your equipment in MaintainX.
Optional Co2 Space Sensor Kit
2AQ04700524
Optional Co2 Sensor Kit
2AQ04700624
Fc Bus 22 Awg Stranded 3-Wire Twisted Shielded Cable Non-Plenum Application Anixter
CBL-22/3-FC-PVC
Fc Bus 22 Awg Stranded 3-Wire Twisted Shielded Cable Non-Plenum Application Belden
B5501FE
Fc Bus 22 Awg Stranded 3-Wire Twisted Shielded Cable Plenum Application Anixter
CBL-22/3-FC-PLN
Unlock efficiency
with MaintainX CoPilot
MaintainX CoPilot is your expert colleague, on call 24/7, helping your team find the answers they need to keep equipment running.
Reduce Unplanned Downtime
Ensure your team follows consistent procedures to minimize equipment failures and costly delays.
Maximize Asset Availability
Keep your assets running longer and more reliably, with standardized maintenance workflows from OEM manuals.
Lower Maintenance Costs
Turn any technician into an expert to streamline operations, maintain more assets, and reduce overall costs.
Thousands of companies manage their assets with MaintainX

'%3e%3cpath%20fill='url(%23b)'%20d='M66.008%2080.068c-5.084-.786-9.763-3.834-12.442-8.68a16.942%2016.942%200%200%201-1.87-5.18c1.096.19%202.203.476%203.298.87%206.525%202.333%2010.836%207.68%2011.014%2012.99ZM51.47%2061.576c.488-5.524%203.62-10.716%208.847-13.597a17.132%2017.132%200%200%201%2011.335-1.882c-.798%208.145-7.43%2014.848-16.038%2015.599-1.417.119-2.799.07-4.144-.12Zm28.564-11.478a17.513%2017.513%200%200%201%203.727%204.62c4.608%208.335%201.584%2018.813-6.75%2023.409a16.988%2016.988%200%200%201-4.359%201.679%2019.624%2019.624%200%200%201-3.977-12.776c.346-7.561%204.942-13.931%2011.36-16.932Z'/%3e%3cpath%20fill='%23110F0D'%20fill-rule='evenodd'%20d='M142.831%2048.324h4.977V77.03h-4.977V48.324Zm27.278%2013.002c.322%201.048.453%202.263.453%203.62v12.073h-4.787V66.208c0-.75-.047-1.572-.154-2.143-.453-2.382-1.822-3.572-4.215-3.572-2.31%200-3.882%201.274-4.43%203.476-.143.596-.226%201.405-.226%202.25v10.8h-4.787V56.623h4.477v2.989c1.536-2.5%203.906-3.43%206.371-3.43%203.488%200%206.263%201.68%207.298%205.144Zm24.636%207.323c0%203.882-2.358%206.525-5.763%207.727-1.298.453-2.632.643-4.62.643h-10.169V48.324h9.085c1.691%200%203.156.143%204.049.38%203.465.93%205.727%203.68%205.727%207.335%200%202.441-.81%204.156-2.762%205.644%202.905%201.417%204.453%203.727%204.453%206.966Zm-15.634-8.656h4.584c1.024%200%201.917-.143%202.536-.417%201.215-.548%201.905-1.608%201.905-3.167%200-1.548-.643-2.572-1.845-3.132-.691-.31-1.762-.452-2.763-.452h-4.417v7.168Zm10.716%208.465c0-1.536-.893-3.37-3.227-3.893-.428-.095-1.036-.143-1.571-.143h-5.918v8.085h5.501c.56%200%201.429-.048%201.953-.167%201.94-.453%203.262-1.846%203.262-3.882Zm47.747-11.847-8.097%2020.408h-4.429l-8.109-20.408h5.191l5.192%2014.574%205.108-14.574h5.144Zm-20.218%2010.002c0%20.69-.036%201.262-.155%201.94h-15.943c.631%202.87%202.714%204.728%205.882%204.728%202.131%200%203.607-.882%204.703-2.525h4.87c-1.762%204.144-5.204%206.692-9.657%206.692-6.084%200-10.537-4.858-10.537-10.49%200-6.108%204.524-10.776%2010.335-10.776%206.239%200%2010.442%204.954%2010.502%2010.43Zm-4.763-1.405c-.333-2.846-2.643-4.858-5.691-4.858-2.894%200-5.287%201.929-5.621%204.858h11.312Zm-72.667%203.44c0%204.787-3.287%208.371-9.419%208.371H119.363V64.66c-1.917.274-3.87.69-5.811%201.238l4.537%2011.121h-5.418l-3.596-9.585c-5.144%202.084-10.085%205.216-14.217%209.585h-4.786L101.8%2048.312h4.56l5.68%2013.883a44.112%2044.112%200%200%201%207.323-1.774V48.312h9.084c1.703%200%203.156.143%204.061.393%203.453.929%205.727%203.667%205.727%207.323%200%201.917-.738%204.179-2.81%205.691%203.06%201.56%204.501%204.025%204.501%206.93Zm-15.634-8.667a62.664%2062.664%200%200%201%202.06-.036c1.703.012%203.239.131%204.608.37%201.441-.549%202.357-1.727%202.357-3.537%200-1.941-.881-3.144-2.488-3.667-.548-.18-1.358-.286-2.322-.286h-4.215v7.156Zm-16.55%203.905-3.715-9.894-6.394%2016.502c2.833-2.595%206.263-4.858%2010.109-6.608Zm27.254%204.74c0-2.775-3.131-4.347-8.513-4.418-.715%200-1.441.011-2.191.047v8.252h5.918c2.548%200%204.786-1.37%204.786-3.882Z'%20clip-rule='evenodd'/%3e%3c/g%3e%3cdefs%3e%3clinearGradient%20id='b'%20x1='51.47'%20x2='85.916'%20y1='62.946'%20y2='62.946'%20gradientUnits='userSpaceOnUse'%3e%3cstop%20stop-color='%23CD9F28'/%3e%3cstop%20offset='1'%20stop-color='%23ECD80B'/%3e%3c/linearGradient%3e%3cclipPath%20id='a'%3e%3cpath%20fill='%23fff'%20d='M51.47%2045.728h186.104V80.14H51.47z'/%3e%3c/clipPath%3e%3c/defs%3e%3c/svg%3e)


More from York


Explore Other Assets


© 2026 MaintainX. All rights reserved.