


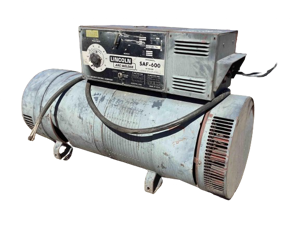
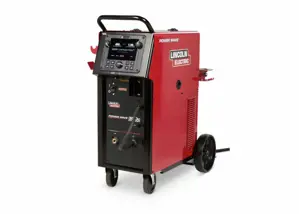
Lincoln Electric Welder K3425-1
Need answers fast?
Explore the manual using AI.

The Lincoln Electric Welder K3425-1 is a robust industrial welding machine designed for high-performance applications. Known for its reliability and efficiency, this welder is ideal for both professional and DIY projects, ensuring quality welds with ease of use.
Turn manuals into instant answers
with your AI-powered assistantTurn manuals into instant answers
with your AI-powered assistant
Manual for Lincoln Electric Welder K3425-1
Complete asset maintenance, one click away
Get instant access to all the maintenance information you need. Empower technicians to perform preventive maintenance with asset packages, ready to use right out of the box.

Documents & Manuals
Find all the essential guides in one place.
 Tensioning Guide
- Belt-diagram
- C-120 pulleys
+ 13 more

Work Order Templates
Pre-built workflows to keep your asset running smoothly.
- Daily Electrical System Inspection
- Replace Roller and Pulley
- Install Engine B-120
+ 29 more

Procedures
Integrate maintenance plans directly into your work orders.
- Motion Industries
- Applied Industrial Technologies
- Electrical Brothers
+ 5 more

Parts
Access the parts list for your equipment in MaintainX.
- Drive Motor
- B2 Rollers
- Tensioning System
+ 40 more
Lincoln Electric Welder K3425-1
Create an account to install this asset package.
Maintenance Plans for Lincoln Electric Welder Model K3425-1
Integrate maintenance plans directly into your work orders in MaintainX.
6 Monthly Welder Cleaning
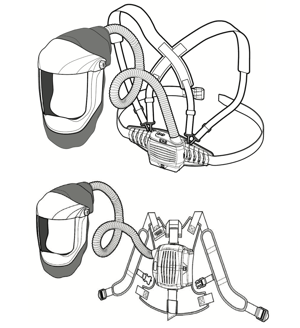
Warning: This cleaning procedure requires trained personnel with PPE!
Machine cleaned with a low pressure airstream?
Select all parts that have been cleaned
Machine operating cooler and with higher reliability after cleaning?
Sign off on the welder cleaning

Welder Voltage Calibration
Connect a resistive load bank to the machine configured for 300A/20V (750A/50V equivalent)
Connect a certified calibrated voltmeter to the output circuit. Use the M25303 low pass filter supplied with the K4171-1 Power Wave Calibration Kit between the meter and the power source
Disconnect input power from the machine being calibrated and remove the right case side to provide access to the User Interface
Rotate the Hot Start control and Arc Control knobs completely counter-clockwise
Replace the right case side; reconnect input power to the machine and energize. The display should read “Cur CAL”
Rotate the Arc Control knob until the display reads “VoL CAL”
Rotate the Hot Start knob clockwise to enable the output which will be indicated by the scrolling message “AdJ Pot So rEAL VoL = 20 VoL” on the display
Enter the actual output voltage
Adjust the output control knob until the actual output voltage reading is within the specified range (20 +/- 0.5 V)
Welder Current Calibration
Connect a resistive load bank to the machine configured for 300A/20V (750A/50V equivalent)
Connect a certified calibrated current probe or current meter and shunt to the output circuit
Disconnect input power from the machine being calibrated remove the right case side to provide access to the User Interface
Rotate the Hot Start control and Arc Control knobs completely counter-clockwise
Replace the right case side; reconnect input power to the machine and energize
The display should read “Cur CAL”
Rotate the Hot Start knob clockwise to enable the output which will be indicated by the scrolling message “AdJ Pot So rEAL Cur = 300 A” on the display
The actual output current should be 300 +/- 2 A
Adjust the output control knob until the actual output current reading is within the specified range
Welder Routine Maintenance
Examine the sheet metal case for dents or breakage
Repair the case as required
Keep the case in good condition to insure that high voltage parts are protected and correct spacings are maintained
All external sheet metal screws must be in place to insure case strength and electrical ground continuity
Sign off on the welder routine maintenance
Welder Visual Inspection
Clean interior of machine with a low pressure air stream
Make a thorough inspection of all components
Look for signs of overheating, broken leads or other obvious problems
Many problems can be uncovered with a good visual inspection
Upload a photo of the machine after inspection
Sign off on the visual inspection
Parts for Lincoln Electric Welder K3425-1
Access the parts list for your equipment in MaintainX.
#10-24X.50HHCS-FULL-GR2-3147
9SCF000371
Self Tapping Screw
9SS9225-100
Output Stud Cover
9SG6864
Washer
9SS9262-184
UI Board Assembly
9SS32071-1
#10-24X.50HHCS-FULL-GR2-3147
9SCF000371
Self Tapping Screw
9SS9225-100
Output Stud Cover
9SG6864
Washer
9SS9262-184
UI Board Assembly
9SS32071-1
#10-24X.50HHCS-FULL-GR2-3147
9SCF000371
Self Tapping Screw
9SS9225-100
Output Stud Cover
9SG6864
Washer
9SS9262-184
UI Board Assembly
9SS32071-1
Unlock efficiency
with MaintainX CoPilot
MaintainX CoPilot is your expert colleague, on call 24/7, helping your team find the answers they need to keep equipment running.
Reduce Unplanned Downtime
Ensure your team follows consistent procedures to minimize equipment failures and costly delays.
Maximize Asset Availability
Keep your assets running longer and more reliably, with standardized maintenance workflows from OEM manuals.
Lower Maintenance Costs
Turn any technician into an expert to streamline operations, maintain more assets, and reduce overall costs.
Thousands of companies manage their assets with MaintainX

'%3e%3cpath%20fill='url(%23b)'%20d='M66.008%2080.068c-5.084-.786-9.763-3.834-12.442-8.68a16.942%2016.942%200%200%201-1.87-5.18c1.096.19%202.203.476%203.298.87%206.525%202.333%2010.836%207.68%2011.014%2012.99ZM51.47%2061.576c.488-5.524%203.62-10.716%208.847-13.597a17.132%2017.132%200%200%201%2011.335-1.882c-.798%208.145-7.43%2014.848-16.038%2015.599-1.417.119-2.799.07-4.144-.12Zm28.564-11.478a17.513%2017.513%200%200%201%203.727%204.62c4.608%208.335%201.584%2018.813-6.75%2023.409a16.988%2016.988%200%200%201-4.359%201.679%2019.624%2019.624%200%200%201-3.977-12.776c.346-7.561%204.942-13.931%2011.36-16.932Z'/%3e%3cpath%20fill='%23110F0D'%20fill-rule='evenodd'%20d='M142.831%2048.324h4.977V77.03h-4.977V48.324Zm27.278%2013.002c.322%201.048.453%202.263.453%203.62v12.073h-4.787V66.208c0-.75-.047-1.572-.154-2.143-.453-2.382-1.822-3.572-4.215-3.572-2.31%200-3.882%201.274-4.43%203.476-.143.596-.226%201.405-.226%202.25v10.8h-4.787V56.623h4.477v2.989c1.536-2.5%203.906-3.43%206.371-3.43%203.488%200%206.263%201.68%207.298%205.144Zm24.636%207.323c0%203.882-2.358%206.525-5.763%207.727-1.298.453-2.632.643-4.62.643h-10.169V48.324h9.085c1.691%200%203.156.143%204.049.38%203.465.93%205.727%203.68%205.727%207.335%200%202.441-.81%204.156-2.762%205.644%202.905%201.417%204.453%203.727%204.453%206.966Zm-15.634-8.656h4.584c1.024%200%201.917-.143%202.536-.417%201.215-.548%201.905-1.608%201.905-3.167%200-1.548-.643-2.572-1.845-3.132-.691-.31-1.762-.452-2.763-.452h-4.417v7.168Zm10.716%208.465c0-1.536-.893-3.37-3.227-3.893-.428-.095-1.036-.143-1.571-.143h-5.918v8.085h5.501c.56%200%201.429-.048%201.953-.167%201.94-.453%203.262-1.846%203.262-3.882Zm47.747-11.847-8.097%2020.408h-4.429l-8.109-20.408h5.191l5.192%2014.574%205.108-14.574h5.144Zm-20.218%2010.002c0%20.69-.036%201.262-.155%201.94h-15.943c.631%202.87%202.714%204.728%205.882%204.728%202.131%200%203.607-.882%204.703-2.525h4.87c-1.762%204.144-5.204%206.692-9.657%206.692-6.084%200-10.537-4.858-10.537-10.49%200-6.108%204.524-10.776%2010.335-10.776%206.239%200%2010.442%204.954%2010.502%2010.43Zm-4.763-1.405c-.333-2.846-2.643-4.858-5.691-4.858-2.894%200-5.287%201.929-5.621%204.858h11.312Zm-72.667%203.44c0%204.787-3.287%208.371-9.419%208.371H119.363V64.66c-1.917.274-3.87.69-5.811%201.238l4.537%2011.121h-5.418l-3.596-9.585c-5.144%202.084-10.085%205.216-14.217%209.585h-4.786L101.8%2048.312h4.56l5.68%2013.883a44.112%2044.112%200%200%201%207.323-1.774V48.312h9.084c1.703%200%203.156.143%204.061.393%203.453.929%205.727%203.667%205.727%207.323%200%201.917-.738%204.179-2.81%205.691%203.06%201.56%204.501%204.025%204.501%206.93Zm-15.634-8.667a62.664%2062.664%200%200%201%202.06-.036c1.703.012%203.239.131%204.608.37%201.441-.549%202.357-1.727%202.357-3.537%200-1.941-.881-3.144-2.488-3.667-.548-.18-1.358-.286-2.322-.286h-4.215v7.156Zm-16.55%203.905-3.715-9.894-6.394%2016.502c2.833-2.595%206.263-4.858%2010.109-6.608Zm27.254%204.74c0-2.775-3.131-4.347-8.513-4.418-.715%200-1.441.011-2.191.047v8.252h5.918c2.548%200%204.786-1.37%204.786-3.882Z'%20clip-rule='evenodd'/%3e%3c/g%3e%3cdefs%3e%3clinearGradient%20id='b'%20x1='51.47'%20x2='85.916'%20y1='62.946'%20y2='62.946'%20gradientUnits='userSpaceOnUse'%3e%3cstop%20stop-color='%23CD9F28'/%3e%3cstop%20offset='1'%20stop-color='%23ECD80B'/%3e%3c/linearGradient%3e%3cclipPath%20id='a'%3e%3cpath%20fill='%23fff'%20d='M51.47%2045.728h186.104V80.14H51.47z'/%3e%3c/clipPath%3e%3c/defs%3e%3c/svg%3e)


More from Lincoln Electric


Explore Other Assets


© 2026 MaintainX. All rights reserved.