


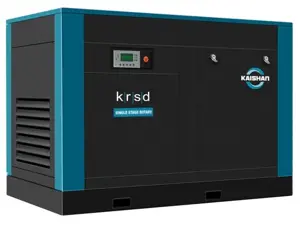
Kaishan Compressor Air Compressor KRSD-30
Need answers fast?
Explore the manual using AI.

Turn manuals into instant answers
with your AI-powered assistantTurn manuals into instant answers
with your AI-powered assistant
Manual for Kaishan Compressor Air Compressor KRSD-30
Complete asset maintenance, one click away
Get instant access to all the maintenance information you need. Empower technicians to perform preventive maintenance with asset packages, ready to use right out of the box.

Documents & Manuals
Find all the essential guides in one place.
 Tensioning Guide
- Belt-diagram
- C-120 pulleys
+ 13 more

Work Order Templates
Pre-built workflows to keep your asset running smoothly.
- Daily Electrical System Inspection
- Replace Roller and Pulley
- Install Engine B-120
+ 29 more

Procedures
Integrate maintenance plans directly into your work orders.
- Motion Industries
- Applied Industrial Technologies
- Electrical Brothers
+ 5 more

Parts
Access the parts list for your equipment in MaintainX.
- Drive Motor
- B2 Rollers
- Tensioning System
+ 40 more
Kaishan Compressor Air Compressor KRSD-30
Create an account to install this asset package.
Maintenance Plans for Kaishan Compressor Air Compressor Model KRSD-30
Integrate maintenance plans directly into your work orders in MaintainX.
2000 Hourly Compressor Maintenance
Safety valve check
6.3 FLUID FILTER
Replace fluid filter
NOTICE: The fluid filter maintenance indicator may read high upon start up on cool mornings due to sluggish fluid creating higher than normal differential pressures. Monitor indicator after the fluid warms up.
Perform fluid sampling
6.5 FLUID SAMPLING PROCEDURE
Check the pressure gauge reading on reservoir and wait until there is no pressure in reservoir.
Take sample at normal operating conditions or immediately after shutting unit down.
Wipe excess contamination from sample area.

Compressor Inspection
4.4 FLUID LEVEL INSPECTION
Inspect the fluid level when the compressor is in shut down mode. Fluid level is indicated on the reservoir sight glass. The maximum fluid level is at the top red-mark. Add fluid until the top red-mark is reached.
4.6 MOTOR ROTATION INSPECTION
Motor rotation must be checked after the wiring has been installed. Operating the compressor in incorrect rotation will result in severe damage to the compressor and warranty coverage will be voided. Motor rotation can be viewed through the opening in the drive grille. The drive motor end of the compressor is marked with an arrow noting the proper rotation.
To inspect rotors rotation, pull out the “EMERGENCY STOP” button and press once, quickly press the “START” and “STOP” button in sequence, allowing the motor to turn 2 or 3 revolutions. Observe the drive shaft for correct direction. If reverse rotation is observed, disconnect the power supply, reverse power input leads at the motor starter. Recheck for proper rotation.
4.7 FAN ROTATION INSPECTION
Fan motor rotation should be inspected. KRSD compressors use an axial fan for cooling. Fan rotation is inspected through an arrow shaped observation hole above the fan motor. The fan must rotate in the direction indicated by the arrow.
NOTICE!
Always inspect fan rotation through the observation hole. Never assume the fan rotation is correct based on the induced air flow across the coolers. A centrifugal fan can pull the airflow across the coolers when rotating in either direction:however, incorrect rotation will cause high discharge temperature.;
500 Hourly Compressor Maintenance
Drain water from air/oil separator tank
Check fluid level
Clean air filter
Clean after-cooler fins
Check for loose fluid and air tubing, electrical wiring connection
Sign off on the compressor maintenance
4000 Hourly/1 Yearly Compressor Air Filter Replacement
WARNING: Always ensure the compressor is switched off and all air pressure is relieved before starting the maintenance.
NOTICE: Intake filtration equipment supplied from the factory may not be adequate for extremely dirty applications or some forms of dust or vapors. It is the customer’s responsibility to provide adequate filtration for those conditions. Warranty will be voided if inadequate filtration causes a failure.
Is the maintenance gauge showing red with the compressor running full load?
Has it been 4000 hours or a year since the last filter replacement?
Are the conditions dirty?
If any of the above checks are 'PASS', proceed with the filter replacement.
Upload a photo of the old filter
Upload a photo of the new filter
After replacement, is the filtered air side of the air cleaner canister and the suction manifold free of dirt?
4000 Hourly Compressor Maintenance
AIR/OIL SEPARATOR
Check if excessive fluid carryover is observed.
Enter the reading from the differential pressure indicator.
Is the reading from the gauge indicating a need for replacement?
KTL4000 FG Fluid Change
Press the emergency stop button and remove the right side cabinet panel (if applicable).
Check the pressure gauge reading on reservoir and wait until reservoir pressure drops to approximately 0.5Bar (7psig).
Close the 1/4 turn valve on the blow-down valve.
Remove the drain plug and attach the 1/4 NPT barb fitting and drain tube (supplied with the unit) to the drain on the oil/air separator tank.
Unlock efficiency
with MaintainX CoPilot
MaintainX CoPilot is your expert colleague, on call 24/7, helping your team find the answers they need to keep equipment running.
Reduce Unplanned Downtime
Ensure your team follows consistent procedures to minimize equipment failures and costly delays.
Maximize Asset Availability
Keep your assets running longer and more reliably, with standardized maintenance workflows from OEM manuals.
Lower Maintenance Costs
Turn any technician into an expert to streamline operations, maintain more assets, and reduce overall costs.
Thousands of companies manage their assets with MaintainX

'%3e%3cpath%20fill='url(%23b)'%20d='M66.008%2080.068c-5.084-.786-9.763-3.834-12.442-8.68a16.942%2016.942%200%200%201-1.87-5.18c1.096.19%202.203.476%203.298.87%206.525%202.333%2010.836%207.68%2011.014%2012.99ZM51.47%2061.576c.488-5.524%203.62-10.716%208.847-13.597a17.132%2017.132%200%200%201%2011.335-1.882c-.798%208.145-7.43%2014.848-16.038%2015.599-1.417.119-2.799.07-4.144-.12Zm28.564-11.478a17.513%2017.513%200%200%201%203.727%204.62c4.608%208.335%201.584%2018.813-6.75%2023.409a16.988%2016.988%200%200%201-4.359%201.679%2019.624%2019.624%200%200%201-3.977-12.776c.346-7.561%204.942-13.931%2011.36-16.932Z'/%3e%3cpath%20fill='%23110F0D'%20fill-rule='evenodd'%20d='M142.831%2048.324h4.977V77.03h-4.977V48.324Zm27.278%2013.002c.322%201.048.453%202.263.453%203.62v12.073h-4.787V66.208c0-.75-.047-1.572-.154-2.143-.453-2.382-1.822-3.572-4.215-3.572-2.31%200-3.882%201.274-4.43%203.476-.143.596-.226%201.405-.226%202.25v10.8h-4.787V56.623h4.477v2.989c1.536-2.5%203.906-3.43%206.371-3.43%203.488%200%206.263%201.68%207.298%205.144Zm24.636%207.323c0%203.882-2.358%206.525-5.763%207.727-1.298.453-2.632.643-4.62.643h-10.169V48.324h9.085c1.691%200%203.156.143%204.049.38%203.465.93%205.727%203.68%205.727%207.335%200%202.441-.81%204.156-2.762%205.644%202.905%201.417%204.453%203.727%204.453%206.966Zm-15.634-8.656h4.584c1.024%200%201.917-.143%202.536-.417%201.215-.548%201.905-1.608%201.905-3.167%200-1.548-.643-2.572-1.845-3.132-.691-.31-1.762-.452-2.763-.452h-4.417v7.168Zm10.716%208.465c0-1.536-.893-3.37-3.227-3.893-.428-.095-1.036-.143-1.571-.143h-5.918v8.085h5.501c.56%200%201.429-.048%201.953-.167%201.94-.453%203.262-1.846%203.262-3.882Zm47.747-11.847-8.097%2020.408h-4.429l-8.109-20.408h5.191l5.192%2014.574%205.108-14.574h5.144Zm-20.218%2010.002c0%20.69-.036%201.262-.155%201.94h-15.943c.631%202.87%202.714%204.728%205.882%204.728%202.131%200%203.607-.882%204.703-2.525h4.87c-1.762%204.144-5.204%206.692-9.657%206.692-6.084%200-10.537-4.858-10.537-10.49%200-6.108%204.524-10.776%2010.335-10.776%206.239%200%2010.442%204.954%2010.502%2010.43Zm-4.763-1.405c-.333-2.846-2.643-4.858-5.691-4.858-2.894%200-5.287%201.929-5.621%204.858h11.312Zm-72.667%203.44c0%204.787-3.287%208.371-9.419%208.371H119.363V64.66c-1.917.274-3.87.69-5.811%201.238l4.537%2011.121h-5.418l-3.596-9.585c-5.144%202.084-10.085%205.216-14.217%209.585h-4.786L101.8%2048.312h4.56l5.68%2013.883a44.112%2044.112%200%200%201%207.323-1.774V48.312h9.084c1.703%200%203.156.143%204.061.393%203.453.929%205.727%203.667%205.727%207.323%200%201.917-.738%204.179-2.81%205.691%203.06%201.56%204.501%204.025%204.501%206.93Zm-15.634-8.667a62.664%2062.664%200%200%201%202.06-.036c1.703.012%203.239.131%204.608.37%201.441-.549%202.357-1.727%202.357-3.537%200-1.941-.881-3.144-2.488-3.667-.548-.18-1.358-.286-2.322-.286h-4.215v7.156Zm-16.55%203.905-3.715-9.894-6.394%2016.502c2.833-2.595%206.263-4.858%2010.109-6.608Zm27.254%204.74c0-2.775-3.131-4.347-8.513-4.418-.715%200-1.441.011-2.191.047v8.252h5.918c2.548%200%204.786-1.37%204.786-3.882Z'%20clip-rule='evenodd'/%3e%3c/g%3e%3cdefs%3e%3clinearGradient%20id='b'%20x1='51.47'%20x2='85.916'%20y1='62.946'%20y2='62.946'%20gradientUnits='userSpaceOnUse'%3e%3cstop%20stop-color='%23CD9F28'/%3e%3cstop%20offset='1'%20stop-color='%23ECD80B'/%3e%3c/linearGradient%3e%3cclipPath%20id='a'%3e%3cpath%20fill='%23fff'%20d='M51.47%2045.728h186.104V80.14H51.47z'/%3e%3c/clipPath%3e%3c/defs%3e%3c/svg%3e)


More from Kaishan Compressor

Explore Other Assets


© 2026 MaintainX. All rights reserved.