


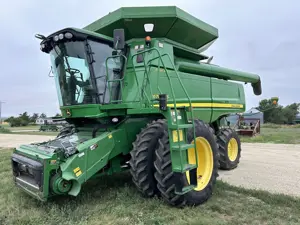
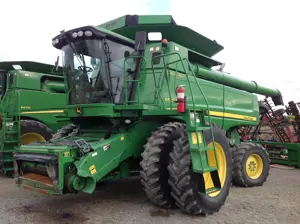
John Deere Tractor 5045E
Need answers fast?
Explore the manual using AI.
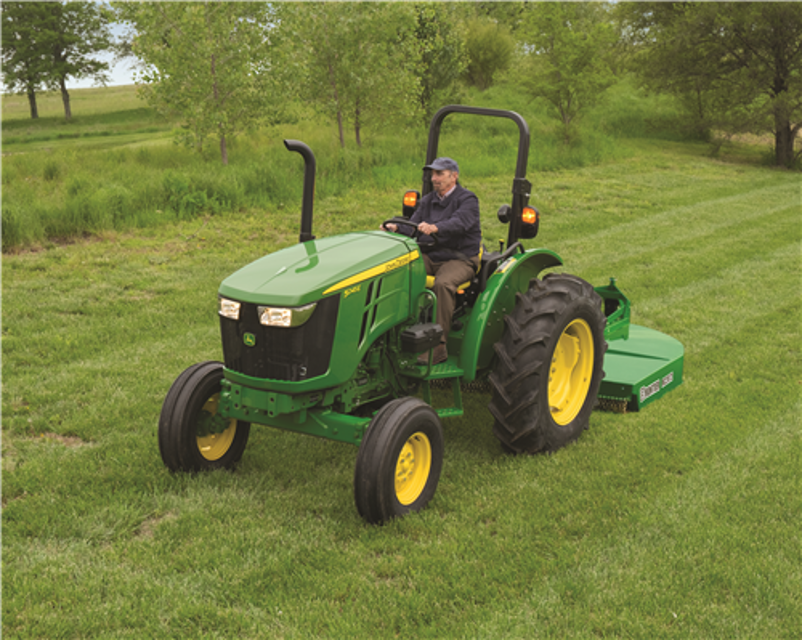
The John Deere Tractor 5045E is a versatile and reliable agricultural asset designed for various farming tasks. Known for its robust performance and efficient operation, this tractor model is ideal for both small and large-scale farming applications, ensuring productivity and durability in the field.
Turn manuals into instant answers
with your AI-powered assistantTurn manuals into instant answers
with your AI-powered assistant
Manual for John Deere Tractor 5045E
Complete asset maintenance, one click away
Get instant access to all the maintenance information you need. Empower technicians to perform preventive maintenance with asset packages, ready to use right out of the box.

Documents & Manuals
Find all the essential guides in one place.
 Tensioning Guide
- Belt-diagram
- C-120 pulleys
+ 13 more

Work Order Templates
Pre-built workflows to keep your asset running smoothly.
- Daily Electrical System Inspection
- Replace Roller and Pulley
- Install Engine B-120
+ 29 more

Procedures
Integrate maintenance plans directly into your work orders.
- Motion Industries
- Applied Industrial Technologies
- Electrical Brothers
+ 5 more

Parts
Access the parts list for your equipment in MaintainX.
- Drive Motor
- B2 Rollers
- Tensioning System
+ 40 more
John Deere Tractor 5045E
Create an account to install this asset package.
Maintenance Plans for John Deere Tractor Model 5045E
Integrate maintenance plans directly into your work orders in MaintainX.
50 Hourly Tractor Maintenance
Clean and check batery
1. Stop engine. (See procedure in Operating the Engine section.)
2. Remove battery cover. (See ACCESS BATTERY in this section.)
3. Wipe battery with a damp cloth. Clean and tighten connections, if needed.
4. Install cover and lower hood.Inspect all tires
1. Use a battery hydrometer to check specific gravity of electrolyte in each cell. Charge battery if reading is below 1.215. Replace battery if difference between cells is more than 0.050 or if battery will not charge above 1.225.
2. Always correct specific gravity reading for electrolyte temperature variation. Add 0.004 to the reading obtained in step one for every 10 *F above 80 *F (add 0.007 to the reading for every 10° above 27 C). Subtract at same rate if electrolyte temperature is below 80 °F (27 C). Correct specific gravity of a fully charged battery is 1.265 to 1.280.
3. A battery is considered fully charged when three consecutive hydrometer readings, taken at hourly intervals, show no rise in specific gravity.
Lubricate front axle pivot pins

600 Hourly Tractor Maintenance
Re-pack front wheel bearing (2WD)
Check and tighten all hoses and hose clamps
Clean engine crankcase vent tube (OCV)
1. Locate crankcase vent port on top right-hand side of engine.
2. Remove crankcase vent tube (A) from open crankcase ventilation filter.
3. Wash in solvent or blow clean with compressed air. Inspect tube for damage, replace if necessary.
4. Install vent tube. Make sure vent tube is not kinked or pinched.
Change MFWD axle and wheel hub oil
1. Park tractor on level surface.
10 Hourly / 1 Daily Tractor Maintenance
Check engine oil level
Check coolant level
1. Raise hood.
2. Check level in coolant reservoir (A) BEFORE starting tractor.
3. If engine is COOL and level is below MIN COLD mark, remove cap and add coolant to reservoir to bring level between MIN and MAX COLD mark.
4. Install cap and lower hood.
Drain water and sediment from fuel tank and fuel filter
Fuel filter:
1. Disconnect wiring harness connector (A). 2. Connect a small hose to end of the drain plug (B). 3. Place a suitable container under drain. 4. Open drain plug (B) to drain moisture and sediment from the fuel filter (C). 5. Tighten drain plug (B) when fuel runs clear. 6. Remove drain hose and connect wiring harness connector (A). Fuel tank:
100 Hourly Tractor Maintenance
Transmission-hydraulic oil filter replaced?
Engine break-in oil and filter changed?
Hose clamps on the air intake system inspected?
Hose clamps on the coolant system inspected?
Sign off on the tractor maintenance
1 Yearly Tractor Maintenance
Replace air cleaner elements
Inspect seat belt
Replace operator enclosure/cab air filters
Replace Engine Air Intake Filters
1. Raise hood.
2. Release Latch (B) and remove Cover (C) from sideways.
3. Rotate Primary element filter (A) anticlock wise to remove. Do not use excessive force. If filter does not pull out with ease, move side-to-side to remove safely.
4. Removal of Secondary filter (B) is similar to removal of Primary filter (A).
5. Install new secondary filter element (B) carefully and lock the filter by rotating the 1/4 turn in clockwise direction.
Unlock efficiency
with MaintainX CoPilot
MaintainX CoPilot is your expert colleague, on call 24/7, helping your team find the answers they need to keep equipment running.
Reduce Unplanned Downtime
Ensure your team follows consistent procedures to minimize equipment failures and costly delays.
Maximize Asset Availability
Keep your assets running longer and more reliably, with standardized maintenance workflows from OEM manuals.
Lower Maintenance Costs
Turn any technician into an expert to streamline operations, maintain more assets, and reduce overall costs.
Thousands of companies manage their assets with MaintainX

'%3e%3cpath%20fill='url(%23b)'%20d='M66.008%2080.068c-5.084-.786-9.763-3.834-12.442-8.68a16.942%2016.942%200%200%201-1.87-5.18c1.096.19%202.203.476%203.298.87%206.525%202.333%2010.836%207.68%2011.014%2012.99ZM51.47%2061.576c.488-5.524%203.62-10.716%208.847-13.597a17.132%2017.132%200%200%201%2011.335-1.882c-.798%208.145-7.43%2014.848-16.038%2015.599-1.417.119-2.799.07-4.144-.12Zm28.564-11.478a17.513%2017.513%200%200%201%203.727%204.62c4.608%208.335%201.584%2018.813-6.75%2023.409a16.988%2016.988%200%200%201-4.359%201.679%2019.624%2019.624%200%200%201-3.977-12.776c.346-7.561%204.942-13.931%2011.36-16.932Z'/%3e%3cpath%20fill='%23110F0D'%20fill-rule='evenodd'%20d='M142.831%2048.324h4.977V77.03h-4.977V48.324Zm27.278%2013.002c.322%201.048.453%202.263.453%203.62v12.073h-4.787V66.208c0-.75-.047-1.572-.154-2.143-.453-2.382-1.822-3.572-4.215-3.572-2.31%200-3.882%201.274-4.43%203.476-.143.596-.226%201.405-.226%202.25v10.8h-4.787V56.623h4.477v2.989c1.536-2.5%203.906-3.43%206.371-3.43%203.488%200%206.263%201.68%207.298%205.144Zm24.636%207.323c0%203.882-2.358%206.525-5.763%207.727-1.298.453-2.632.643-4.62.643h-10.169V48.324h9.085c1.691%200%203.156.143%204.049.38%203.465.93%205.727%203.68%205.727%207.335%200%202.441-.81%204.156-2.762%205.644%202.905%201.417%204.453%203.727%204.453%206.966Zm-15.634-8.656h4.584c1.024%200%201.917-.143%202.536-.417%201.215-.548%201.905-1.608%201.905-3.167%200-1.548-.643-2.572-1.845-3.132-.691-.31-1.762-.452-2.763-.452h-4.417v7.168Zm10.716%208.465c0-1.536-.893-3.37-3.227-3.893-.428-.095-1.036-.143-1.571-.143h-5.918v8.085h5.501c.56%200%201.429-.048%201.953-.167%201.94-.453%203.262-1.846%203.262-3.882Zm47.747-11.847-8.097%2020.408h-4.429l-8.109-20.408h5.191l5.192%2014.574%205.108-14.574h5.144Zm-20.218%2010.002c0%20.69-.036%201.262-.155%201.94h-15.943c.631%202.87%202.714%204.728%205.882%204.728%202.131%200%203.607-.882%204.703-2.525h4.87c-1.762%204.144-5.204%206.692-9.657%206.692-6.084%200-10.537-4.858-10.537-10.49%200-6.108%204.524-10.776%2010.335-10.776%206.239%200%2010.442%204.954%2010.502%2010.43Zm-4.763-1.405c-.333-2.846-2.643-4.858-5.691-4.858-2.894%200-5.287%201.929-5.621%204.858h11.312Zm-72.667%203.44c0%204.787-3.287%208.371-9.419%208.371H119.363V64.66c-1.917.274-3.87.69-5.811%201.238l4.537%2011.121h-5.418l-3.596-9.585c-5.144%202.084-10.085%205.216-14.217%209.585h-4.786L101.8%2048.312h4.56l5.68%2013.883a44.112%2044.112%200%200%201%207.323-1.774V48.312h9.084c1.703%200%203.156.143%204.061.393%203.453.929%205.727%203.667%205.727%207.323%200%201.917-.738%204.179-2.81%205.691%203.06%201.56%204.501%204.025%204.501%206.93Zm-15.634-8.667a62.664%2062.664%200%200%201%202.06-.036c1.703.012%203.239.131%204.608.37%201.441-.549%202.357-1.727%202.357-3.537%200-1.941-.881-3.144-2.488-3.667-.548-.18-1.358-.286-2.322-.286h-4.215v7.156Zm-16.55%203.905-3.715-9.894-6.394%2016.502c2.833-2.595%206.263-4.858%2010.109-6.608Zm27.254%204.74c0-2.775-3.131-4.347-8.513-4.418-.715%200-1.441.011-2.191.047v8.252h5.918c2.548%200%204.786-1.37%204.786-3.882Z'%20clip-rule='evenodd'/%3e%3c/g%3e%3cdefs%3e%3clinearGradient%20id='b'%20x1='51.47'%20x2='85.916'%20y1='62.946'%20y2='62.946'%20gradientUnits='userSpaceOnUse'%3e%3cstop%20stop-color='%23CD9F28'/%3e%3cstop%20offset='1'%20stop-color='%23ECD80B'/%3e%3c/linearGradient%3e%3cclipPath%20id='a'%3e%3cpath%20fill='%23fff'%20d='M51.47%2045.728h186.104V80.14H51.47z'/%3e%3c/clipPath%3e%3c/defs%3e%3c/svg%3e)


More from John Deere


Explore Other Assets


© 2026 MaintainX. All rights reserved.