


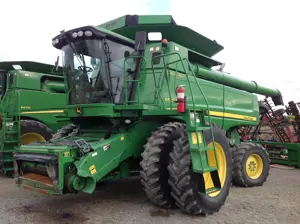
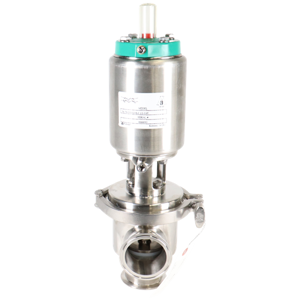
John Deere Lawn Tractor S260
Need answers fast?
Explore the manual using AI.
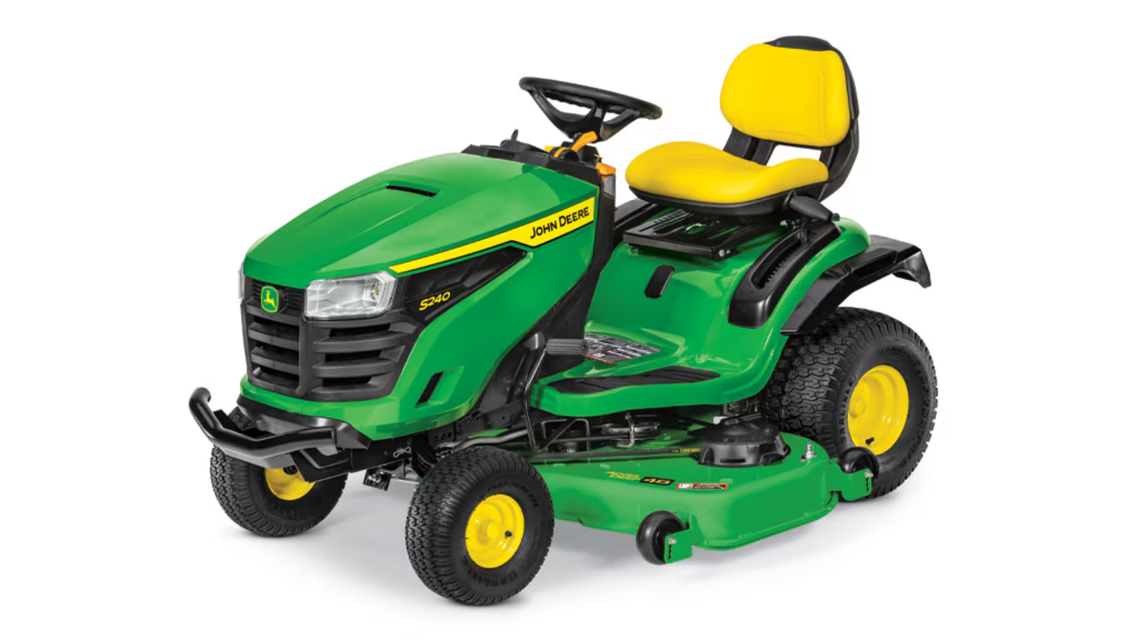
The John Deere Lawn Tractor S260 is a reliable and efficient asset designed for residential lawn care. This versatile model offers powerful performance and ease of use, making it ideal for maintaining your lawn with precision and care. Experience the quality and durability that John Deere is known for in this exceptional lawn tractor.
Turn manuals into instant answers
with your AI-powered assistantTurn manuals into instant answers
with your AI-powered assistant
Manual for John Deere Lawn Tractor S260
Complete asset maintenance, one click away
Get instant access to all the maintenance information you need. Empower technicians to perform preventive maintenance with asset packages, ready to use right out of the box.

Documents & Manuals
Find all the essential guides in one place.
 Tensioning Guide
- Belt-diagram
- C-120 pulleys
+ 13 more

Work Order Templates
Pre-built workflows to keep your asset running smoothly.
- Daily Electrical System Inspection
- Replace Roller and Pulley
- Install Engine B-120
+ 29 more

Procedures
Integrate maintenance plans directly into your work orders.
- Motion Industries
- Applied Industrial Technologies
- Electrical Brothers
+ 5 more

Parts
Access the parts list for your equipment in MaintainX.
- Drive Motor
- B2 Rollers
- Tensioning System
+ 40 more
John Deere Lawn Tractor S260
Create an account to install this asset package.
Maintenance Plans for John Deere Lawn Tractor Model S260
Integrate maintenance plans directly into your work orders in MaintainX.
8 Hourly Saw Bar / Chain Oil Level Check
CAUTION! Before performing any maintenance or disconnecting any hydraulic line, fitting or component, switch OFF the master disconnect switch except when checking hydraulic pressures. Wear work gloves and keep fingers clear. Failure to follow these safety precautions can lead to serious injury
NOTE! Check the fluid level in the oil reservoir tanks. Add oil as required. Clean strainer of any dirt or debris before adding oil
Oil filled to the bottom of the filler neck?
If saw use is heavy, check the level more often than the prescribed 8 hour interval
Reservoir ran dry?
If the reservoir runs dry, manually apply oil to the stopped chain. Refill the reservoir and “prime” the oiler by cycling the bar up and down at least ten times
NOTE! Use BIO-HY-GARD oil or an equivalent “All Season” high quality bio-degradable oil such as John Deere UP08142 Bar and Chain Oil;
Sign off on the oil level check

8 Hourly Machine Lubrication
CAUTION! Before performing any maintenance or disconnecting any hydraulic line, fitting or component, switch OFF the master disconnect switch except when checking hydraulic pressures. Wear work gloves and keep fingers clear. Failure to follow these safety precautions can lead to serious injury
Master disconnect switch turned OFF
Work gloves worn
Fingers kept clear from machine parts
Grease each fitting until fresh grease exudes. Wipe away all excess grease
Fittings greased
Excess grease wiped away
NOTE! Use lithium based EP2 Grease containing 3% to 5% molybdenum disulfide
Correct grease used
8 Hourly Saw Chain Sprocket Inspection
CAUTION! Before performing any maintenance or disconnecting any hydraulic line, fitting or component, switch OFF the master disconnect switch except when checking hydraulic pressures. Wear work gloves and keep fingers clear. Failure to follow these safety precautions can lead to serious injury
Drive sprockets are of the correct size and pitch and properly aligned with the bar
Sprocket has not worn out of pitch
NOTE! It is recommended that the drive sprocket be replaced after every ten chains. DO NOT USE REWELDED SPROCKETS!
Number of chains used since last sprocket replacement
Is it time to replace the sprocket?
Sign off on the saw chain sprocket inspection
8 Hourly Hydraulic Hoses and Fittings Check
CAUTION! Before performing any maintenance or disconnecting any hydraulic line, fitting or component, switch OFF the master disconnect switch except when checking hydraulic pressures. Wear work gloves and keep fingers clear. Failure to follow these safety precautions can lead to serious injury
CAUTION! Escaping fluid under pressure can penetrate the skin causing serious injury
Avoid the hazard by relieving pressure before disconnecting hydraulic or other lines. Pressure may remain in the hydraulic system after the power source and pumps have been shut down. To bleed pressure, lower implements to the ground and cycle all appropriate controls. Remove breather and filler caps slowly
Tighten all connections before applying pressure
Search for leaks with a piece of cardboard. Protect hands and body from high pressure fluids
If an accident occurs,see a doctor immediately
Any fluid injected into the skin must be surgically removed withim a few hours or gangrene may result. Doctors unfamiliar with this type of injury should referencea knowledgeable medical source
Thoroughly inspect all of the hydraulic hoses and fittings for signs of hydraulic leaks
Tighten any loose connections
8 Hourly Saw Bar Groove Depth Inspection
CAUTION! Before performing any maintenance or disconnecting any hydraulic line, fitting or component, switch OFF the master disconnect switch except when checking hydraulic pressures. Wear work gloves and keep fingers clear. Failure to follow these safety precautions can lead to serious injury
NOTE! The bar’s groove depth must be sufficient for the chain’s straps and cutters to ride on the bar’s rails without drive links touching the bottom of the groove
Remove any imbedded particles or debris from the groove
If wear on the saw bar is beyond limits, chain sprocket pitch and alignment must be corrected
See “Inspect Sprocket Pitch Wear” for more details
Sign off on the inspection
Unlock efficiency
with MaintainX CoPilot
MaintainX CoPilot is your expert colleague, on call 24/7, helping your team find the answers they need to keep equipment running.
Reduce Unplanned Downtime
Ensure your team follows consistent procedures to minimize equipment failures and costly delays.
Maximize Asset Availability
Keep your assets running longer and more reliably, with standardized maintenance workflows from OEM manuals.
Lower Maintenance Costs
Turn any technician into an expert to streamline operations, maintain more assets, and reduce overall costs.
Thousands of companies manage their assets with MaintainX

'%3e%3cpath%20fill='url(%23b)'%20d='M66.008%2080.068c-5.084-.786-9.763-3.834-12.442-8.68a16.942%2016.942%200%200%201-1.87-5.18c1.096.19%202.203.476%203.298.87%206.525%202.333%2010.836%207.68%2011.014%2012.99ZM51.47%2061.576c.488-5.524%203.62-10.716%208.847-13.597a17.132%2017.132%200%200%201%2011.335-1.882c-.798%208.145-7.43%2014.848-16.038%2015.599-1.417.119-2.799.07-4.144-.12Zm28.564-11.478a17.513%2017.513%200%200%201%203.727%204.62c4.608%208.335%201.584%2018.813-6.75%2023.409a16.988%2016.988%200%200%201-4.359%201.679%2019.624%2019.624%200%200%201-3.977-12.776c.346-7.561%204.942-13.931%2011.36-16.932Z'/%3e%3cpath%20fill='%23110F0D'%20fill-rule='evenodd'%20d='M142.831%2048.324h4.977V77.03h-4.977V48.324Zm27.278%2013.002c.322%201.048.453%202.263.453%203.62v12.073h-4.787V66.208c0-.75-.047-1.572-.154-2.143-.453-2.382-1.822-3.572-4.215-3.572-2.31%200-3.882%201.274-4.43%203.476-.143.596-.226%201.405-.226%202.25v10.8h-4.787V56.623h4.477v2.989c1.536-2.5%203.906-3.43%206.371-3.43%203.488%200%206.263%201.68%207.298%205.144Zm24.636%207.323c0%203.882-2.358%206.525-5.763%207.727-1.298.453-2.632.643-4.62.643h-10.169V48.324h9.085c1.691%200%203.156.143%204.049.38%203.465.93%205.727%203.68%205.727%207.335%200%202.441-.81%204.156-2.762%205.644%202.905%201.417%204.453%203.727%204.453%206.966Zm-15.634-8.656h4.584c1.024%200%201.917-.143%202.536-.417%201.215-.548%201.905-1.608%201.905-3.167%200-1.548-.643-2.572-1.845-3.132-.691-.31-1.762-.452-2.763-.452h-4.417v7.168Zm10.716%208.465c0-1.536-.893-3.37-3.227-3.893-.428-.095-1.036-.143-1.571-.143h-5.918v8.085h5.501c.56%200%201.429-.048%201.953-.167%201.94-.453%203.262-1.846%203.262-3.882Zm47.747-11.847-8.097%2020.408h-4.429l-8.109-20.408h5.191l5.192%2014.574%205.108-14.574h5.144Zm-20.218%2010.002c0%20.69-.036%201.262-.155%201.94h-15.943c.631%202.87%202.714%204.728%205.882%204.728%202.131%200%203.607-.882%204.703-2.525h4.87c-1.762%204.144-5.204%206.692-9.657%206.692-6.084%200-10.537-4.858-10.537-10.49%200-6.108%204.524-10.776%2010.335-10.776%206.239%200%2010.442%204.954%2010.502%2010.43Zm-4.763-1.405c-.333-2.846-2.643-4.858-5.691-4.858-2.894%200-5.287%201.929-5.621%204.858h11.312Zm-72.667%203.44c0%204.787-3.287%208.371-9.419%208.371H119.363V64.66c-1.917.274-3.87.69-5.811%201.238l4.537%2011.121h-5.418l-3.596-9.585c-5.144%202.084-10.085%205.216-14.217%209.585h-4.786L101.8%2048.312h4.56l5.68%2013.883a44.112%2044.112%200%200%201%207.323-1.774V48.312h9.084c1.703%200%203.156.143%204.061.393%203.453.929%205.727%203.667%205.727%207.323%200%201.917-.738%204.179-2.81%205.691%203.06%201.56%204.501%204.025%204.501%206.93Zm-15.634-8.667a62.664%2062.664%200%200%201%202.06-.036c1.703.012%203.239.131%204.608.37%201.441-.549%202.357-1.727%202.357-3.537%200-1.941-.881-3.144-2.488-3.667-.548-.18-1.358-.286-2.322-.286h-4.215v7.156Zm-16.55%203.905-3.715-9.894-6.394%2016.502c2.833-2.595%206.263-4.858%2010.109-6.608Zm27.254%204.74c0-2.775-3.131-4.347-8.513-4.418-.715%200-1.441.011-2.191.047v8.252h5.918c2.548%200%204.786-1.37%204.786-3.882Z'%20clip-rule='evenodd'/%3e%3c/g%3e%3cdefs%3e%3clinearGradient%20id='b'%20x1='51.47'%20x2='85.916'%20y1='62.946'%20y2='62.946'%20gradientUnits='userSpaceOnUse'%3e%3cstop%20stop-color='%23CD9F28'/%3e%3cstop%20offset='1'%20stop-color='%23ECD80B'/%3e%3c/linearGradient%3e%3cclipPath%20id='a'%3e%3cpath%20fill='%23fff'%20d='M51.47%2045.728h186.104V80.14H51.47z'/%3e%3c/clipPath%3e%3c/defs%3e%3c/svg%3e)


More from John Deere


Explore Other Assets


© 2026 MaintainX. All rights reserved.