


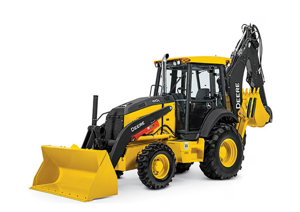
John Deere Compact Utility Tractor 4120
Need answers fast?
Explore the manual using AI.
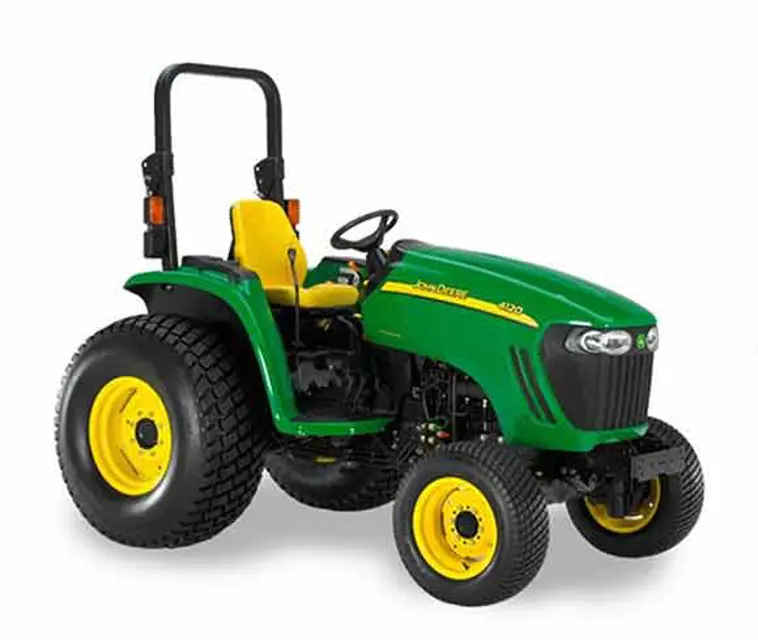
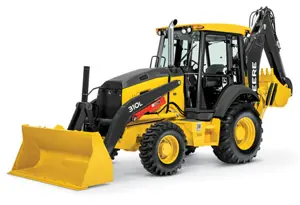
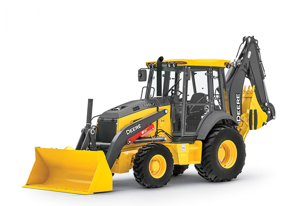
The John Deere Compact Utility Tractor 4120 is a versatile and powerful machine designed for various agricultural and landscaping tasks. Known for its reliability and efficiency, this model offers exceptional performance in compact spaces, making it an ideal choice for both professional and personal use.
Turn manuals into instant answers
with your AI-powered assistantTurn manuals into instant answers
with your AI-powered assistant
Manual for John Deere Compact Utility Tractor 4120
Complete asset maintenance, one click away
Get instant access to all the maintenance information you need. Empower technicians to perform preventive maintenance with asset packages, ready to use right out of the box.

Documents & Manuals
Find all the essential guides in one place.
 Tensioning Guide
- Belt-diagram
- C-120 pulleys
+ 13 more

Work Order Templates
Pre-built workflows to keep your asset running smoothly.
- Daily Electrical System Inspection
- Replace Roller and Pulley
- Install Engine B-120
+ 29 more

Procedures
Integrate maintenance plans directly into your work orders.
- Motion Industries
- Applied Industrial Technologies
- Electrical Brothers
+ 5 more

Parts
Access the parts list for your equipment in MaintainX.
- Drive Motor
- B2 Rollers
- Tensioning System
+ 40 more
John Deere Compact Utility Tractor 4120
Create an account to install this asset package.
Maintenance Plans for John Deere Compact Utility Tractor Model 4120
Integrate maintenance plans directly into your work orders in MaintainX.
Plastic Surfaces Cleaning
Rinse hood and entire machine with clean water to remove dirt and dust that may scratch the surface.
Wash surface with clean water and a mild liquid automotive washing soap.
Dry thoroughly to avoid water spots.
Wax the surface with a liquid automotive wax. Use products that specifically say “contains no abrasives.”
Buff applied wax by hand using a clean, soft cloth.
Sign off on the cleaning procedure

Metal Surfaces Maintenance
Cleaning
Cleaned vehicle painted metal surfaces
Upload a photo of cleaned surfaces
Repairing Minor Scratches (surface scratch)
Cleaned area to be repaired thoroughly
Used automotive polishing compound to remove surface scratches
Applied wax to entire surface
Upload a photo of repaired minor scratches
Repairing Deep Scratches (bare metal or primer showing)
10 Hourly / Daily Maintenance
Test safety systems
Check engine oil level
Park the machine safely
Remove dipstick (A). Wipe with a clean cloth.
Install dipstick.
Remove dipstick.
Check oil level on dipstick. Oil level should be between levels (B) and (C) on dipstick.
If oil level is low: a. Remove oil fill cap (D).
Add proper engine oil until oil level is within operating range on dipstick. Do not overfill.
1200 Hourly Maintenance
Check and clean inline hydraulic filter.
Position drain pan under filter (I).
Remove filter from lines.
Remove nut (J) with internal element from case.
Clean case and internal element with a mild solvent. Allow to dry.
Check engine valve clearance. See your John Deere dealer.
Sign off on the 1200 Hourly Maintenance
As Needed Maintenance
Warning: This maintenance check requires trained personnel with PPE!
Machine parked safely?
Engine cooled down?
Hood raised?
Belts inspected for cracks, fraying, or stretched out areas?
Belt replaced?
New belt correctly seated in all pulley grooves?
Tension applied to belt with tensioner?
Engine started and belt alignment checked?
Parts for John Deere Compact Utility Tractor 4120
Access the parts list for your equipment in MaintainX.
Air Cleaner Assembly
AP33330
Light Bulbs
RE200798
Light Bulbs
57M7019
Light Bulbs
AR48041
Fuses
57M7690
Air Cleaner Assembly
AP33330
Light Bulbs
RE200798
Light Bulbs
57M7019
Light Bulbs
AR48041
Fuses
57M7690
Air Cleaner Assembly
AP33330
Light Bulbs
RE200798
Light Bulbs
57M7019
Light Bulbs
AR48041
Fuses
57M7690
Unlock efficiency
with MaintainX CoPilot
MaintainX CoPilot is your expert colleague, on call 24/7, helping your team find the answers they need to keep equipment running.
Reduce Unplanned Downtime
Ensure your team follows consistent procedures to minimize equipment failures and costly delays.
Maximize Asset Availability
Keep your assets running longer and more reliably, with standardized maintenance workflows from OEM manuals.
Lower Maintenance Costs
Turn any technician into an expert to streamline operations, maintain more assets, and reduce overall costs.
Thousands of companies manage their assets with MaintainX

'%3e%3cpath%20fill='url(%23b)'%20d='M66.008%2080.068c-5.084-.786-9.763-3.834-12.442-8.68a16.942%2016.942%200%200%201-1.87-5.18c1.096.19%202.203.476%203.298.87%206.525%202.333%2010.836%207.68%2011.014%2012.99ZM51.47%2061.576c.488-5.524%203.62-10.716%208.847-13.597a17.132%2017.132%200%200%201%2011.335-1.882c-.798%208.145-7.43%2014.848-16.038%2015.599-1.417.119-2.799.07-4.144-.12Zm28.564-11.478a17.513%2017.513%200%200%201%203.727%204.62c4.608%208.335%201.584%2018.813-6.75%2023.409a16.988%2016.988%200%200%201-4.359%201.679%2019.624%2019.624%200%200%201-3.977-12.776c.346-7.561%204.942-13.931%2011.36-16.932Z'/%3e%3cpath%20fill='%23110F0D'%20fill-rule='evenodd'%20d='M142.831%2048.324h4.977V77.03h-4.977V48.324Zm27.278%2013.002c.322%201.048.453%202.263.453%203.62v12.073h-4.787V66.208c0-.75-.047-1.572-.154-2.143-.453-2.382-1.822-3.572-4.215-3.572-2.31%200-3.882%201.274-4.43%203.476-.143.596-.226%201.405-.226%202.25v10.8h-4.787V56.623h4.477v2.989c1.536-2.5%203.906-3.43%206.371-3.43%203.488%200%206.263%201.68%207.298%205.144Zm24.636%207.323c0%203.882-2.358%206.525-5.763%207.727-1.298.453-2.632.643-4.62.643h-10.169V48.324h9.085c1.691%200%203.156.143%204.049.38%203.465.93%205.727%203.68%205.727%207.335%200%202.441-.81%204.156-2.762%205.644%202.905%201.417%204.453%203.727%204.453%206.966Zm-15.634-8.656h4.584c1.024%200%201.917-.143%202.536-.417%201.215-.548%201.905-1.608%201.905-3.167%200-1.548-.643-2.572-1.845-3.132-.691-.31-1.762-.452-2.763-.452h-4.417v7.168Zm10.716%208.465c0-1.536-.893-3.37-3.227-3.893-.428-.095-1.036-.143-1.571-.143h-5.918v8.085h5.501c.56%200%201.429-.048%201.953-.167%201.94-.453%203.262-1.846%203.262-3.882Zm47.747-11.847-8.097%2020.408h-4.429l-8.109-20.408h5.191l5.192%2014.574%205.108-14.574h5.144Zm-20.218%2010.002c0%20.69-.036%201.262-.155%201.94h-15.943c.631%202.87%202.714%204.728%205.882%204.728%202.131%200%203.607-.882%204.703-2.525h4.87c-1.762%204.144-5.204%206.692-9.657%206.692-6.084%200-10.537-4.858-10.537-10.49%200-6.108%204.524-10.776%2010.335-10.776%206.239%200%2010.442%204.954%2010.502%2010.43Zm-4.763-1.405c-.333-2.846-2.643-4.858-5.691-4.858-2.894%200-5.287%201.929-5.621%204.858h11.312Zm-72.667%203.44c0%204.787-3.287%208.371-9.419%208.371H119.363V64.66c-1.917.274-3.87.69-5.811%201.238l4.537%2011.121h-5.418l-3.596-9.585c-5.144%202.084-10.085%205.216-14.217%209.585h-4.786L101.8%2048.312h4.56l5.68%2013.883a44.112%2044.112%200%200%201%207.323-1.774V48.312h9.084c1.703%200%203.156.143%204.061.393%203.453.929%205.727%203.667%205.727%207.323%200%201.917-.738%204.179-2.81%205.691%203.06%201.56%204.501%204.025%204.501%206.93Zm-15.634-8.667a62.664%2062.664%200%200%201%202.06-.036c1.703.012%203.239.131%204.608.37%201.441-.549%202.357-1.727%202.357-3.537%200-1.941-.881-3.144-2.488-3.667-.548-.18-1.358-.286-2.322-.286h-4.215v7.156Zm-16.55%203.905-3.715-9.894-6.394%2016.502c2.833-2.595%206.263-4.858%2010.109-6.608Zm27.254%204.74c0-2.775-3.131-4.347-8.513-4.418-.715%200-1.441.011-2.191.047v8.252h5.918c2.548%200%204.786-1.37%204.786-3.882Z'%20clip-rule='evenodd'/%3e%3c/g%3e%3cdefs%3e%3clinearGradient%20id='b'%20x1='51.47'%20x2='85.916'%20y1='62.946'%20y2='62.946'%20gradientUnits='userSpaceOnUse'%3e%3cstop%20stop-color='%23CD9F28'/%3e%3cstop%20offset='1'%20stop-color='%23ECD80B'/%3e%3c/linearGradient%3e%3cclipPath%20id='a'%3e%3cpath%20fill='%23fff'%20d='M51.47%2045.728h186.104V80.14H51.47z'/%3e%3c/clipPath%3e%3c/defs%3e%3c/svg%3e)


More from John Deere


Explore Other Assets


© 2026 MaintainX. All rights reserved.