


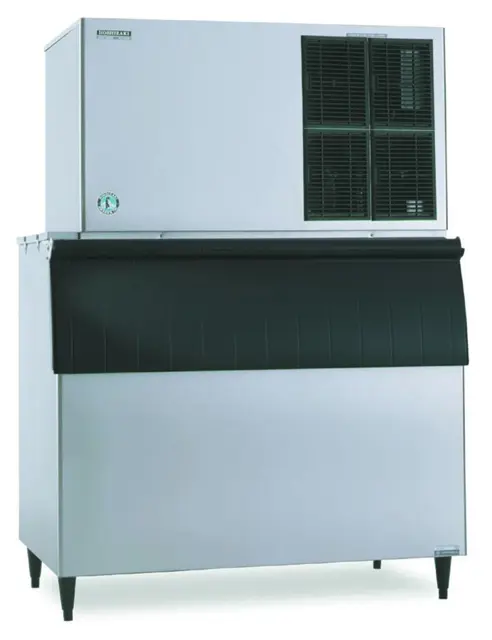
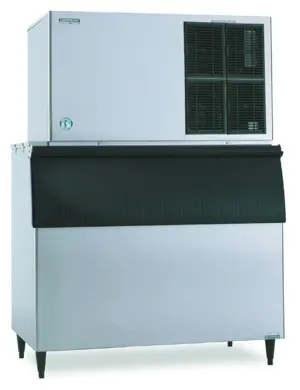
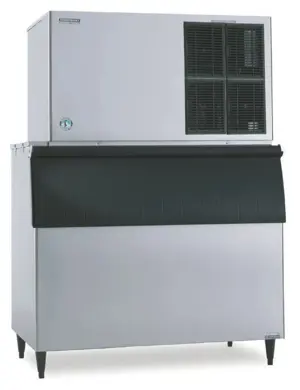
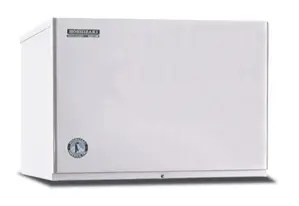
Hoshizaki Stackable Crescent Cuber KM-1601SWH3
Need answers fast?
Explore the manual using AI.
Turn manuals into instant answers
with your AI-powered assistantTurn manuals into instant answers
with your AI-powered assistant
Manual for Hoshizaki Stackable Crescent Cuber KM-1601SWH3
Complete asset maintenance, one click away
Get instant access to all the maintenance information you need. Empower technicians to perform preventive maintenance with asset packages, ready to use right out of the box.

Documents & Manuals
Find all the essential guides in one place.
 Tensioning Guide
- Belt-diagram
- C-120 pulleys
+ 13 more

Work Order Templates
Pre-built workflows to keep your asset running smoothly.
- Daily Electrical System Inspection
- Replace Roller and Pulley
- Install Engine B-120
+ 29 more

Procedures
Integrate maintenance plans directly into your work orders.
- Motion Industries
- Applied Industrial Technologies
- Electrical Brothers
+ 5 more

Parts
Access the parts list for your equipment in MaintainX.
- Drive Motor
- B2 Rollers
- Tensioning System
+ 40 more
Hoshizaki Stackable Crescent Cuber KM-1601SWH3
Create an account to install this asset package.
Maintenance Plans for Hoshizaki Stackable Crescent Cuber Model KM-1601SWH3
Integrate maintenance plans directly into your work orders in MaintainX.
1 Yearly Water Supply Inlet Cleaning
V. Maintenance
WARNING: Only qualified service technicians should service the appliance.
To reduce the risk of electric shock, do not touch the control switch or service switch with damp hands.
Before servicing: Move the control switch to the 'OFF' position and turn off the power supply. Place the disconnect in the 'OFF' position. Lockout/Tagout to prevent the power supply from being turned back on inadvertently.
CHOKING HAZARD: Ensure all components, fasteners, and thumbscrews are securely in place after any maintenance is done to the icemaker. Make sure that none have fallen into the dispenser unit/ice storage bin.
Icemaker water supply line shut-off valve closed?
Water system drained?
Water supply inlet screen cleaned?
Sign off on the water supply inlet cleaning

1 Monthly Icemaker Exterior Cleaning
V. Maintenance
More frequent maintenance may be required depending on water quality, the appliance's environment, and local sanitation regulations
WARNING
Only qualified service technicians should service the appliance.
To reduce the risk of electric shock, do not touch the control switch or service switch with damp hands
Before servicing: Move the control switch to the 'OFF' position and turn off the power supply. Place the disconnect in the 'OFF' position. Lockout/Tagout to prevent the power supply from being turned back on inadvertently.
CHOKING HAZARD: Ensure all components, fasteners, and thumbscrews are securely in place after any maintenance is done to the icemaker. Make sure that none have fallen into the dispenser unit/ice storage bin.
Icemaker Exterior:
Wipe down with a clean, soft cloth.
2 Weekly Air Filters Maintenance
V. Maintenance
More frequent maintenance may be required depending on water quality, the appliance's environment, and local sanitation regulations
WARNING
Only qualified service technicians should service the appliance.
To reduce the risk of electric shock, do not touch the control switch or service switch with damp hands
Before servicing: Move the control switch to the 'OFF' position and turn off the power supply. Place the disconnect in the 'OFF' position. Lockout/Tagout to prevent the power supply from being turned back on inadvertently.
CHOKING HAZARD: Ensure all components, fasteners, and thumbscrews are securely in place after any maintenance is done to the icemaker. Make sure that none have fallen into the dispenser unit/ice storage bin.
Air Filters:
Inspect air filters
1 Yearly Icemaker and Dispenser Unit Cleaning
V. Maintenance
WARNING: Only qualified service technicians should service the appliance.
To reduce the risk of electric shock, do not touch the control switch or service switch with damp hands.
Before servicing: Move the control switch to the 'OFF' position and turn off the power supply. Place the disconnect in the 'OFF' position. Lockout/Tagout to prevent the power supply from being turned back on inadvertently.
CHOKING HAZARD: Ensure all components, fasteners, and thumbscrews are securely in place after any maintenance is done to the icemaker. Make sure that none have fallen into the dispenser unit/ice storage bin.
Icemaker and Dispenser Unit/Ice Storage Bin Liner:
Clean and sanitize per the cleaning and sanitizing instructions provided in the instruction manual or maintenance label on the icemaker.
Sign off on the icemaker and dispenser unit cleaning
1 Daily Scoop Cleaning
V. Maintenance
More frequent maintenance may be required depending on water quality, the appliance's environment, and local sanitation regulations
WARNING
Only qualified service technicians should service the appliance.
To reduce the risk of electric shock, do not touch the control switch or service switch with damp hands
Before servicing: Move the control switch to the \OFF\" position and turn off the power supply. Place the disconnect in the \"OFF\" position. Lockout/Tagout to prevent the power supply from being turned back on inadvertently."
CHOKING HAZARD: Ensure all components, fasteners, and thumbscrews are securely in place after any maintenance is done to the icemaker. Make sure that none have fallen into the dispenser unit/ice storage bin.
Is the control switch in the \OFF\" position?"
Is the power supply turned off?
Parts for Hoshizaki Stackable Crescent Cuber KM-1601SWH3
Access the parts list for your equipment in MaintainX.
High Thermal Conductive Type Sealant
4A0683-01
E Control Board
2A1410-02
G Control Board
2A3792-01
High Thermal Conductive Type Sealant
4A0683-01
E Control Board
2A1410-02
G Control Board
2A3792-01
High Thermal Conductive Type Sealant
4A0683-01
E Control Board
2A1410-02
G Control Board
2A3792-01
Unlock efficiency
with MaintainX CoPilot
MaintainX CoPilot is your expert colleague, on call 24/7, helping your team find the answers they need to keep equipment running.
Reduce Unplanned Downtime
Ensure your team follows consistent procedures to minimize equipment failures and costly delays.
Maximize Asset Availability
Keep your assets running longer and more reliably, with standardized maintenance workflows from OEM manuals.
Lower Maintenance Costs
Turn any technician into an expert to streamline operations, maintain more assets, and reduce overall costs.
Thousands of companies manage their assets with MaintainX

'%3e%3cpath%20fill='url(%23b)'%20d='M66.008%2080.068c-5.084-.786-9.763-3.834-12.442-8.68a16.942%2016.942%200%200%201-1.87-5.18c1.096.19%202.203.476%203.298.87%206.525%202.333%2010.836%207.68%2011.014%2012.99ZM51.47%2061.576c.488-5.524%203.62-10.716%208.847-13.597a17.132%2017.132%200%200%201%2011.335-1.882c-.798%208.145-7.43%2014.848-16.038%2015.599-1.417.119-2.799.07-4.144-.12Zm28.564-11.478a17.513%2017.513%200%200%201%203.727%204.62c4.608%208.335%201.584%2018.813-6.75%2023.409a16.988%2016.988%200%200%201-4.359%201.679%2019.624%2019.624%200%200%201-3.977-12.776c.346-7.561%204.942-13.931%2011.36-16.932Z'/%3e%3cpath%20fill='%23110F0D'%20fill-rule='evenodd'%20d='M142.831%2048.324h4.977V77.03h-4.977V48.324Zm27.278%2013.002c.322%201.048.453%202.263.453%203.62v12.073h-4.787V66.208c0-.75-.047-1.572-.154-2.143-.453-2.382-1.822-3.572-4.215-3.572-2.31%200-3.882%201.274-4.43%203.476-.143.596-.226%201.405-.226%202.25v10.8h-4.787V56.623h4.477v2.989c1.536-2.5%203.906-3.43%206.371-3.43%203.488%200%206.263%201.68%207.298%205.144Zm24.636%207.323c0%203.882-2.358%206.525-5.763%207.727-1.298.453-2.632.643-4.62.643h-10.169V48.324h9.085c1.691%200%203.156.143%204.049.38%203.465.93%205.727%203.68%205.727%207.335%200%202.441-.81%204.156-2.762%205.644%202.905%201.417%204.453%203.727%204.453%206.966Zm-15.634-8.656h4.584c1.024%200%201.917-.143%202.536-.417%201.215-.548%201.905-1.608%201.905-3.167%200-1.548-.643-2.572-1.845-3.132-.691-.31-1.762-.452-2.763-.452h-4.417v7.168Zm10.716%208.465c0-1.536-.893-3.37-3.227-3.893-.428-.095-1.036-.143-1.571-.143h-5.918v8.085h5.501c.56%200%201.429-.048%201.953-.167%201.94-.453%203.262-1.846%203.262-3.882Zm47.747-11.847-8.097%2020.408h-4.429l-8.109-20.408h5.191l5.192%2014.574%205.108-14.574h5.144Zm-20.218%2010.002c0%20.69-.036%201.262-.155%201.94h-15.943c.631%202.87%202.714%204.728%205.882%204.728%202.131%200%203.607-.882%204.703-2.525h4.87c-1.762%204.144-5.204%206.692-9.657%206.692-6.084%200-10.537-4.858-10.537-10.49%200-6.108%204.524-10.776%2010.335-10.776%206.239%200%2010.442%204.954%2010.502%2010.43Zm-4.763-1.405c-.333-2.846-2.643-4.858-5.691-4.858-2.894%200-5.287%201.929-5.621%204.858h11.312Zm-72.667%203.44c0%204.787-3.287%208.371-9.419%208.371H119.363V64.66c-1.917.274-3.87.69-5.811%201.238l4.537%2011.121h-5.418l-3.596-9.585c-5.144%202.084-10.085%205.216-14.217%209.585h-4.786L101.8%2048.312h4.56l5.68%2013.883a44.112%2044.112%200%200%201%207.323-1.774V48.312h9.084c1.703%200%203.156.143%204.061.393%203.453.929%205.727%203.667%205.727%207.323%200%201.917-.738%204.179-2.81%205.691%203.06%201.56%204.501%204.025%204.501%206.93Zm-15.634-8.667a62.664%2062.664%200%200%201%202.06-.036c1.703.012%203.239.131%204.608.37%201.441-.549%202.357-1.727%202.357-3.537%200-1.941-.881-3.144-2.488-3.667-.548-.18-1.358-.286-2.322-.286h-4.215v7.156Zm-16.55%203.905-3.715-9.894-6.394%2016.502c2.833-2.595%206.263-4.858%2010.109-6.608Zm27.254%204.74c0-2.775-3.131-4.347-8.513-4.418-.715%200-1.441.011-2.191.047v8.252h5.918c2.548%200%204.786-1.37%204.786-3.882Z'%20clip-rule='evenodd'/%3e%3c/g%3e%3cdefs%3e%3clinearGradient%20id='b'%20x1='51.47'%20x2='85.916'%20y1='62.946'%20y2='62.946'%20gradientUnits='userSpaceOnUse'%3e%3cstop%20stop-color='%23CD9F28'/%3e%3cstop%20offset='1'%20stop-color='%23ECD80B'/%3e%3c/linearGradient%3e%3cclipPath%20id='a'%3e%3cpath%20fill='%23fff'%20d='M51.47%2045.728h186.104V80.14H51.47z'/%3e%3c/clipPath%3e%3c/defs%3e%3c/svg%3e)


More from Hoshizaki


Explore Other Assets


© 2026 MaintainX. All rights reserved.