


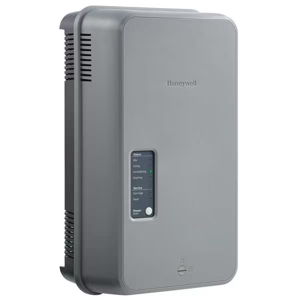
Honeywell Printer I-4212 Mark II
Need answers fast?
Explore the manual using AI.
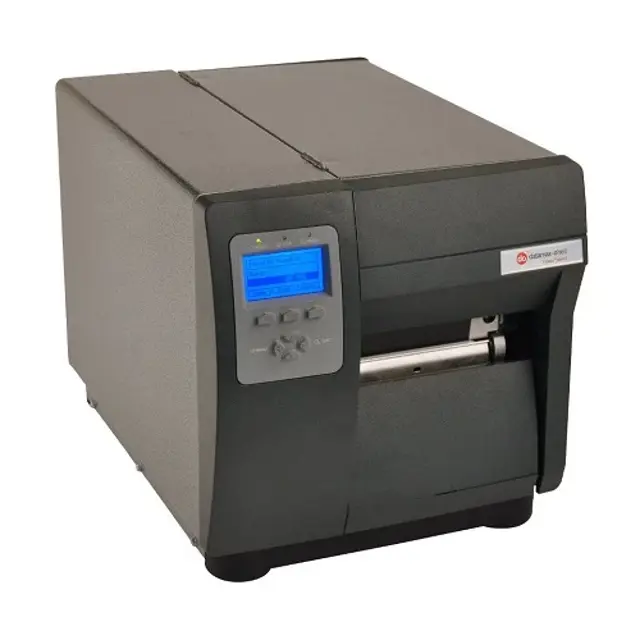
The Honeywell Printer I-4212 Mark II is a robust industrial printer designed for high-volume printing needs. Known for its reliability and efficiency, this model is ideal for various applications, ensuring quality output and ease of maintenance for operational excellence.
Turn manuals into instant answers
with your AI-powered assistantTurn manuals into instant answers
with your AI-powered assistant
Manual for Honeywell Printer I-4212 Mark II
Complete asset maintenance, one click away
Get instant access to all the maintenance information you need. Empower technicians to perform preventive maintenance with asset packages, ready to use right out of the box.

Documents & Manuals
Find all the essential guides in one place.
 Tensioning Guide
- Belt-diagram
- C-120 pulleys
+ 13 more

Work Order Templates
Pre-built workflows to keep your asset running smoothly.
- Daily Electrical System Inspection
- Replace Roller and Pulley
- Install Engine B-120
+ 29 more

Procedures
Integrate maintenance plans directly into your work orders.
- Motion Industries
- Applied Industrial Technologies
- Electrical Brothers
+ 5 more

Parts
Access the parts list for your equipment in MaintainX.
- Drive Motor
- B2 Rollers
- Tensioning System
+ 40 more
Honeywell Printer I-4212 Mark II
Create an account to install this asset package.
Maintenance Plans for Honeywell Printer Model I-4212 Mark II
Integrate maintenance plans directly into your work orders in MaintainX.
Printhead Replacement
NOTE! Printheads are fragile; use extreme care when handling and never use a sharp object on the surface. If you have questions, contact a qualified technician or Datamax-O’Neil Technical Support before proceeding.
Discharged static electricity by touching a bare metal part of the printer’s frame
Turned 'Off' and unplugged the printer
Opened the cover and removed the ribbon if installed
Loosened the Printhead Mounting Screw
Unlatched the Printhead Assembly
Raised the assembly and disconnected the two cables
Removed the old Printhead
Connected both cables to the new Printhead

Printhead Cleaning
Turn ‘Off’ and unplug the printer
Open the cover. Unlock the Printhead Latch and raise the Printhead Assembly. Allow the printhead to cool before proceeding
Move media and ribbon away from the printhead as necessary
Using a Cotton Swab moistened, not soaked, with isopropyl alcohol gently wipe away any build-up on the printhead surface, paying close attention to the Burn Line. Allow the printhead to dry
Replace the ribbon and media. Lower the Printhead Assembly back to the locked position
Close the cover. Plug in and turn ‘On’ the printer. Feed several labels to normalize tracking
Remove media and ribbon for Automated Printhead Cleaning
Place a Datamax-O’Neil Cleaning Card, part number 70-2013-01 under the printhead. Lower and lock the printhead. Ensure that the Media Width Adjustment is not engaged
Press and hold the TEST Key for approximately four seconds. The printer will begin the cleaning routine
Printhead Pressure Adjustment
Warning: Printhead Pressure Adjustment should only be performed after attempting to improve print quality through the use of other print quality controls.
Upload a photo of the label format
Is the image complete with even contrast after printing a small batch of labels?
Direction of Pressure Adjustment Screw turn
Do all arrows point in the same direction?
Sign off on the Printhead Pressure Adjustment
Media Width Adjustment
Warning: This procedure requires trained personnel!
Media loaded?
Download your label format or use a Test Menu format
Begin printing a small batch of labels
While observing the printed output, rotate the Leveling Cam counter-clockwise until the image fades across the label
Upload a photo of the faded image
While observing the printed output, rotate the Leveling Cam clockwise until the image is complete, with even contrast
Upload a photo of the complete image
Sign off on the media width adjustment
Upgrading Filmware
Warning: Only trained personnel should perform this procedure
Enter the model of your printer
Upload the new version of the firmware downloaded from the Datamax-O’Neil Web site
Did you save the configuration before downloading firmware?
Did you check the box labeled “Include Sensor Calibration Data on Open” when restoring the configuration?
Upload the binary file (BIN file) for the firmware update
Did you click the ‘Send’ button to start the firmware update?
Was only one communication cable connected to the printer during the firmware upgrade?
Upload the binary files (BIN files) for each of the Boot files
Parts for Honeywell Printer I-4212 Mark II
Access the parts list for your equipment in MaintainX.
Cleaning Card
70-2013-01
Cleaning Card
70-2013-01
Cleaning Card
70-2013-01
Unlock efficiency
with MaintainX CoPilot
MaintainX CoPilot is your expert colleague, on call 24/7, helping your team find the answers they need to keep equipment running.
Reduce Unplanned Downtime
Ensure your team follows consistent procedures to minimize equipment failures and costly delays.
Maximize Asset Availability
Keep your assets running longer and more reliably, with standardized maintenance workflows from OEM manuals.
Lower Maintenance Costs
Turn any technician into an expert to streamline operations, maintain more assets, and reduce overall costs.
Thousands of companies manage their assets with MaintainX

'%3e%3cpath%20fill='url(%23b)'%20d='M66.008%2080.068c-5.084-.786-9.763-3.834-12.442-8.68a16.942%2016.942%200%200%201-1.87-5.18c1.096.19%202.203.476%203.298.87%206.525%202.333%2010.836%207.68%2011.014%2012.99ZM51.47%2061.576c.488-5.524%203.62-10.716%208.847-13.597a17.132%2017.132%200%200%201%2011.335-1.882c-.798%208.145-7.43%2014.848-16.038%2015.599-1.417.119-2.799.07-4.144-.12Zm28.564-11.478a17.513%2017.513%200%200%201%203.727%204.62c4.608%208.335%201.584%2018.813-6.75%2023.409a16.988%2016.988%200%200%201-4.359%201.679%2019.624%2019.624%200%200%201-3.977-12.776c.346-7.561%204.942-13.931%2011.36-16.932Z'/%3e%3cpath%20fill='%23110F0D'%20fill-rule='evenodd'%20d='M142.831%2048.324h4.977V77.03h-4.977V48.324Zm27.278%2013.002c.322%201.048.453%202.263.453%203.62v12.073h-4.787V66.208c0-.75-.047-1.572-.154-2.143-.453-2.382-1.822-3.572-4.215-3.572-2.31%200-3.882%201.274-4.43%203.476-.143.596-.226%201.405-.226%202.25v10.8h-4.787V56.623h4.477v2.989c1.536-2.5%203.906-3.43%206.371-3.43%203.488%200%206.263%201.68%207.298%205.144Zm24.636%207.323c0%203.882-2.358%206.525-5.763%207.727-1.298.453-2.632.643-4.62.643h-10.169V48.324h9.085c1.691%200%203.156.143%204.049.38%203.465.93%205.727%203.68%205.727%207.335%200%202.441-.81%204.156-2.762%205.644%202.905%201.417%204.453%203.727%204.453%206.966Zm-15.634-8.656h4.584c1.024%200%201.917-.143%202.536-.417%201.215-.548%201.905-1.608%201.905-3.167%200-1.548-.643-2.572-1.845-3.132-.691-.31-1.762-.452-2.763-.452h-4.417v7.168Zm10.716%208.465c0-1.536-.893-3.37-3.227-3.893-.428-.095-1.036-.143-1.571-.143h-5.918v8.085h5.501c.56%200%201.429-.048%201.953-.167%201.94-.453%203.262-1.846%203.262-3.882Zm47.747-11.847-8.097%2020.408h-4.429l-8.109-20.408h5.191l5.192%2014.574%205.108-14.574h5.144Zm-20.218%2010.002c0%20.69-.036%201.262-.155%201.94h-15.943c.631%202.87%202.714%204.728%205.882%204.728%202.131%200%203.607-.882%204.703-2.525h4.87c-1.762%204.144-5.204%206.692-9.657%206.692-6.084%200-10.537-4.858-10.537-10.49%200-6.108%204.524-10.776%2010.335-10.776%206.239%200%2010.442%204.954%2010.502%2010.43Zm-4.763-1.405c-.333-2.846-2.643-4.858-5.691-4.858-2.894%200-5.287%201.929-5.621%204.858h11.312Zm-72.667%203.44c0%204.787-3.287%208.371-9.419%208.371H119.363V64.66c-1.917.274-3.87.69-5.811%201.238l4.537%2011.121h-5.418l-3.596-9.585c-5.144%202.084-10.085%205.216-14.217%209.585h-4.786L101.8%2048.312h4.56l5.68%2013.883a44.112%2044.112%200%200%201%207.323-1.774V48.312h9.084c1.703%200%203.156.143%204.061.393%203.453.929%205.727%203.667%205.727%207.323%200%201.917-.738%204.179-2.81%205.691%203.06%201.56%204.501%204.025%204.501%206.93Zm-15.634-8.667a62.664%2062.664%200%200%201%202.06-.036c1.703.012%203.239.131%204.608.37%201.441-.549%202.357-1.727%202.357-3.537%200-1.941-.881-3.144-2.488-3.667-.548-.18-1.358-.286-2.322-.286h-4.215v7.156Zm-16.55%203.905-3.715-9.894-6.394%2016.502c2.833-2.595%206.263-4.858%2010.109-6.608Zm27.254%204.74c0-2.775-3.131-4.347-8.513-4.418-.715%200-1.441.011-2.191.047v8.252h5.918c2.548%200%204.786-1.37%204.786-3.882Z'%20clip-rule='evenodd'/%3e%3c/g%3e%3cdefs%3e%3clinearGradient%20id='b'%20x1='51.47'%20x2='85.916'%20y1='62.946'%20y2='62.946'%20gradientUnits='userSpaceOnUse'%3e%3cstop%20stop-color='%23CD9F28'/%3e%3cstop%20offset='1'%20stop-color='%23ECD80B'/%3e%3c/linearGradient%3e%3cclipPath%20id='a'%3e%3cpath%20fill='%23fff'%20d='M51.47%2045.728h186.104V80.14H51.47z'/%3e%3c/clipPath%3e%3c/defs%3e%3c/svg%3e)


More from Honeywell


Explore Other Assets


© 2026 MaintainX. All rights reserved.