


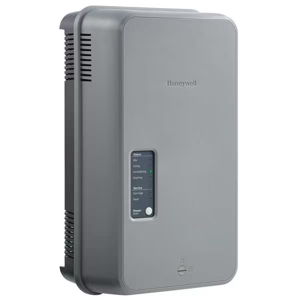
Honeywell Gas Detector MiniRAE 3000
Need answers fast?
Explore the manual using AI.
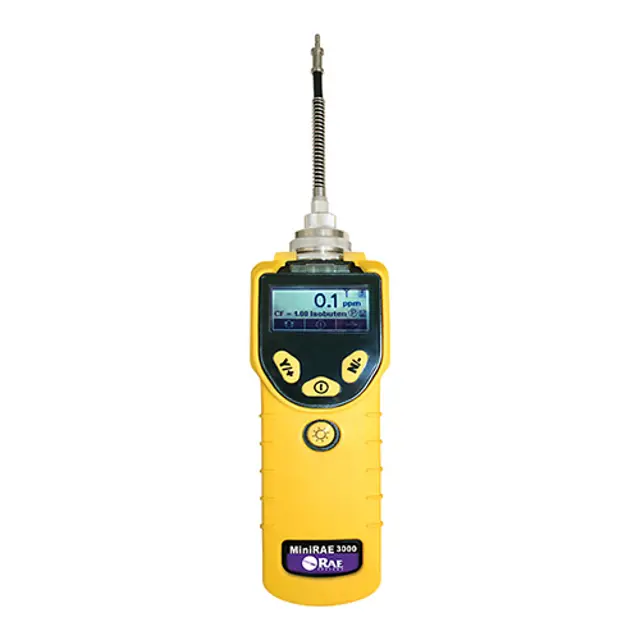
The Honeywell Gas Detector MiniRAE 3000 is a portable, advanced gas detection device designed for industrial applications. This model offers reliable performance in detecting volatile organic compounds (VOCs) and ensures safety in hazardous environments through its robust features and easy-to-use interface.
Turn manuals into instant answers
with your AI-powered assistantTurn manuals into instant answers
with your AI-powered assistant
Manual for Honeywell Gas Detector MiniRAE 3000
Complete asset maintenance, one click away
Get instant access to all the maintenance information you need. Empower technicians to perform preventive maintenance with asset packages, ready to use right out of the box.

Documents & Manuals
Find all the essential guides in one place.
 Tensioning Guide
- Belt-diagram
- C-120 pulleys
+ 13 more

Work Order Templates
Pre-built workflows to keep your asset running smoothly.
- Daily Electrical System Inspection
- Replace Roller and Pulley
- Install Engine B-120
+ 29 more

Procedures
Integrate maintenance plans directly into your work orders.
- Motion Industries
- Applied Industrial Technologies
- Electrical Brothers
+ 5 more

Parts
Access the parts list for your equipment in MaintainX.
- Drive Motor
- B2 Rollers
- Tensioning System
+ 40 more
Honeywell Gas Detector MiniRAE 3000
Create an account to install this asset package.
Maintenance Plans for Honeywell Gas Detector Model MiniRAE 3000
Integrate maintenance plans directly into your work orders in MaintainX.
Battery Replacement
Turn off the instrument
Slide down the battery tab to unlock the battery
Remove the battery pack from the battery compartment by tilting it out
Replace a fully charged spare battery pack inside the battery compartment. Make sure the battery pack is oriented properly inside the compartment
Slide the capture tab back up to its locked position

PID Sensor Cleaning
Warning: This procedure requires trained personnel with PPE!
PID sensor module placed in GC grade methanol
Sensor cleaned in ultrasound bath for at least 15 minutes
Sensor dried thoroughly
Electrodes of the sensor not touched by hand
Lamp housing wiped off with methanol-soaked cotton swab
Sensor turned over for inspection
Sensor electrodes checked for corrosion, damage, or misalignment
Sensor electrode fingers adjusted if necessary
Instrument Cleaning
Instrument cleaned with a soft cloth
Detergents or chemicals not used
Contacts at the base of the instrument visually inspected
Battery contacts visually inspected
Charging cradle contacts visually inspected
Contacts wiped with a soft, dry cloth if not clean
Solvents or cleaners not used
Sign off on the instrument cleaning
Alkaline Battery Adapter Replacement
Warning: To reduce the risk of ignition of hazardous atmospheres, recharge the battery only in areas known to be non-hazardous. Remove and replace the battery only in areas known to be non-hazardous.
Remove the three Philips-head screws to open the compartment.
Insert four fresh AA batteries as indicated by the polarity (+/-) markings.
Replace the cover. Replace the three screws.
Remove the Li-ion battery pack from the battery compartment by sliding the tab and tilting out the battery.
Replace it with the alkaline battery adapter
Slide the tab back into place to secure the battery adapter.
IMPORTANT! Alkaline batteries cannot be recharged. The instrument’s internal circuit detects alkaline batteries and will not allow recharging. If you place the instrument in its cradle, the alkaline battery will not be recharged. The internal charging circuit is designed to prevent damage to alkaline batteries and the charging circuit when alkaline batteries are installed inside the instrument.
Note: When replacing alkaline batteries, dispose of old ones properly.
Pump Sampling
Warning: Only trained personnel should perform this procedure
Enter the current energy consumption of the pump
Inlet connector is tight and the inlet tubing is in good condition
Enter the flow rate measured from the gas inlet probe
Flow rate is above 450 cc/min
Pump working properly?
If pump is not working properly, describe the issue
Sign off on the pump sampling
Parts for Honeywell Gas Detector MiniRAE 3000
Access the parts list for your equipment in MaintainX.
Alkaline Battery Adapter
059-3052-000
Alkaline Battery Adapter
059-3051-000
Wall-mount Transformer
500-0114-000
Alkaline Battery Adapter
059-3054-000
Alkaline Battery
MN1500
Alkaline Battery Adapter
059-3052-000
Alkaline Battery Adapter
059-3051-000
Wall-mount Transformer
500-0114-000
Alkaline Battery Adapter
059-3054-000
Alkaline Battery
MN1500
Alkaline Battery Adapter
059-3052-000
Alkaline Battery Adapter
059-3051-000
Wall-mount Transformer
500-0114-000
Alkaline Battery Adapter
059-3054-000
Alkaline Battery
MN1500
Unlock efficiency
with MaintainX CoPilot
MaintainX CoPilot is your expert colleague, on call 24/7, helping your team find the answers they need to keep equipment running.
Reduce Unplanned Downtime
Ensure your team follows consistent procedures to minimize equipment failures and costly delays.
Maximize Asset Availability
Keep your assets running longer and more reliably, with standardized maintenance workflows from OEM manuals.
Lower Maintenance Costs
Turn any technician into an expert to streamline operations, maintain more assets, and reduce overall costs.
Thousands of companies manage their assets with MaintainX

'%3e%3cpath%20fill='url(%23b)'%20d='M66.008%2080.068c-5.084-.786-9.763-3.834-12.442-8.68a16.942%2016.942%200%200%201-1.87-5.18c1.096.19%202.203.476%203.298.87%206.525%202.333%2010.836%207.68%2011.014%2012.99ZM51.47%2061.576c.488-5.524%203.62-10.716%208.847-13.597a17.132%2017.132%200%200%201%2011.335-1.882c-.798%208.145-7.43%2014.848-16.038%2015.599-1.417.119-2.799.07-4.144-.12Zm28.564-11.478a17.513%2017.513%200%200%201%203.727%204.62c4.608%208.335%201.584%2018.813-6.75%2023.409a16.988%2016.988%200%200%201-4.359%201.679%2019.624%2019.624%200%200%201-3.977-12.776c.346-7.561%204.942-13.931%2011.36-16.932Z'/%3e%3cpath%20fill='%23110F0D'%20fill-rule='evenodd'%20d='M142.831%2048.324h4.977V77.03h-4.977V48.324Zm27.278%2013.002c.322%201.048.453%202.263.453%203.62v12.073h-4.787V66.208c0-.75-.047-1.572-.154-2.143-.453-2.382-1.822-3.572-4.215-3.572-2.31%200-3.882%201.274-4.43%203.476-.143.596-.226%201.405-.226%202.25v10.8h-4.787V56.623h4.477v2.989c1.536-2.5%203.906-3.43%206.371-3.43%203.488%200%206.263%201.68%207.298%205.144Zm24.636%207.323c0%203.882-2.358%206.525-5.763%207.727-1.298.453-2.632.643-4.62.643h-10.169V48.324h9.085c1.691%200%203.156.143%204.049.38%203.465.93%205.727%203.68%205.727%207.335%200%202.441-.81%204.156-2.762%205.644%202.905%201.417%204.453%203.727%204.453%206.966Zm-15.634-8.656h4.584c1.024%200%201.917-.143%202.536-.417%201.215-.548%201.905-1.608%201.905-3.167%200-1.548-.643-2.572-1.845-3.132-.691-.31-1.762-.452-2.763-.452h-4.417v7.168Zm10.716%208.465c0-1.536-.893-3.37-3.227-3.893-.428-.095-1.036-.143-1.571-.143h-5.918v8.085h5.501c.56%200%201.429-.048%201.953-.167%201.94-.453%203.262-1.846%203.262-3.882Zm47.747-11.847-8.097%2020.408h-4.429l-8.109-20.408h5.191l5.192%2014.574%205.108-14.574h5.144Zm-20.218%2010.002c0%20.69-.036%201.262-.155%201.94h-15.943c.631%202.87%202.714%204.728%205.882%204.728%202.131%200%203.607-.882%204.703-2.525h4.87c-1.762%204.144-5.204%206.692-9.657%206.692-6.084%200-10.537-4.858-10.537-10.49%200-6.108%204.524-10.776%2010.335-10.776%206.239%200%2010.442%204.954%2010.502%2010.43Zm-4.763-1.405c-.333-2.846-2.643-4.858-5.691-4.858-2.894%200-5.287%201.929-5.621%204.858h11.312Zm-72.667%203.44c0%204.787-3.287%208.371-9.419%208.371H119.363V64.66c-1.917.274-3.87.69-5.811%201.238l4.537%2011.121h-5.418l-3.596-9.585c-5.144%202.084-10.085%205.216-14.217%209.585h-4.786L101.8%2048.312h4.56l5.68%2013.883a44.112%2044.112%200%200%201%207.323-1.774V48.312h9.084c1.703%200%203.156.143%204.061.393%203.453.929%205.727%203.667%205.727%207.323%200%201.917-.738%204.179-2.81%205.691%203.06%201.56%204.501%204.025%204.501%206.93Zm-15.634-8.667a62.664%2062.664%200%200%201%202.06-.036c1.703.012%203.239.131%204.608.37%201.441-.549%202.357-1.727%202.357-3.537%200-1.941-.881-3.144-2.488-3.667-.548-.18-1.358-.286-2.322-.286h-4.215v7.156Zm-16.55%203.905-3.715-9.894-6.394%2016.502c2.833-2.595%206.263-4.858%2010.109-6.608Zm27.254%204.74c0-2.775-3.131-4.347-8.513-4.418-.715%200-1.441.011-2.191.047v8.252h5.918c2.548%200%204.786-1.37%204.786-3.882Z'%20clip-rule='evenodd'/%3e%3c/g%3e%3cdefs%3e%3clinearGradient%20id='b'%20x1='51.47'%20x2='85.916'%20y1='62.946'%20y2='62.946'%20gradientUnits='userSpaceOnUse'%3e%3cstop%20stop-color='%23CD9F28'/%3e%3cstop%20offset='1'%20stop-color='%23ECD80B'/%3e%3c/linearGradient%3e%3cclipPath%20id='a'%3e%3cpath%20fill='%23fff'%20d='M51.47%2045.728h186.104V80.14H51.47z'/%3e%3c/clipPath%3e%3c/defs%3e%3c/svg%3e)


More from Honeywell


Explore Other Assets


© 2026 MaintainX. All rights reserved.