


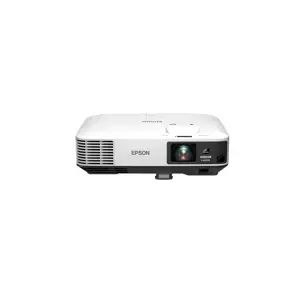
Epson Multimedia Projector EB-2165W
Need answers fast?
Explore the manual using AI.

Turn manuals into instant answers
with your AI-powered assistantTurn manuals into instant answers
with your AI-powered assistant
Complete asset maintenance, one click away
Get instant access to all the maintenance information you need. Empower technicians to perform preventive maintenance with asset packages, ready to use right out of the box.

Documents & Manuals
Find all the essential guides in one place.
 Tensioning Guide
- Belt-diagram
- C-120 pulleys
+ 13 more

Work Order Templates
Pre-built workflows to keep your asset running smoothly.
- Daily Electrical System Inspection
- Replace Roller and Pulley
- Install Engine B-120
+ 29 more

Procedures
Integrate maintenance plans directly into your work orders.
- Motion Industries
- Applied Industrial Technologies
- Electrical Brothers
+ 5 more

Parts
Access the parts list for your equipment in MaintainX.
- Drive Motor
- B2 Rollers
- Tensioning System
+ 40 more
Epson Multimedia Projector EB-2165W
Create an account to install this asset package.
Maintenance Plans for Epson Multimedia Projector Model EB-2165W
Integrate maintenance plans directly into your work orders in MaintainX.
Remote Control Batteries Replacement
Safety Instructions: Make sure you read the Safety Instructions before handling the batteries.
Warning: Check the positions of the (+) and (–) marks inside the battery holder to ensure the batteries are inserted the correct way. If the batteries are not used correctly, they could explode or leak causing a fire, injury, or damage to the product.
Remove the battery cover as shown.
Remove the old batteries.
Insert the batteries with the + and– ends facing as shown.
Replace the battery cover and press it down until it clicks into place.
Sign off on the battery replacement

3 Monthly Air Filter and Vent Cleaning
Regular filter maintenance is important to maintaining your projector. Clean the air filter when a message appears telling you the temperature inside the projector has reached a high level.; It is recommended that you clean these parts at least once every three months. Clean them more often than this if you use the projector in a particularly dusty environment.
Attention!
If regular maintenance is not performed, your Epson projector will notify you when the temperature inside the projector has reached a high level.
Do not wait until this warning appears to maintain your projector filter as prolonged exposure to high temperatures may reduce the life of your projector or lamp.
Cleaning the Air Filter and Vents
Clean the projector's air filter or vents if they get dusty, or if you see a message telling you to clean them.
1. Turn off the projector and unplug the power cord.
2. Gently remove the dust using a small vacuum designed for computers or a very soft brush (such as a paintbrush).
You can remove the air filter so that you can clean both sides. Do not rinse the air filter in water, or use any detergent or solvent to clean it.
Projector Lamp Replacement
Warning: Let the lamp fully cool before replacing it to avoid injury.
Warning: Never disassemble or modify the lamp. It could cause a fire, electric shock, or other damage or injury.
Turn off the projector and unplug the power cord.
Allow the projector lamp to cool down for at least one hour.
Use the screwdriver included with the replacement lamp to loosen the screw securing the lamp cover.
Slide the lamp cover out and lift it off.
Loosen the screws securing the lamp to the projector. The screws do not come all the way out.
Remove the lamp. Grasp the raised section of the lamp and gently pull the lamp out of the projector.
Install the new lamp. Do not touch any glass on the lamp assembly to avoid premature lamp failure.
Projector Parts Cleaning
Warning!
Before cleaning any part of the projector, turn it off and unplug the power cord.
Never open any cover on the projector, except as specifically explained in this manual. Dangerous electrical voltages in the projector can injure you severely.
Cleaning the Lens
Clean the projector's lens periodically, or whenever you notice dust or smudges on the surface.
To remove dust or smudges, gently wipe the lens with lens-cleaning paper.
To remove stubborn smudges, moisten a soft, lint-free cloth with lens cleaner and gently wipe the lens. Do not spray any liquid directly on the lens.
Warning!
Do not use a lens cleaner that contains flammable gas. The high heat generated by the projector lamp may cause a fire.
Air Filter Replacement
Warning: Ensure the projector is turned off and unplugged before starting the procedure.
Check if the air filter needs replacement
If the air filter is torn or damaged, proceed with the replacement.
Turn off the projector and unplug the power cord.
Slide the air filter cover latch and open the air filter cover.
Pull the air filter out of the projector.
Upload a photo of the old air filter.
Place the new air filter in the projector and push gently until it clicks into place.
Close the air filter cover.
Unlock efficiency
with MaintainX CoPilot
MaintainX CoPilot is your expert colleague, on call 24/7, helping your team find the answers they need to keep equipment running.
Reduce Unplanned Downtime
Ensure your team follows consistent procedures to minimize equipment failures and costly delays.
Maximize Asset Availability
Keep your assets running longer and more reliably, with standardized maintenance workflows from OEM manuals.
Lower Maintenance Costs
Turn any technician into an expert to streamline operations, maintain more assets, and reduce overall costs.
Thousands of companies manage their assets with MaintainX

'%3e%3cpath%20fill='url(%23b)'%20d='M66.008%2080.068c-5.084-.786-9.763-3.834-12.442-8.68a16.942%2016.942%200%200%201-1.87-5.18c1.096.19%202.203.476%203.298.87%206.525%202.333%2010.836%207.68%2011.014%2012.99ZM51.47%2061.576c.488-5.524%203.62-10.716%208.847-13.597a17.132%2017.132%200%200%201%2011.335-1.882c-.798%208.145-7.43%2014.848-16.038%2015.599-1.417.119-2.799.07-4.144-.12Zm28.564-11.478a17.513%2017.513%200%200%201%203.727%204.62c4.608%208.335%201.584%2018.813-6.75%2023.409a16.988%2016.988%200%200%201-4.359%201.679%2019.624%2019.624%200%200%201-3.977-12.776c.346-7.561%204.942-13.931%2011.36-16.932Z'/%3e%3cpath%20fill='%23110F0D'%20fill-rule='evenodd'%20d='M142.831%2048.324h4.977V77.03h-4.977V48.324Zm27.278%2013.002c.322%201.048.453%202.263.453%203.62v12.073h-4.787V66.208c0-.75-.047-1.572-.154-2.143-.453-2.382-1.822-3.572-4.215-3.572-2.31%200-3.882%201.274-4.43%203.476-.143.596-.226%201.405-.226%202.25v10.8h-4.787V56.623h4.477v2.989c1.536-2.5%203.906-3.43%206.371-3.43%203.488%200%206.263%201.68%207.298%205.144Zm24.636%207.323c0%203.882-2.358%206.525-5.763%207.727-1.298.453-2.632.643-4.62.643h-10.169V48.324h9.085c1.691%200%203.156.143%204.049.38%203.465.93%205.727%203.68%205.727%207.335%200%202.441-.81%204.156-2.762%205.644%202.905%201.417%204.453%203.727%204.453%206.966Zm-15.634-8.656h4.584c1.024%200%201.917-.143%202.536-.417%201.215-.548%201.905-1.608%201.905-3.167%200-1.548-.643-2.572-1.845-3.132-.691-.31-1.762-.452-2.763-.452h-4.417v7.168Zm10.716%208.465c0-1.536-.893-3.37-3.227-3.893-.428-.095-1.036-.143-1.571-.143h-5.918v8.085h5.501c.56%200%201.429-.048%201.953-.167%201.94-.453%203.262-1.846%203.262-3.882Zm47.747-11.847-8.097%2020.408h-4.429l-8.109-20.408h5.191l5.192%2014.574%205.108-14.574h5.144Zm-20.218%2010.002c0%20.69-.036%201.262-.155%201.94h-15.943c.631%202.87%202.714%204.728%205.882%204.728%202.131%200%203.607-.882%204.703-2.525h4.87c-1.762%204.144-5.204%206.692-9.657%206.692-6.084%200-10.537-4.858-10.537-10.49%200-6.108%204.524-10.776%2010.335-10.776%206.239%200%2010.442%204.954%2010.502%2010.43Zm-4.763-1.405c-.333-2.846-2.643-4.858-5.691-4.858-2.894%200-5.287%201.929-5.621%204.858h11.312Zm-72.667%203.44c0%204.787-3.287%208.371-9.419%208.371H119.363V64.66c-1.917.274-3.87.69-5.811%201.238l4.537%2011.121h-5.418l-3.596-9.585c-5.144%202.084-10.085%205.216-14.217%209.585h-4.786L101.8%2048.312h4.56l5.68%2013.883a44.112%2044.112%200%200%201%207.323-1.774V48.312h9.084c1.703%200%203.156.143%204.061.393%203.453.929%205.727%203.667%205.727%207.323%200%201.917-.738%204.179-2.81%205.691%203.06%201.56%204.501%204.025%204.501%206.93Zm-15.634-8.667a62.664%2062.664%200%200%201%202.06-.036c1.703.012%203.239.131%204.608.37%201.441-.549%202.357-1.727%202.357-3.537%200-1.941-.881-3.144-2.488-3.667-.548-.18-1.358-.286-2.322-.286h-4.215v7.156Zm-16.55%203.905-3.715-9.894-6.394%2016.502c2.833-2.595%206.263-4.858%2010.109-6.608Zm27.254%204.74c0-2.775-3.131-4.347-8.513-4.418-.715%200-1.441.011-2.191.047v8.252h5.918c2.548%200%204.786-1.37%204.786-3.882Z'%20clip-rule='evenodd'/%3e%3c/g%3e%3cdefs%3e%3clinearGradient%20id='b'%20x1='51.47'%20x2='85.916'%20y1='62.946'%20y2='62.946'%20gradientUnits='userSpaceOnUse'%3e%3cstop%20stop-color='%23CD9F28'/%3e%3cstop%20offset='1'%20stop-color='%23ECD80B'/%3e%3c/linearGradient%3e%3cclipPath%20id='a'%3e%3cpath%20fill='%23fff'%20d='M51.47%2045.728h186.104V80.14H51.47z'/%3e%3c/clipPath%3e%3c/defs%3e%3c/svg%3e)


More from Epson


Explore Other Assets


© 2026 MaintainX. All rights reserved.