


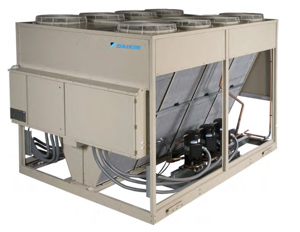
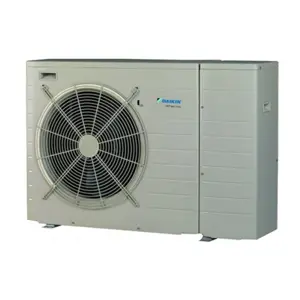
Daikin Air-Cooled Split System Condensing Units RCS 025D
Need answers fast?
Explore the manual using AI.

Turn manuals into instant answers
with your AI-powered assistantTurn manuals into instant answers
with your AI-powered assistant
Manual for Daikin Air-Cooled Split System Condensing Units RCS 025D
Complete asset maintenance, one click away
Get instant access to all the maintenance information you need. Empower technicians to perform preventive maintenance with asset packages, ready to use right out of the box.

Documents & Manuals
Find all the essential guides in one place.
 Tensioning Guide
- Belt-diagram
- C-120 pulleys
+ 13 more

Work Order Templates
Pre-built workflows to keep your asset running smoothly.
- Daily Electrical System Inspection
- Replace Roller and Pulley
- Install Engine B-120
+ 29 more

Procedures
Integrate maintenance plans directly into your work orders.
- Motion Industries
- Applied Industrial Technologies
- Electrical Brothers
+ 5 more

Parts
Access the parts list for your equipment in MaintainX.
- Drive Motor
- B2 Rollers
- Tensioning System
+ 40 more
Daikin Air-Cooled Split System Condensing Units RCS 025D
Create an account to install this asset package.
Maintenance Plans for Daikin Air-Cooled Split System Condensing Units Model RCS 025D
Integrate maintenance plans directly into your work orders in MaintainX.
Aluminium Coil Maintenance
All-Aluminum Condenser Coils
The condenser coils are an all-aluminum design including the connections, micro-channels, fins (an oven brazing process brazes the fins to the micro-channel flat tube), and headers.
During the condensing process, refrigerant in the coil passes through the micro-channel flat tubes, resulting in higher efficiency heat transfer from the refrigerant to the airstream.
Connecting the Condenser Coil to Copper Tubing
Because of the low melting point of aluminum (1220°F compared to 1984°F for copper), this brazed joint is performed with a low temperature brazing process.
CAUTION! Potential equipment damage. If a standard copper brazing process is performed at this joint, the process will damage the aluminum connection.
If a leak is found at a copper-aluminum joint, it is recommended that the entire microchannel coil module be replaced. Do not attempt to repair the copper-aluminum joint on site.
Micro-Channel aluminum coil cleaning recommendations
Any detergent left on the coil surfaces will promote corrosion.

Scroll Compressor Piping Maintenance
Scroll Compressor Piping
When replacing an individual scroll compressor on tandem or trio assemblies, three refrigerant lines must be disconnected and re-assembled:
1. TPTL Oil Equalization Line
a. This line (Figure 23) contains the oil sight glass.
b. This line connects to each compressor at “rota-lock” fittings (Figure 24).
c. This line should be disconnected and re-used
2. Suction Line
a. This is the largest diameter piping.
b. This line is brazed to each compressor.
Cooling Circuits Maintenance
The steps below are necessary only if the unit has been started.
Each circuit is properly pumped down.
Compressor MMP(s) turned off.
All the refrigerant service valves on each circuit are closed.
Valves are tagged as a warning for the technician who restarts the units.
Condensing Unit Routine Maintenance
Disconnect all electric power to the unit when servicing control panel components.
Before servicing, always inspect units for multiple disconnects to ensure all power is removed from the control panel and its components.
Danger! Hazardous voltage. Will cause severe injury or death. Disconnect electric power before servicing equipment. More than one disconnect may be required to de-energize the unit.
Planned Maintenance
Preventive maintenance is the best way to avoid unnecessary expense and inconvenience. Have this system inspected at regular intervals by a qualified service technician.
The required frequency of inspections depends upon the total operating time and the indoor and outdoor environmental conditions.
Tighten all wire connections.
Clean condenser coils with cold water, if necessary.
Check each circuit’s refrigerant sightglass when the circuit is operating under steady-state, full-load conditions.
Manual Motor Protector Maintenance
Warning: Only authorized personnel should perform this procedure.
Check if the short circuit indicator is functional.
If the motor ampacity changes or the MMP is replaced, adjust the MMP trip points.
Select the motor service factor
Enter the motor FLA
For motors with a 1.15 service factor, rotate the arrow on the dial to correspond to the motor FLA.
For motors with a 1.0 service factor, multiply the motor FLA by 0.9; then rotate the arrow on the dial to correspond to that value.
Check if the MMP has tripped.
If the MMP has tripped, rotate the knob counterclockwise to the OFF position; then rotate knob clockwise to the ON position.
Unlock efficiency
with MaintainX CoPilot
MaintainX CoPilot is your expert colleague, on call 24/7, helping your team find the answers they need to keep equipment running.
Reduce Unplanned Downtime
Ensure your team follows consistent procedures to minimize equipment failures and costly delays.
Maximize Asset Availability
Keep your assets running longer and more reliably, with standardized maintenance workflows from OEM manuals.
Lower Maintenance Costs
Turn any technician into an expert to streamline operations, maintain more assets, and reduce overall costs.
Thousands of companies manage their assets with MaintainX

'%3e%3cpath%20fill='url(%23b)'%20d='M66.008%2080.068c-5.084-.786-9.763-3.834-12.442-8.68a16.942%2016.942%200%200%201-1.87-5.18c1.096.19%202.203.476%203.298.87%206.525%202.333%2010.836%207.68%2011.014%2012.99ZM51.47%2061.576c.488-5.524%203.62-10.716%208.847-13.597a17.132%2017.132%200%200%201%2011.335-1.882c-.798%208.145-7.43%2014.848-16.038%2015.599-1.417.119-2.799.07-4.144-.12Zm28.564-11.478a17.513%2017.513%200%200%201%203.727%204.62c4.608%208.335%201.584%2018.813-6.75%2023.409a16.988%2016.988%200%200%201-4.359%201.679%2019.624%2019.624%200%200%201-3.977-12.776c.346-7.561%204.942-13.931%2011.36-16.932Z'/%3e%3cpath%20fill='%23110F0D'%20fill-rule='evenodd'%20d='M142.831%2048.324h4.977V77.03h-4.977V48.324Zm27.278%2013.002c.322%201.048.453%202.263.453%203.62v12.073h-4.787V66.208c0-.75-.047-1.572-.154-2.143-.453-2.382-1.822-3.572-4.215-3.572-2.31%200-3.882%201.274-4.43%203.476-.143.596-.226%201.405-.226%202.25v10.8h-4.787V56.623h4.477v2.989c1.536-2.5%203.906-3.43%206.371-3.43%203.488%200%206.263%201.68%207.298%205.144Zm24.636%207.323c0%203.882-2.358%206.525-5.763%207.727-1.298.453-2.632.643-4.62.643h-10.169V48.324h9.085c1.691%200%203.156.143%204.049.38%203.465.93%205.727%203.68%205.727%207.335%200%202.441-.81%204.156-2.762%205.644%202.905%201.417%204.453%203.727%204.453%206.966Zm-15.634-8.656h4.584c1.024%200%201.917-.143%202.536-.417%201.215-.548%201.905-1.608%201.905-3.167%200-1.548-.643-2.572-1.845-3.132-.691-.31-1.762-.452-2.763-.452h-4.417v7.168Zm10.716%208.465c0-1.536-.893-3.37-3.227-3.893-.428-.095-1.036-.143-1.571-.143h-5.918v8.085h5.501c.56%200%201.429-.048%201.953-.167%201.94-.453%203.262-1.846%203.262-3.882Zm47.747-11.847-8.097%2020.408h-4.429l-8.109-20.408h5.191l5.192%2014.574%205.108-14.574h5.144Zm-20.218%2010.002c0%20.69-.036%201.262-.155%201.94h-15.943c.631%202.87%202.714%204.728%205.882%204.728%202.131%200%203.607-.882%204.703-2.525h4.87c-1.762%204.144-5.204%206.692-9.657%206.692-6.084%200-10.537-4.858-10.537-10.49%200-6.108%204.524-10.776%2010.335-10.776%206.239%200%2010.442%204.954%2010.502%2010.43Zm-4.763-1.405c-.333-2.846-2.643-4.858-5.691-4.858-2.894%200-5.287%201.929-5.621%204.858h11.312Zm-72.667%203.44c0%204.787-3.287%208.371-9.419%208.371H119.363V64.66c-1.917.274-3.87.69-5.811%201.238l4.537%2011.121h-5.418l-3.596-9.585c-5.144%202.084-10.085%205.216-14.217%209.585h-4.786L101.8%2048.312h4.56l5.68%2013.883a44.112%2044.112%200%200%201%207.323-1.774V48.312h9.084c1.703%200%203.156.143%204.061.393%203.453.929%205.727%203.667%205.727%207.323%200%201.917-.738%204.179-2.81%205.691%203.06%201.56%204.501%204.025%204.501%206.93Zm-15.634-8.667a62.664%2062.664%200%200%201%202.06-.036c1.703.012%203.239.131%204.608.37%201.441-.549%202.357-1.727%202.357-3.537%200-1.941-.881-3.144-2.488-3.667-.548-.18-1.358-.286-2.322-.286h-4.215v7.156Zm-16.55%203.905-3.715-9.894-6.394%2016.502c2.833-2.595%206.263-4.858%2010.109-6.608Zm27.254%204.74c0-2.775-3.131-4.347-8.513-4.418-.715%200-1.441.011-2.191.047v8.252h5.918c2.548%200%204.786-1.37%204.786-3.882Z'%20clip-rule='evenodd'/%3e%3c/g%3e%3cdefs%3e%3clinearGradient%20id='b'%20x1='51.47'%20x2='85.916'%20y1='62.946'%20y2='62.946'%20gradientUnits='userSpaceOnUse'%3e%3cstop%20stop-color='%23CD9F28'/%3e%3cstop%20offset='1'%20stop-color='%23ECD80B'/%3e%3c/linearGradient%3e%3cclipPath%20id='a'%3e%3cpath%20fill='%23fff'%20d='M51.47%2045.728h186.104V80.14H51.47z'/%3e%3c/clipPath%3e%3c/defs%3e%3c/svg%3e)


More from Daikin


Explore Other Assets


© 2026 MaintainX. All rights reserved.