


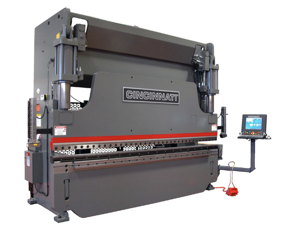
Cincinnati Hydraulic Press Brake 135CBIIX8FT
Need answers fast?
Explore the manual using AI.
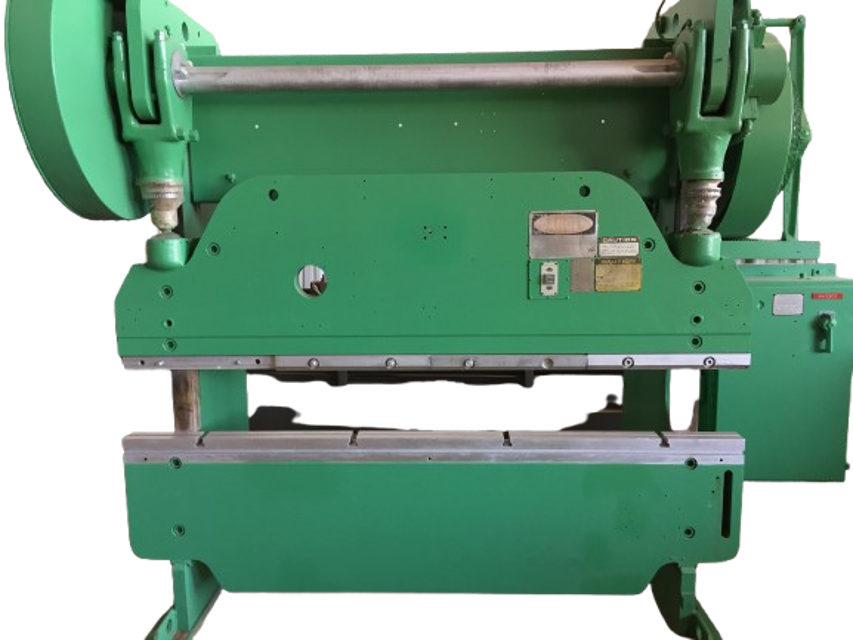
The Cincinnati Hydraulic Press Brake 135CBIIX8FT is a robust industrial machine designed for precision metal forming. Known for its reliability and efficiency, this model is ideal for various bending applications in manufacturing environments. Ensure optimal performance with regular maintenance and quality spare parts.
Turn manuals into instant answers
with your AI-powered assistantTurn manuals into instant answers
with your AI-powered assistant
Manual for Cincinnati Hydraulic Press Brake 135CBIIX8FT
Complete asset maintenance, one click away
Get instant access to all the maintenance information you need. Empower technicians to perform preventive maintenance with asset packages, ready to use right out of the box.

Documents & Manuals
Find all the essential guides in one place.
 Tensioning Guide
- Belt-diagram
- C-120 pulleys
+ 13 more

Work Order Templates
Pre-built workflows to keep your asset running smoothly.
- Daily Electrical System Inspection
- Replace Roller and Pulley
- Install Engine B-120
+ 29 more

Procedures
Integrate maintenance plans directly into your work orders.
- Motion Industries
- Applied Industrial Technologies
- Electrical Brothers
+ 5 more

Parts
Access the parts list for your equipment in MaintainX.
- Drive Motor
- B2 Rollers
- Tensioning System
+ 40 more
Cincinnati Hydraulic Press Brake 135CBIIX8FT
Create an account to install this asset package.
Maintenance Plans for Cincinnati Hydraulic Press Brake Model 135CBIIX8FT
Integrate maintenance plans directly into your work orders in MaintainX.
1 Monthly Hydraulic Press Brake Maintenance
Lubricate cylinder clevis pin(s)
Clean and flush ram guides with oil
Check for water in reservoir(s)
Wipe entire machine clean
Check leveling system
Check reservoir oil level(s) everyday
Check lubrication at both guides everyday
Clean leveling band every 1 week
Lubricate stroke adjustment and tilt adjustment screws every 1 week

Leveling Band Replacement
Block the ram so it is parallel to bed
Turn OFF all power to the machine and lock the electrical disconnect
Remove the old leveling band and cut the new band to the same length as the old one
Attach the new leveling band to the anchor point on the adjusting knob screw
Pass the leveling band over the sheaves and through the protective tube on the rear of the ram
Attach the left end of the leveling band to the servo valve anchor, pulling the band as tight as possible
Tighten the band by turning the tilt adjusting knob (clockwise) until .040\ clearance is provided between the servo valve anchor collar and the bottom of the servo valve mounting block. This is the zero point or neutral position for the servo valve"
The tilt adjusting knob screw should be recessed approximately 5/8\ (+1/8\") from the end of the knob when the servo valve is in the neutral position"
Check the level of the bed and ram per the previous instructions
Piston Rod Seal Replacement
Run ram to the maximum down position and block both ends of the ram
Turn OFF machine and LOCK the electrical disconnect
Remove ram pin cover plate on front of ram using extractor bar
Swing cylinder out from ram and insert wooden block between cylinder and housing so piston rod is clear of ram
Remove 6 or 8 bolts from seal retainer and insert 3 or 4 3/8\ x 1\" (or longer) set screws into tapped holes in retainer. Tighten set screws to back-off retainer"
Support retainer to keep from falling free and remove seal retainer
Remove seal from groove in bore of seal retainer. The seal has an energizing \o\" ring to pre-load the seal"
Replace with a new seal. Also inspect non-metallic bearing strip in bore of seal retainer and \o\" ring seal in top face of retainer. Replace if necessary"
Using auto body slide hammer-puller, remove the piston rod seal. This seal has no energizing. Be careful not to damage finished surface of piston rod or lower head seat
Servo Valve Replacement
Warning: This procedure requires trained personnel with PPE!
Ram blocked at both ends
Power to machine turned OFF and disconnect switch on main electrical enclosure LOCKED
Cover and old servo valve removed from servo valve housing
Feeler gage measurement between servo valve anchor collar and servo valve housing
Locknuts installed on servo valve stem located at bottom of servo valve
New servo valve bolted in place
Position of valve spool adjusted with adjusting nuts to obtain .188\ +.005 dimension"
Parallelism of bed and ram checked and adjusted if necessary
1 Yearly Air Breather Cleaning
Cap removed and back blow performed
Low pressure air hose used for back blow
Air breather cleaned
Enter the current operating hours
Is it time to replace the suction strainer? (Every 6 months or 1000 operating hours)
Is it time to replace the filter cartridge? (Every 1000 operating hours)
Sign off on the air breather cleaning
Parts for Cincinnati Hydraulic Press Brake 135CBIIX8FT
Access the parts list for your equipment in MaintainX.
C.I Oil
B-150
C.I Grease
H-2M
C.I Oil
B-150
C.I Grease
H-2M
C.I Oil
B-150
C.I Grease
H-2M
Unlock efficiency
with MaintainX CoPilot
MaintainX CoPilot is your expert colleague, on call 24/7, helping your team find the answers they need to keep equipment running.
Reduce Unplanned Downtime
Ensure your team follows consistent procedures to minimize equipment failures and costly delays.
Maximize Asset Availability
Keep your assets running longer and more reliably, with standardized maintenance workflows from OEM manuals.
Lower Maintenance Costs
Turn any technician into an expert to streamline operations, maintain more assets, and reduce overall costs.
Thousands of companies manage their assets with MaintainX

'%3e%3cpath%20fill='url(%23b)'%20d='M66.008%2080.068c-5.084-.786-9.763-3.834-12.442-8.68a16.942%2016.942%200%200%201-1.87-5.18c1.096.19%202.203.476%203.298.87%206.525%202.333%2010.836%207.68%2011.014%2012.99ZM51.47%2061.576c.488-5.524%203.62-10.716%208.847-13.597a17.132%2017.132%200%200%201%2011.335-1.882c-.798%208.145-7.43%2014.848-16.038%2015.599-1.417.119-2.799.07-4.144-.12Zm28.564-11.478a17.513%2017.513%200%200%201%203.727%204.62c4.608%208.335%201.584%2018.813-6.75%2023.409a16.988%2016.988%200%200%201-4.359%201.679%2019.624%2019.624%200%200%201-3.977-12.776c.346-7.561%204.942-13.931%2011.36-16.932Z'/%3e%3cpath%20fill='%23110F0D'%20fill-rule='evenodd'%20d='M142.831%2048.324h4.977V77.03h-4.977V48.324Zm27.278%2013.002c.322%201.048.453%202.263.453%203.62v12.073h-4.787V66.208c0-.75-.047-1.572-.154-2.143-.453-2.382-1.822-3.572-4.215-3.572-2.31%200-3.882%201.274-4.43%203.476-.143.596-.226%201.405-.226%202.25v10.8h-4.787V56.623h4.477v2.989c1.536-2.5%203.906-3.43%206.371-3.43%203.488%200%206.263%201.68%207.298%205.144Zm24.636%207.323c0%203.882-2.358%206.525-5.763%207.727-1.298.453-2.632.643-4.62.643h-10.169V48.324h9.085c1.691%200%203.156.143%204.049.38%203.465.93%205.727%203.68%205.727%207.335%200%202.441-.81%204.156-2.762%205.644%202.905%201.417%204.453%203.727%204.453%206.966Zm-15.634-8.656h4.584c1.024%200%201.917-.143%202.536-.417%201.215-.548%201.905-1.608%201.905-3.167%200-1.548-.643-2.572-1.845-3.132-.691-.31-1.762-.452-2.763-.452h-4.417v7.168Zm10.716%208.465c0-1.536-.893-3.37-3.227-3.893-.428-.095-1.036-.143-1.571-.143h-5.918v8.085h5.501c.56%200%201.429-.048%201.953-.167%201.94-.453%203.262-1.846%203.262-3.882Zm47.747-11.847-8.097%2020.408h-4.429l-8.109-20.408h5.191l5.192%2014.574%205.108-14.574h5.144Zm-20.218%2010.002c0%20.69-.036%201.262-.155%201.94h-15.943c.631%202.87%202.714%204.728%205.882%204.728%202.131%200%203.607-.882%204.703-2.525h4.87c-1.762%204.144-5.204%206.692-9.657%206.692-6.084%200-10.537-4.858-10.537-10.49%200-6.108%204.524-10.776%2010.335-10.776%206.239%200%2010.442%204.954%2010.502%2010.43Zm-4.763-1.405c-.333-2.846-2.643-4.858-5.691-4.858-2.894%200-5.287%201.929-5.621%204.858h11.312Zm-72.667%203.44c0%204.787-3.287%208.371-9.419%208.371H119.363V64.66c-1.917.274-3.87.69-5.811%201.238l4.537%2011.121h-5.418l-3.596-9.585c-5.144%202.084-10.085%205.216-14.217%209.585h-4.786L101.8%2048.312h4.56l5.68%2013.883a44.112%2044.112%200%200%201%207.323-1.774V48.312h9.084c1.703%200%203.156.143%204.061.393%203.453.929%205.727%203.667%205.727%207.323%200%201.917-.738%204.179-2.81%205.691%203.06%201.56%204.501%204.025%204.501%206.93Zm-15.634-8.667a62.664%2062.664%200%200%201%202.06-.036c1.703.012%203.239.131%204.608.37%201.441-.549%202.357-1.727%202.357-3.537%200-1.941-.881-3.144-2.488-3.667-.548-.18-1.358-.286-2.322-.286h-4.215v7.156Zm-16.55%203.905-3.715-9.894-6.394%2016.502c2.833-2.595%206.263-4.858%2010.109-6.608Zm27.254%204.74c0-2.775-3.131-4.347-8.513-4.418-.715%200-1.441.011-2.191.047v8.252h5.918c2.548%200%204.786-1.37%204.786-3.882Z'%20clip-rule='evenodd'/%3e%3c/g%3e%3cdefs%3e%3clinearGradient%20id='b'%20x1='51.47'%20x2='85.916'%20y1='62.946'%20y2='62.946'%20gradientUnits='userSpaceOnUse'%3e%3cstop%20stop-color='%23CD9F28'/%3e%3cstop%20offset='1'%20stop-color='%23ECD80B'/%3e%3c/linearGradient%3e%3cclipPath%20id='a'%3e%3cpath%20fill='%23fff'%20d='M51.47%2045.728h186.104V80.14H51.47z'/%3e%3c/clipPath%3e%3c/defs%3e%3c/svg%3e)


More from Cincinnati


Explore Other Assets


© 2026 MaintainX. All rights reserved.