


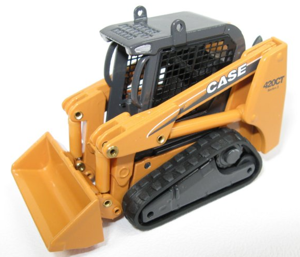
Case Tractor FARMALL JX 80 DT
Need answers fast?
Explore the manual using AI.

Turn manuals into instant answers
with your AI-powered assistantTurn manuals into instant answers
with your AI-powered assistant
Manual for Case Tractor FARMALL JX 80 DT
Complete asset maintenance, one click away
Get instant access to all the maintenance information you need. Empower technicians to perform preventive maintenance with asset packages, ready to use right out of the box.

Documents & Manuals
Find all the essential guides in one place.
 Tensioning Guide
- Belt-diagram
- C-120 pulleys
+ 13 more

Work Order Templates
Pre-built workflows to keep your asset running smoothly.
- Daily Electrical System Inspection
- Replace Roller and Pulley
- Install Engine B-120
+ 29 more

Procedures
Integrate maintenance plans directly into your work orders.
- Motion Industries
- Applied Industrial Technologies
- Electrical Brothers
+ 5 more

Parts
Access the parts list for your equipment in MaintainX.
- Drive Motor
- B2 Rollers
- Tensioning System
+ 40 more
Case Tractor FARMALL JX 80 DT
Create an account to install this asset package.
Maintenance Plans for Case Tractor Model FARMALL JX 80 DT
Integrate maintenance plans directly into your work orders in MaintainX.
Engine Valve Guides Replacement
WARNING: Lift and handle all heavy parts using suitable lifting equipment. Make sure that assemblies or parts are supported by means of suitable slings and hooks. Check that no one is in the vicinity of the load to be lifted.
WARNING: Always use suitable tools to align holes in parts. NEVER USE FINGERS OR HANDS
Cylinder head placed on the test bench
Bore of the valve guide enlarged using twist drill 380000276
Valve guide removed using drift 380000219 (1)
New valve guide with the enlarged bore force fitted using drift 380000219 (1) and bush 380000242 (2)
Valve guide bore reamed out using reamer (1) 380000222
NOTE: When replacing exhaust valve guides you must also carry out the following further operations.
Measure the distance (L) between the cylinder head face and the base of the valve guide using a caliper gauge and the special plate of tool 380000277

Air Conditioning and Heating Pipes Replacement
DANGER: When recovering refrigerant from the system adhere to the safety rules on page 2.
Disconnect the negative battery lead.
Recover the refrigerant from the system using the recovery/recycling station 294048 as described on page 22.
Drain off the coolant from the drain line (1) on the engine block.
Remove the fixing plugs on the roof mat (1) and take off the roof mat
Remove fastening bolts (1) which are located in back of roof and take off the top cover (2)
Remove the electric connectors (1).
Remove A/C inlet and outlet pipes (1)
Remove heater pipe connections (1) and take off the pipes.
1 Yearly Compressor Oil Change
Warning: The oil in the compressor of the recovery/recycling station should be replaced with new oil (code 293825) every 12 months to maintain the station’s refrigerant treatment capacity and to protect the compressor.
Open cock (13), and drain the oil into a container to be disposed of in accordance with local regulations for waste oil disposal.
Close cock (13).
Remove the caps from the service valves (14) on the side of the compressor and (13) on the sight glass.
Connect the service pipe of the evacuation station (294030) to valve (14) and connect a pick--up pipe from kit 294043to valve (13) on the sight glass.
Perform the evacuation operation with the pump in operation. The new oil can be aspirated from an external container by means of the pick--up pipe.
Once the compressor has been filled with correct quantity of oil (half--way up the sight glass) close valve (13), disconnect the pick--up pipe, and replace the cap on service valve (13). Continue the evacuation for approx. 30 minutes.
On conclusion, close the cocks, switch off the pump, disconnect the service pipe and replace the cap on service valve (14).
Record the operation on the appropriate service report card.
Alternator Wire Connection Test
Warning: Disconnect the battery before starting the procedure
Battery disconnected
B+ and D+ alternator terminals disconnected
Reconnect the battery and turn the ignition key into position ON but without starting the engine
Battery reconnected and ignition key in ON position
Voltage at the battery
If there is no voltage at the battery, check for a continuity fault in the external wiring. See circuit diagram in figure 2.
Continuity fault in the external wiring checked
D+ terminal, warning light wire (red) and earth (ground) connected. The warning light should illuminate.
Draft Control Adjustment
Remove the end section of the draft control rod and mount it on the rod of tool 380000263. Fasten it using lock nut.
Place the tool 380000263 complete with its rod and the end section of the draft control rod on a surface plate.
Measure the distance between the upper surface of the rod and the micrometer gauge bearing surface on the tool.
With tool 380000264 mounted on the lift body and disconnected from the compressed air system, move the position control lever and the draft control lever fully back against the spacer.
Move the eccentric pin, connected to the internal draft control lever, to the horizontal position with the eccentric cam pointed towards the rear of the lift assembly.
Fit tool 380000263 to the lift body and fasten it to the two holes in the box as shown in figure.
Turn the screw on the internal draft control lever until the end of the plunger is flush with the inner reference surface of tool 380000264.
Turn the eccentric pin slightly to withdraw the end of the plunger of tool 380000264 as far as possible.
Again turn the screw to adjust the internal draft control lever until the end of the plunger is flush with the inner reference surface of the tool 380000264.
Parts for Case Tractor FARMALL JX 80 DT
Access the parts list for your equipment in MaintainX.
Tractor Dismantling Stand
380000236
Engine Lifting Hook
380000216
Rotating Engine Service Stand
380000301
Engine Mounting Brackets (For Rotating Stand 380000301)
380000313
Compression Test Kit (Complete With Dummy Injector 380000617)
380000303
Tractor Dismantling Stand
380000236
Engine Lifting Hook
380000216
Rotating Engine Service Stand
380000301
Engine Mounting Brackets (For Rotating Stand 380000301)
380000313
Compression Test Kit (Complete With Dummy Injector 380000617)
380000303
Tractor Dismantling Stand
380000236
Engine Lifting Hook
380000216
Rotating Engine Service Stand
380000301
Engine Mounting Brackets (For Rotating Stand 380000301)
380000313
Compression Test Kit (Complete With Dummy Injector 380000617)
380000303
Unlock efficiency
with MaintainX CoPilot
MaintainX CoPilot is your expert colleague, on call 24/7, helping your team find the answers they need to keep equipment running.
Reduce Unplanned Downtime
Ensure your team follows consistent procedures to minimize equipment failures and costly delays.
Maximize Asset Availability
Keep your assets running longer and more reliably, with standardized maintenance workflows from OEM manuals.
Lower Maintenance Costs
Turn any technician into an expert to streamline operations, maintain more assets, and reduce overall costs.
Thousands of companies manage their assets with MaintainX

'%3e%3cpath%20fill='url(%23b)'%20d='M66.008%2080.068c-5.084-.786-9.763-3.834-12.442-8.68a16.942%2016.942%200%200%201-1.87-5.18c1.096.19%202.203.476%203.298.87%206.525%202.333%2010.836%207.68%2011.014%2012.99ZM51.47%2061.576c.488-5.524%203.62-10.716%208.847-13.597a17.132%2017.132%200%200%201%2011.335-1.882c-.798%208.145-7.43%2014.848-16.038%2015.599-1.417.119-2.799.07-4.144-.12Zm28.564-11.478a17.513%2017.513%200%200%201%203.727%204.62c4.608%208.335%201.584%2018.813-6.75%2023.409a16.988%2016.988%200%200%201-4.359%201.679%2019.624%2019.624%200%200%201-3.977-12.776c.346-7.561%204.942-13.931%2011.36-16.932Z'/%3e%3cpath%20fill='%23110F0D'%20fill-rule='evenodd'%20d='M142.831%2048.324h4.977V77.03h-4.977V48.324Zm27.278%2013.002c.322%201.048.453%202.263.453%203.62v12.073h-4.787V66.208c0-.75-.047-1.572-.154-2.143-.453-2.382-1.822-3.572-4.215-3.572-2.31%200-3.882%201.274-4.43%203.476-.143.596-.226%201.405-.226%202.25v10.8h-4.787V56.623h4.477v2.989c1.536-2.5%203.906-3.43%206.371-3.43%203.488%200%206.263%201.68%207.298%205.144Zm24.636%207.323c0%203.882-2.358%206.525-5.763%207.727-1.298.453-2.632.643-4.62.643h-10.169V48.324h9.085c1.691%200%203.156.143%204.049.38%203.465.93%205.727%203.68%205.727%207.335%200%202.441-.81%204.156-2.762%205.644%202.905%201.417%204.453%203.727%204.453%206.966Zm-15.634-8.656h4.584c1.024%200%201.917-.143%202.536-.417%201.215-.548%201.905-1.608%201.905-3.167%200-1.548-.643-2.572-1.845-3.132-.691-.31-1.762-.452-2.763-.452h-4.417v7.168Zm10.716%208.465c0-1.536-.893-3.37-3.227-3.893-.428-.095-1.036-.143-1.571-.143h-5.918v8.085h5.501c.56%200%201.429-.048%201.953-.167%201.94-.453%203.262-1.846%203.262-3.882Zm47.747-11.847-8.097%2020.408h-4.429l-8.109-20.408h5.191l5.192%2014.574%205.108-14.574h5.144Zm-20.218%2010.002c0%20.69-.036%201.262-.155%201.94h-15.943c.631%202.87%202.714%204.728%205.882%204.728%202.131%200%203.607-.882%204.703-2.525h4.87c-1.762%204.144-5.204%206.692-9.657%206.692-6.084%200-10.537-4.858-10.537-10.49%200-6.108%204.524-10.776%2010.335-10.776%206.239%200%2010.442%204.954%2010.502%2010.43Zm-4.763-1.405c-.333-2.846-2.643-4.858-5.691-4.858-2.894%200-5.287%201.929-5.621%204.858h11.312Zm-72.667%203.44c0%204.787-3.287%208.371-9.419%208.371H119.363V64.66c-1.917.274-3.87.69-5.811%201.238l4.537%2011.121h-5.418l-3.596-9.585c-5.144%202.084-10.085%205.216-14.217%209.585h-4.786L101.8%2048.312h4.56l5.68%2013.883a44.112%2044.112%200%200%201%207.323-1.774V48.312h9.084c1.703%200%203.156.143%204.061.393%203.453.929%205.727%203.667%205.727%207.323%200%201.917-.738%204.179-2.81%205.691%203.06%201.56%204.501%204.025%204.501%206.93Zm-15.634-8.667a62.664%2062.664%200%200%201%202.06-.036c1.703.012%203.239.131%204.608.37%201.441-.549%202.357-1.727%202.357-3.537%200-1.941-.881-3.144-2.488-3.667-.548-.18-1.358-.286-2.322-.286h-4.215v7.156Zm-16.55%203.905-3.715-9.894-6.394%2016.502c2.833-2.595%206.263-4.858%2010.109-6.608Zm27.254%204.74c0-2.775-3.131-4.347-8.513-4.418-.715%200-1.441.011-2.191.047v8.252h5.918c2.548%200%204.786-1.37%204.786-3.882Z'%20clip-rule='evenodd'/%3e%3c/g%3e%3cdefs%3e%3clinearGradient%20id='b'%20x1='51.47'%20x2='85.916'%20y1='62.946'%20y2='62.946'%20gradientUnits='userSpaceOnUse'%3e%3cstop%20stop-color='%23CD9F28'/%3e%3cstop%20offset='1'%20stop-color='%23ECD80B'/%3e%3c/linearGradient%3e%3cclipPath%20id='a'%3e%3cpath%20fill='%23fff'%20d='M51.47%2045.728h186.104V80.14H51.47z'/%3e%3c/clipPath%3e%3c/defs%3e%3c/svg%3e)


More from Case


Explore Other Assets


© 2026 MaintainX. All rights reserved.