


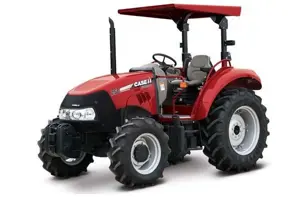
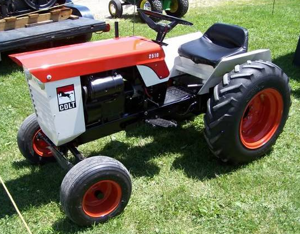
Case Tractor FARMALL JX 75 DT
Need answers fast?
Explore the manual using AI.

Turn manuals into instant answers
with your AI-powered assistantTurn manuals into instant answers
with your AI-powered assistant
Manual for Case Tractor FARMALL JX 75 DT
Complete asset maintenance, one click away
Get instant access to all the maintenance information you need. Empower technicians to perform preventive maintenance with asset packages, ready to use right out of the box.

Documents & Manuals
Find all the essential guides in one place.
 Tensioning Guide
- Belt-diagram
- C-120 pulleys
+ 13 more

Work Order Templates
Pre-built workflows to keep your asset running smoothly.
- Daily Electrical System Inspection
- Replace Roller and Pulley
- Install Engine B-120
+ 29 more

Procedures
Integrate maintenance plans directly into your work orders.
- Motion Industries
- Applied Industrial Technologies
- Electrical Brothers
+ 5 more

Parts
Access the parts list for your equipment in MaintainX.
- Drive Motor
- B2 Rollers
- Tensioning System
+ 40 more
Case Tractor FARMALL JX 75 DT
Create an account to install this asset package.
Maintenance Plans for Case Tractor Model FARMALL JX 75 DT
Integrate maintenance plans directly into your work orders in MaintainX.
Engine Cylinder Block and Cylinder Liners Maintenance
WARNING: Handle all parts carefully. Do not put your hands or fingers between parts. Wear suitable safety clothing, safety goggles, gloves and footwear.
Clean all parts carefully before proceeding with the operations described below.
NOTE: Cylinder liner dimensions must only be measured when the liner is installed in the cylinder bore as they are subject to deformation when not fitted.
NOTE: If one of the liners requires reboring, all the liners in the engine must be rebored to the same oversize.
Check liner wear
Measure the inside diameter in the area swept by the piston rings X (fig. 139)
Measure the inside diameter at the upper and lower ends of this area both parallel to the crankshaft centre line (a) and at right angles to the crankshaft centre line (b)
Compare measurements to determine liner ovality and taper.
To check piston running clearance, measure the inside diameter of each liner in the area Z (fig. 139) along the axis at right angles to the crankshaft centre line.

Clutch Overhaul
This procedure requires the universal outfit 293650.
Parts of the universal outfit 293650 necessary to adjust the VALEO clutch.
List of parts used from the universal outfit 293650
Before fitting the clutch on the outfit 293650, remove the three bolts retaining the flexible tabs.
To fit the clutch on the universal outfit 293650, follow these steps:
Steps to fit the clutch on the universal outfit 293650
To check the coplanarity, follow these steps:
Steps to check the coplanarity
To remove the clutch, follow these steps:
Cab Air Conditioning System Test
Engine speed (rpm)
Cab ventilation fan set to maximum speed
Air conditioning switched on
Pressure on suction side of compressor (low pressure gauge)
Pressure on discharge side of compressor (high pressure gauge)
Ambient air temperature
Ambient relative humidity
Temperature of air leaving vents inside the cab
Pressure readings within the value ranges indicated on page 3
PTO Engaged Switch Adjustment
ATTENTION: Always use appropriate tools to align fixing holes. NEVER USE FINGERS OR HANDS.
Check that the PTO clutch is disengaged.
Unscrew the PTO engaged switch (2) retaining screws(1) and move the switch away from the control valve lever (3).
Move the switch (2) towards control valve lever (3) until the switch clicks into position.
Lock the switch (2) in this position with the retaining screws (1).
PTO Clutch Linkage (Valeo Clutch) Adjustment
Measure the clutch free travel (C, fig. 20)
Is the clutch free travel 4.5 mm?
If the clutch free travel is down to 2.5 mm, adjust the clutch as follows:
Move the PTO clutch lever (1) fig. 19 to engaged position (A) (fully raised)
Loosen the locknut (1) fig. 20 and remove the split pin (2)
Turn the sleeve (3) to completely tighten the cable
Slacken the sleeve (3) for 4 turns (approximately 4.5 mm) to lengthen the cable length
Lock the split pin (2), so as to restore the travel with no load to 4.5 mm (0.1772 in.) then tighten the locknut (1)
Sign off on the PTO Clutch Linkage (Valeo Clutch) Adjustment
Parts for Case Tractor FARMALL JX 75 DT
Access the parts list for your equipment in MaintainX.
Tractor Dismantling Stand
380000236
Engine Lifting Hook
380000216
Rotating Engine Service Stand
380000301
Engine Mounting Brackets (For Rotating Stand 380000301)
380000313
Compression Test Kit (Complete With Dummy Injector 380000617)
380000303
Tractor Dismantling Stand
380000236
Engine Lifting Hook
380000216
Rotating Engine Service Stand
380000301
Engine Mounting Brackets (For Rotating Stand 380000301)
380000313
Compression Test Kit (Complete With Dummy Injector 380000617)
380000303
Tractor Dismantling Stand
380000236
Engine Lifting Hook
380000216
Rotating Engine Service Stand
380000301
Engine Mounting Brackets (For Rotating Stand 380000301)
380000313
Compression Test Kit (Complete With Dummy Injector 380000617)
380000303
Unlock efficiency
with MaintainX CoPilot
MaintainX CoPilot is your expert colleague, on call 24/7, helping your team find the answers they need to keep equipment running.
Reduce Unplanned Downtime
Ensure your team follows consistent procedures to minimize equipment failures and costly delays.
Maximize Asset Availability
Keep your assets running longer and more reliably, with standardized maintenance workflows from OEM manuals.
Lower Maintenance Costs
Turn any technician into an expert to streamline operations, maintain more assets, and reduce overall costs.
Thousands of companies manage their assets with MaintainX

'%3e%3cpath%20fill='url(%23b)'%20d='M66.008%2080.068c-5.084-.786-9.763-3.834-12.442-8.68a16.942%2016.942%200%200%201-1.87-5.18c1.096.19%202.203.476%203.298.87%206.525%202.333%2010.836%207.68%2011.014%2012.99ZM51.47%2061.576c.488-5.524%203.62-10.716%208.847-13.597a17.132%2017.132%200%200%201%2011.335-1.882c-.798%208.145-7.43%2014.848-16.038%2015.599-1.417.119-2.799.07-4.144-.12Zm28.564-11.478a17.513%2017.513%200%200%201%203.727%204.62c4.608%208.335%201.584%2018.813-6.75%2023.409a16.988%2016.988%200%200%201-4.359%201.679%2019.624%2019.624%200%200%201-3.977-12.776c.346-7.561%204.942-13.931%2011.36-16.932Z'/%3e%3cpath%20fill='%23110F0D'%20fill-rule='evenodd'%20d='M142.831%2048.324h4.977V77.03h-4.977V48.324Zm27.278%2013.002c.322%201.048.453%202.263.453%203.62v12.073h-4.787V66.208c0-.75-.047-1.572-.154-2.143-.453-2.382-1.822-3.572-4.215-3.572-2.31%200-3.882%201.274-4.43%203.476-.143.596-.226%201.405-.226%202.25v10.8h-4.787V56.623h4.477v2.989c1.536-2.5%203.906-3.43%206.371-3.43%203.488%200%206.263%201.68%207.298%205.144Zm24.636%207.323c0%203.882-2.358%206.525-5.763%207.727-1.298.453-2.632.643-4.62.643h-10.169V48.324h9.085c1.691%200%203.156.143%204.049.38%203.465.93%205.727%203.68%205.727%207.335%200%202.441-.81%204.156-2.762%205.644%202.905%201.417%204.453%203.727%204.453%206.966Zm-15.634-8.656h4.584c1.024%200%201.917-.143%202.536-.417%201.215-.548%201.905-1.608%201.905-3.167%200-1.548-.643-2.572-1.845-3.132-.691-.31-1.762-.452-2.763-.452h-4.417v7.168Zm10.716%208.465c0-1.536-.893-3.37-3.227-3.893-.428-.095-1.036-.143-1.571-.143h-5.918v8.085h5.501c.56%200%201.429-.048%201.953-.167%201.94-.453%203.262-1.846%203.262-3.882Zm47.747-11.847-8.097%2020.408h-4.429l-8.109-20.408h5.191l5.192%2014.574%205.108-14.574h5.144Zm-20.218%2010.002c0%20.69-.036%201.262-.155%201.94h-15.943c.631%202.87%202.714%204.728%205.882%204.728%202.131%200%203.607-.882%204.703-2.525h4.87c-1.762%204.144-5.204%206.692-9.657%206.692-6.084%200-10.537-4.858-10.537-10.49%200-6.108%204.524-10.776%2010.335-10.776%206.239%200%2010.442%204.954%2010.502%2010.43Zm-4.763-1.405c-.333-2.846-2.643-4.858-5.691-4.858-2.894%200-5.287%201.929-5.621%204.858h11.312Zm-72.667%203.44c0%204.787-3.287%208.371-9.419%208.371H119.363V64.66c-1.917.274-3.87.69-5.811%201.238l4.537%2011.121h-5.418l-3.596-9.585c-5.144%202.084-10.085%205.216-14.217%209.585h-4.786L101.8%2048.312h4.56l5.68%2013.883a44.112%2044.112%200%200%201%207.323-1.774V48.312h9.084c1.703%200%203.156.143%204.061.393%203.453.929%205.727%203.667%205.727%207.323%200%201.917-.738%204.179-2.81%205.691%203.06%201.56%204.501%204.025%204.501%206.93Zm-15.634-8.667a62.664%2062.664%200%200%201%202.06-.036c1.703.012%203.239.131%204.608.37%201.441-.549%202.357-1.727%202.357-3.537%200-1.941-.881-3.144-2.488-3.667-.548-.18-1.358-.286-2.322-.286h-4.215v7.156Zm-16.55%203.905-3.715-9.894-6.394%2016.502c2.833-2.595%206.263-4.858%2010.109-6.608Zm27.254%204.74c0-2.775-3.131-4.347-8.513-4.418-.715%200-1.441.011-2.191.047v8.252h5.918c2.548%200%204.786-1.37%204.786-3.882Z'%20clip-rule='evenodd'/%3e%3c/g%3e%3cdefs%3e%3clinearGradient%20id='b'%20x1='51.47'%20x2='85.916'%20y1='62.946'%20y2='62.946'%20gradientUnits='userSpaceOnUse'%3e%3cstop%20stop-color='%23CD9F28'/%3e%3cstop%20offset='1'%20stop-color='%23ECD80B'/%3e%3c/linearGradient%3e%3cclipPath%20id='a'%3e%3cpath%20fill='%23fff'%20d='M51.47%2045.728h186.104V80.14H51.47z'/%3e%3c/clipPath%3e%3c/defs%3e%3c/svg%3e)


More from Case


Explore Other Assets


© 2026 MaintainX. All rights reserved.