


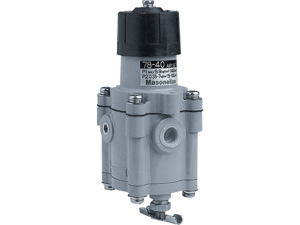
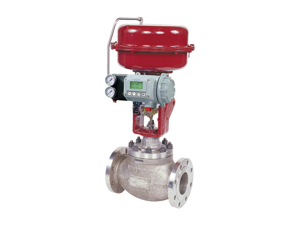
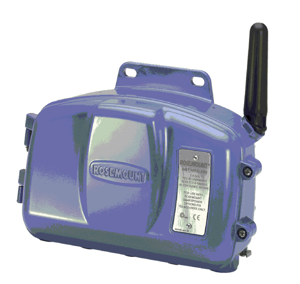
Baker Hughes Temperature Calibrators Dry TC 650
Need answers fast?
Explore the manual using AI.
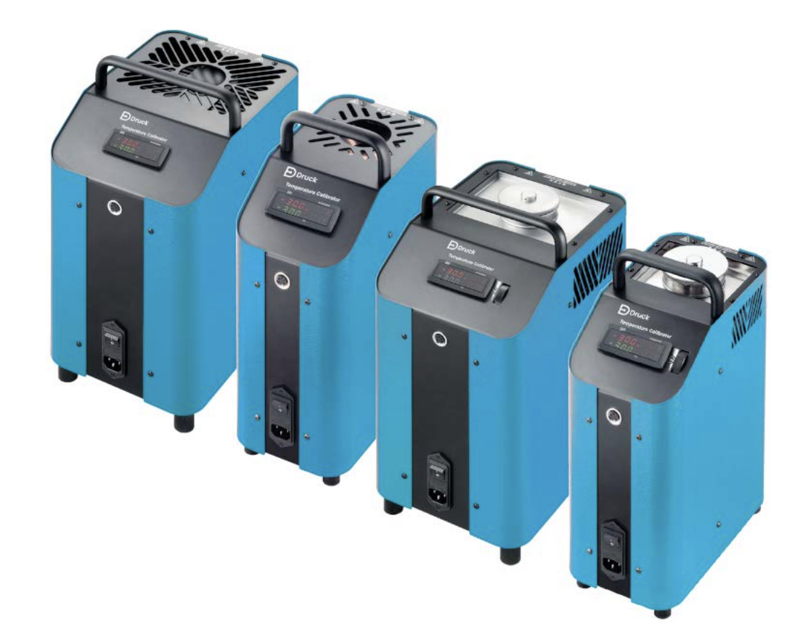
The Baker Hughes Temperature Calibrators Dry TC 650 is a high-precision calibration tool designed for accurate temperature measurement and control. Ideal for industrial applications, this model ensures reliable performance and compliance with industry standards, making it essential for maintaining optimal operational efficiency.
Turn manuals into instant answers
with your AI-powered assistantTurn manuals into instant answers
with your AI-powered assistant
Manual for Baker Hughes Temperature Calibrators Dry TC 650
Complete asset maintenance, one click away
Get instant access to all the maintenance information you need. Empower technicians to perform preventive maintenance with asset packages, ready to use right out of the box.

Documents & Manuals
Find all the essential guides in one place.
 Tensioning Guide
- Belt-diagram
- C-120 pulleys
+ 13 more

Work Order Templates
Pre-built workflows to keep your asset running smoothly.
- Daily Electrical System Inspection
- Replace Roller and Pulley
- Install Engine B-120
+ 29 more

Procedures
Integrate maintenance plans directly into your work orders.
- Motion Industries
- Applied Industrial Technologies
- Electrical Brothers
+ 5 more

Parts
Access the parts list for your equipment in MaintainX.
- Drive Motor
- B2 Rollers
- Tensioning System
+ 40 more
Baker Hughes Temperature Calibrators Dry TC 650
Create an account to install this asset package.
Maintenance Plans for Baker Hughes Temperature Calibrators Model Dry TC 650
Integrate maintenance plans directly into your work orders in MaintainX.
Temperature Calibrator Cleaning
Exterior Chassis
- Clean the calibrator with a dry or slightly damp lint-free cloth. Do not use sharp objects or aggressive agents for cleaning. Ensure that your cleaning agent cannot be a source of danger from a reaction with parts of the calibrator or the materials inside. If unsure of clean agent compatibility, contact Druck Services.
Vent Grilles for Inlet Air
- The grille openings, see Figure 1 items 11 and 12, in the base of the calibrator must be cleaned at regular intervals. The cleaning interval depends upon on the air pollution at the installation site and the amount of use.
1. Clean the grille openings by vacuuming or brushing.
Inserts
During normal operation, the inserts create small quantities of metal dust. This can result in an insert getting stuck in the dry block.
1. Remove the insert from the dry block with the aid of the sleeve exchange tool.
2. Clean the insert and the dry block at regular intervals.

500 Hours/36 Monthly Calibration
- It is recommended to send the calibrator to Druck for recalibration after 36 months, or after a maximum of 500 operating hours, whichever is sooner.;
1 Yearly Inspection
1. Visually inspect all parts of the calibrator for corrosion, wear and damage.
2. Have a trained technical person carry out an electrical safety inspection.;
Temperature Calibrator Check
Magnetic Stirrer The magnetic stirrer is subject to mechanical wear and tear during normal operation. The magnetic stirrer has a limited lifetime and requires periodic replacement. The fillet in the middle of the magnetic stirrer reduces the friction during the rotary movement. Once the fillet has worn, the stirring function can no longer be guaranteed because of the increased friction.
1. Check the fillet of the magnetic stirrer for wear and tear. Replace the magnetic stirrer if necessary.;
Temperature Calibrator Check
Mains Fuses
The mains fuses of the calibrator are located on the front side and are integrated in the mains connection. If mains voltage is present, but the display is dark and the fan is not running, check the mains fuses. Replace the fuses if necessary.
1. Disconnect the mains connection cable from the calibrator.
2. Prise open the fuse compartment from the bottom with a fingernail or a flat screwdriver.
3. Remove the compartment with the fuses.
4. Check the fuses and replace any blown fuses.
Note: Always replace both fuses, even if only one has blown.
5. Fit the fuse compartment back in place and connect the mains connecting cable. See Section 4.2.
Note: Should the fuses blow repeatedly, there is probably a fault with the calibrator. Send the calibrator to Druck for repair.;
Unlock efficiency
with MaintainX CoPilot
MaintainX CoPilot is your expert colleague, on call 24/7, helping your team find the answers they need to keep equipment running.
Reduce Unplanned Downtime
Ensure your team follows consistent procedures to minimize equipment failures and costly delays.
Maximize Asset Availability
Keep your assets running longer and more reliably, with standardized maintenance workflows from OEM manuals.
Lower Maintenance Costs
Turn any technician into an expert to streamline operations, maintain more assets, and reduce overall costs.
Thousands of companies manage their assets with MaintainX

'%3e%3cpath%20fill='url(%23b)'%20d='M66.008%2080.068c-5.084-.786-9.763-3.834-12.442-8.68a16.942%2016.942%200%200%201-1.87-5.18c1.096.19%202.203.476%203.298.87%206.525%202.333%2010.836%207.68%2011.014%2012.99ZM51.47%2061.576c.488-5.524%203.62-10.716%208.847-13.597a17.132%2017.132%200%200%201%2011.335-1.882c-.798%208.145-7.43%2014.848-16.038%2015.599-1.417.119-2.799.07-4.144-.12Zm28.564-11.478a17.513%2017.513%200%200%201%203.727%204.62c4.608%208.335%201.584%2018.813-6.75%2023.409a16.988%2016.988%200%200%201-4.359%201.679%2019.624%2019.624%200%200%201-3.977-12.776c.346-7.561%204.942-13.931%2011.36-16.932Z'/%3e%3cpath%20fill='%23110F0D'%20fill-rule='evenodd'%20d='M142.831%2048.324h4.977V77.03h-4.977V48.324Zm27.278%2013.002c.322%201.048.453%202.263.453%203.62v12.073h-4.787V66.208c0-.75-.047-1.572-.154-2.143-.453-2.382-1.822-3.572-4.215-3.572-2.31%200-3.882%201.274-4.43%203.476-.143.596-.226%201.405-.226%202.25v10.8h-4.787V56.623h4.477v2.989c1.536-2.5%203.906-3.43%206.371-3.43%203.488%200%206.263%201.68%207.298%205.144Zm24.636%207.323c0%203.882-2.358%206.525-5.763%207.727-1.298.453-2.632.643-4.62.643h-10.169V48.324h9.085c1.691%200%203.156.143%204.049.38%203.465.93%205.727%203.68%205.727%207.335%200%202.441-.81%204.156-2.762%205.644%202.905%201.417%204.453%203.727%204.453%206.966Zm-15.634-8.656h4.584c1.024%200%201.917-.143%202.536-.417%201.215-.548%201.905-1.608%201.905-3.167%200-1.548-.643-2.572-1.845-3.132-.691-.31-1.762-.452-2.763-.452h-4.417v7.168Zm10.716%208.465c0-1.536-.893-3.37-3.227-3.893-.428-.095-1.036-.143-1.571-.143h-5.918v8.085h5.501c.56%200%201.429-.048%201.953-.167%201.94-.453%203.262-1.846%203.262-3.882Zm47.747-11.847-8.097%2020.408h-4.429l-8.109-20.408h5.191l5.192%2014.574%205.108-14.574h5.144Zm-20.218%2010.002c0%20.69-.036%201.262-.155%201.94h-15.943c.631%202.87%202.714%204.728%205.882%204.728%202.131%200%203.607-.882%204.703-2.525h4.87c-1.762%204.144-5.204%206.692-9.657%206.692-6.084%200-10.537-4.858-10.537-10.49%200-6.108%204.524-10.776%2010.335-10.776%206.239%200%2010.442%204.954%2010.502%2010.43Zm-4.763-1.405c-.333-2.846-2.643-4.858-5.691-4.858-2.894%200-5.287%201.929-5.621%204.858h11.312Zm-72.667%203.44c0%204.787-3.287%208.371-9.419%208.371H119.363V64.66c-1.917.274-3.87.69-5.811%201.238l4.537%2011.121h-5.418l-3.596-9.585c-5.144%202.084-10.085%205.216-14.217%209.585h-4.786L101.8%2048.312h4.56l5.68%2013.883a44.112%2044.112%200%200%201%207.323-1.774V48.312h9.084c1.703%200%203.156.143%204.061.393%203.453.929%205.727%203.667%205.727%207.323%200%201.917-.738%204.179-2.81%205.691%203.06%201.56%204.501%204.025%204.501%206.93Zm-15.634-8.667a62.664%2062.664%200%200%201%202.06-.036c1.703.012%203.239.131%204.608.37%201.441-.549%202.357-1.727%202.357-3.537%200-1.941-.881-3.144-2.488-3.667-.548-.18-1.358-.286-2.322-.286h-4.215v7.156Zm-16.55%203.905-3.715-9.894-6.394%2016.502c2.833-2.595%206.263-4.858%2010.109-6.608Zm27.254%204.74c0-2.775-3.131-4.347-8.513-4.418-.715%200-1.441.011-2.191.047v8.252h5.918c2.548%200%204.786-1.37%204.786-3.882Z'%20clip-rule='evenodd'/%3e%3c/g%3e%3cdefs%3e%3clinearGradient%20id='b'%20x1='51.47'%20x2='85.916'%20y1='62.946'%20y2='62.946'%20gradientUnits='userSpaceOnUse'%3e%3cstop%20stop-color='%23CD9F28'/%3e%3cstop%20offset='1'%20stop-color='%23ECD80B'/%3e%3c/linearGradient%3e%3cclipPath%20id='a'%3e%3cpath%20fill='%23fff'%20d='M51.47%2045.728h186.104V80.14H51.47z'/%3e%3c/clipPath%3e%3c/defs%3e%3c/svg%3e)


More from Baker Hughes


Explore Other Assets


© 2026 MaintainX. All rights reserved.