


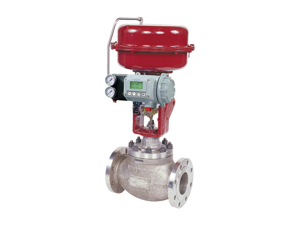
Baker Hughes Erosion Resistant Control Valves 74000 Series
Need answers fast?
Explore the manual using AI.
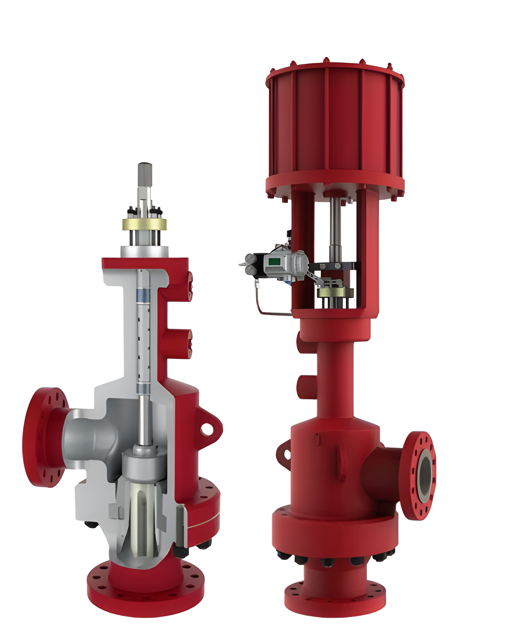
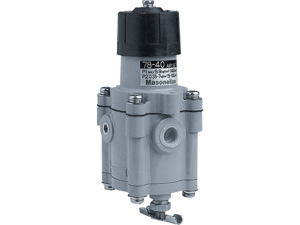
The Baker Hughes Erosion Resistant Control Valves 74000 Series are designed for durability and precision in demanding industrial applications. These valves provide reliable control and protection against erosion, ensuring optimal performance and longevity in various operational environments.
Turn manuals into instant answers
with your AI-powered assistantTurn manuals into instant answers
with your AI-powered assistant
Manual for Baker Hughes Erosion Resistant Control Valves 74000 Series
Complete asset maintenance, one click away
Get instant access to all the maintenance information you need. Empower technicians to perform preventive maintenance with asset packages, ready to use right out of the box.

Documents & Manuals
Find all the essential guides in one place.
 Tensioning Guide
- Belt-diagram
- C-120 pulleys
+ 13 more

Work Order Templates
Pre-built workflows to keep your asset running smoothly.
- Daily Electrical System Inspection
- Replace Roller and Pulley
- Install Engine B-120
+ 29 more

Procedures
Integrate maintenance plans directly into your work orders.
- Motion Industries
- Applied Industrial Technologies
- Electrical Brothers
+ 5 more

Parts
Access the parts list for your equipment in MaintainX.
- Drive Motor
- B2 Rollers
- Tensioning System
+ 40 more
Baker Hughes Erosion Resistant Control Valves 74000 Series
Create an account to install this asset package.
Maintenance Plans for Baker Hughes Erosion Resistant Control Valves Model 74000 Series
Integrate maintenance plans directly into your work orders in MaintainX.
Gaskets Replacement
- Gasket seating surfaces must be free of dents, scratches, corrosion, or other types of damage. Clean mating surfaces as required and replace any non-conforming parts. Spiral wound gaskets (B015 and B102) must always be replaced after disassembly.;

PTFE Packing Maintenance
- Kevlar®/PTFE, carbon/PTFE and pure PTFE packing rings are cut in such a way that they can be replaced without having to separate the valve plug stem from the actuator stem.
- Unscrew and remove the Packing Nuts (B201) and Disk Springs (B714).
- Lift the Packing Flange (B213) and Packing Follower (B212) up along the Plug Stem (B120).
- Using a packing puller tool, remove all packing box components being careful not to damage the sealing surface of the packing box or the Plug Stem (B120).
- Replace the Packing Rings (B207), placing the cut in each ring about 120° apart from the adjacent ring. Press rings in one at a time.
- Reassemble the Packing Follower (B212) and the Packing Flange (B213).
- Tighten the Packing Nuts (B201) without over compressing the Packing Rings (B207).
- Put the valve back into service and check for leakage.
- Tighten Packing Nuts (B201) as required.;
Packing Box Maintenance
- Packing box maintenance is one of the principal tasks during routine servicing. Tightness of the packing is maintained by proper compression. Compression is achieved by evenly tightening the Packing Nuts (B201) against the Packing Flange (B213). Periodic re-tightening of the Packing Nuts (B201) may be required to maintain proper sealing.
- Care must be taken not to over tighten, as this could create unnecessary friction preventing smooth valve operation. If packing leakage persists after applying maximum compression, then the packing needs to be replaced.
- The valve must be isolated and the process pressure vented prior to performing any packing box maintenance.;
Plug/Stem S/A Replacement
- The Plug/Stem sub-assembly (B119) are assembled under tight tolerances to prevent damage to the hardened (and extremely brittle) parts. For this reason, the Plug/Stem sub-assembly (B119) must always be replaced together as a complete assembly with factory OEM parts.;
Valve with Graphite Packing Maintenance
- To replace graphite packing, it is necessary to separate the Plug/Stem sub-assembly (B119) from the actuator stem.
- Remove the Packing Nuts (B201) and packing Disk Springs (B714).
- Lift the Packing Flange (B213) and Packing Follower (B212) up along the Plug/Stem sub-assembly (B119).
- Using a packing puller tool, remove all packing box components being careful not to damage the sealing surface of the packing box or the Plug Stem (B120).
- Replace the Packing Rings (B207). Press a back-up ring (carbon/graphite/Inconel braided ring) into the packing box. Next press the expanded graphite rings into the packing area one at a time. Press an additional back-up ring into packing area.
- Reassemble the Packing Follower (B212) and the Packing Flange (B213).
- Tighten the Packing Nuts (B201) without overcompressing the Packing Rings (B207).
- Open and close the valve several times, then retighten the packing as required.
- Put the valve back into service and check for leakage.
Parts for Baker Hughes Erosion Resistant Control Valves 74000 Series
Access the parts list for your equipment in MaintainX.
Seat Ring Upper Gasket
-
Plug Stem
-
Seat Ring Gasket
-
Body Gasket
-
Body Stud
-
Seat Ring Upper Gasket
-
Plug Stem
-
Seat Ring Gasket
-
Body Gasket
-
Body Stud
-
Seat Ring Upper Gasket
-
Plug Stem
-
Seat Ring Gasket
-
Body Gasket
-
Body Stud
-
Unlock efficiency
with MaintainX CoPilot
MaintainX CoPilot is your expert colleague, on call 24/7, helping your team find the answers they need to keep equipment running.
Reduce Unplanned Downtime
Ensure your team follows consistent procedures to minimize equipment failures and costly delays.
Maximize Asset Availability
Keep your assets running longer and more reliably, with standardized maintenance workflows from OEM manuals.
Lower Maintenance Costs
Turn any technician into an expert to streamline operations, maintain more assets, and reduce overall costs.
Thousands of companies manage their assets with MaintainX

'%3e%3cpath%20fill='url(%23b)'%20d='M66.008%2080.068c-5.084-.786-9.763-3.834-12.442-8.68a16.942%2016.942%200%200%201-1.87-5.18c1.096.19%202.203.476%203.298.87%206.525%202.333%2010.836%207.68%2011.014%2012.99ZM51.47%2061.576c.488-5.524%203.62-10.716%208.847-13.597a17.132%2017.132%200%200%201%2011.335-1.882c-.798%208.145-7.43%2014.848-16.038%2015.599-1.417.119-2.799.07-4.144-.12Zm28.564-11.478a17.513%2017.513%200%200%201%203.727%204.62c4.608%208.335%201.584%2018.813-6.75%2023.409a16.988%2016.988%200%200%201-4.359%201.679%2019.624%2019.624%200%200%201-3.977-12.776c.346-7.561%204.942-13.931%2011.36-16.932Z'/%3e%3cpath%20fill='%23110F0D'%20fill-rule='evenodd'%20d='M142.831%2048.324h4.977V77.03h-4.977V48.324Zm27.278%2013.002c.322%201.048.453%202.263.453%203.62v12.073h-4.787V66.208c0-.75-.047-1.572-.154-2.143-.453-2.382-1.822-3.572-4.215-3.572-2.31%200-3.882%201.274-4.43%203.476-.143.596-.226%201.405-.226%202.25v10.8h-4.787V56.623h4.477v2.989c1.536-2.5%203.906-3.43%206.371-3.43%203.488%200%206.263%201.68%207.298%205.144Zm24.636%207.323c0%203.882-2.358%206.525-5.763%207.727-1.298.453-2.632.643-4.62.643h-10.169V48.324h9.085c1.691%200%203.156.143%204.049.38%203.465.93%205.727%203.68%205.727%207.335%200%202.441-.81%204.156-2.762%205.644%202.905%201.417%204.453%203.727%204.453%206.966Zm-15.634-8.656h4.584c1.024%200%201.917-.143%202.536-.417%201.215-.548%201.905-1.608%201.905-3.167%200-1.548-.643-2.572-1.845-3.132-.691-.31-1.762-.452-2.763-.452h-4.417v7.168Zm10.716%208.465c0-1.536-.893-3.37-3.227-3.893-.428-.095-1.036-.143-1.571-.143h-5.918v8.085h5.501c.56%200%201.429-.048%201.953-.167%201.94-.453%203.262-1.846%203.262-3.882Zm47.747-11.847-8.097%2020.408h-4.429l-8.109-20.408h5.191l5.192%2014.574%205.108-14.574h5.144Zm-20.218%2010.002c0%20.69-.036%201.262-.155%201.94h-15.943c.631%202.87%202.714%204.728%205.882%204.728%202.131%200%203.607-.882%204.703-2.525h4.87c-1.762%204.144-5.204%206.692-9.657%206.692-6.084%200-10.537-4.858-10.537-10.49%200-6.108%204.524-10.776%2010.335-10.776%206.239%200%2010.442%204.954%2010.502%2010.43Zm-4.763-1.405c-.333-2.846-2.643-4.858-5.691-4.858-2.894%200-5.287%201.929-5.621%204.858h11.312Zm-72.667%203.44c0%204.787-3.287%208.371-9.419%208.371H119.363V64.66c-1.917.274-3.87.69-5.811%201.238l4.537%2011.121h-5.418l-3.596-9.585c-5.144%202.084-10.085%205.216-14.217%209.585h-4.786L101.8%2048.312h4.56l5.68%2013.883a44.112%2044.112%200%200%201%207.323-1.774V48.312h9.084c1.703%200%203.156.143%204.061.393%203.453.929%205.727%203.667%205.727%207.323%200%201.917-.738%204.179-2.81%205.691%203.06%201.56%204.501%204.025%204.501%206.93Zm-15.634-8.667a62.664%2062.664%200%200%201%202.06-.036c1.703.012%203.239.131%204.608.37%201.441-.549%202.357-1.727%202.357-3.537%200-1.941-.881-3.144-2.488-3.667-.548-.18-1.358-.286-2.322-.286h-4.215v7.156Zm-16.55%203.905-3.715-9.894-6.394%2016.502c2.833-2.595%206.263-4.858%2010.109-6.608Zm27.254%204.74c0-2.775-3.131-4.347-8.513-4.418-.715%200-1.441.011-2.191.047v8.252h5.918c2.548%200%204.786-1.37%204.786-3.882Z'%20clip-rule='evenodd'/%3e%3c/g%3e%3cdefs%3e%3clinearGradient%20id='b'%20x1='51.47'%20x2='85.916'%20y1='62.946'%20y2='62.946'%20gradientUnits='userSpaceOnUse'%3e%3cstop%20stop-color='%23CD9F28'/%3e%3cstop%20offset='1'%20stop-color='%23ECD80B'/%3e%3c/linearGradient%3e%3cclipPath%20id='a'%3e%3cpath%20fill='%23fff'%20d='M51.47%2045.728h186.104V80.14H51.47z'/%3e%3c/clipPath%3e%3c/defs%3e%3c/svg%3e)


More from Baker Hughes


Explore Other Assets


© 2026 MaintainX. All rights reserved.