


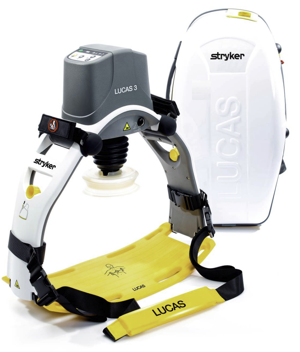
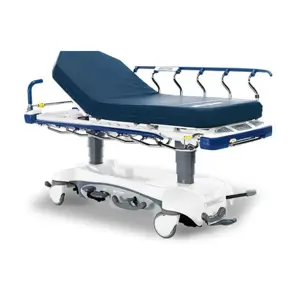
Stryker Stretcher 3500 S3
Need answers fast?
Explore the manual using AI.
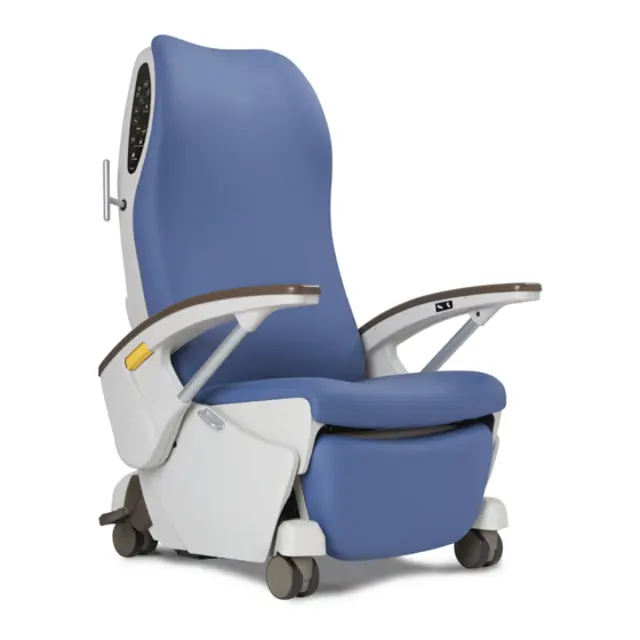
The Stryker Stretcher 3500 S3 is a high-performance medical transport solution designed for patient safety and comfort. This stretcher features advanced hydraulic systems and durable construction, making it ideal for emergency medical services and hospital use. Regular maintenance ensures optimal performance and longevity.
Turn manuals into instant answers
with your AI-powered assistantTurn manuals into instant answers
with your AI-powered assistant
Manual for Stryker Stretcher 3500 S3
Complete asset maintenance, one click away
Get instant access to all the maintenance information you need. Empower technicians to perform preventive maintenance with asset packages, ready to use right out of the box.

Documents & Manuals
Find all the essential guides in one place.
 Tensioning Guide
- Belt-diagram
- C-120 pulleys
+ 13 more

Work Order Templates
Pre-built workflows to keep your asset running smoothly.
- Daily Electrical System Inspection
- Replace Roller and Pulley
- Install Engine B-120
+ 29 more

Procedures
Integrate maintenance plans directly into your work orders.
- Motion Industries
- Applied Industrial Technologies
- Electrical Brothers
+ 5 more

Parts
Access the parts list for your equipment in MaintainX.
- Drive Motor
- B2 Rollers
- Tensioning System
+ 40 more
Stryker Stretcher 3500 S3
Create an account to install this asset package.
Maintenance Plans for Stryker Stretcher Model 3500 S3
Integrate maintenance plans directly into your work orders in MaintainX.
Armrest Replacement
Apply the brakes
Put the chair in the full flat position by pushing the Lateral Transfer button
Unplug the power cord from the wall outlet. If the chair has the battery option, turn the battery on/off switch off (O)
Remove the push caps and label covers for the ten fasteners
Use a T25 Torx driver to remove the two screws that secure the armrest overmold to the armrest
Use a T27 Torx driver to remove the screw that secures the armrest overmold to the armrest
Use a T27 Torx driver to remove the five screws that secure the inside arm cover to the outside arm cover
Use a T27 Torx driver to remove the two screws that secure the inside arm cover to the outside arm cover. Save the outside arm cover
Use wire cutters to remove the zip tie that secures the armrest occupant control cable to the arm weldment

Items Inspection
Inspect All welds
Inspect All fasteners are secure
Inspect Casters swivel and rotate
Inspect Casters are not loose or wobbly
Inspect Casters are free of wax and debris
Inspect Parking brake operates and all casters lock when you apply the parking brake
Inspect Backrest, seat, and footrest cushions are not ripped or torn
Inspect Armrests for cracks or splits
Inspect Armrests move, latch, and stow
Coil Cord Dc Base Power Replacement
Put the footrest up by pushing the Upright 2 button and raise to high height by pushing the Seat Height Up button.
Unplug the power cord from the wall outlet. If the chair has the battery option, turn the battery on/off switch off (O).
Remove the base rear cover (Base rear cover replacement (page 33)).
Use a T27 Torx driver to remove the two screws that secure the base mid cover. Save the screws and cover.
Unplug the cable connections to the coil cord.
Remove the coil cord cable connections from the base weldment.
Use wire cutters to remove the zip tie that secures the coil cord to the base weldment.
Use a T30 Torx driver to remove the two cable clamps (A), screws (B), and washers (C) that secure the coil cord to the base and seat weldments (Figure 32). Save the clamps, screws, and washers.
Unplug the coil cord connection underneath the seat weldment and discard the coil cord.
Backrest Cushion Replacement
Apply the brakes
Put the chair in the upright high height position by pushing the Upright 1 button and then Seat Height Up button
Use a pick to remove the Stryker label on the backrest cover. Discard the label
Lift the rear flap and remove the two rue clips and two washers that secure the flap to the chassis. Save the rue clips and washers
Use a bungee cord to support the rear flap to the operator handles
Use a T30 Torx driver to remove the four screws (A) (Figure 1)
Fold the backrest cushion forward
Unsnap the five snaps that hold the seat cushion to the backrest
Remove the backrest cushion
Caster Foot End Replacement
Brakes applied
Chair in the recline high height position
Power cord unplugged from the wall outlet
Battery option turned off
Base front cover removed
Floor jack placed under the base lift point
Chair raised a few inches
Mounting bolt removed using a 1/2” drive ratchet and a 22 mm socket
Chair lowered back down on all four casters
Parts for Stryker Stretcher 3500 S3
Access the parts list for your equipment in MaintainX.
Brakes toggle link, head end
3333-001-081
Hex washer head screw
0003-221-000
External tooth lock washer
0013-038-000
Washer
0011-206-000
Clevis pin
0026-676-000
Brakes toggle link, head end
3333-001-081
Hex washer head screw
0003-221-000
External tooth lock washer
0013-038-000
Washer
0011-206-000
Clevis pin
0026-676-000
Brakes toggle link, head end
3333-001-081
Hex washer head screw
0003-221-000
External tooth lock washer
0013-038-000
Washer
0011-206-000
Clevis pin
0026-676-000
Unlock efficiency
with MaintainX CoPilot
MaintainX CoPilot is your expert colleague, on call 24/7, helping your team find the answers they need to keep equipment running.
Reduce Unplanned Downtime
Ensure your team follows consistent procedures to minimize equipment failures and costly delays.
Maximize Asset Availability
Keep your assets running longer and more reliably, with standardized maintenance workflows from OEM manuals.
Lower Maintenance Costs
Turn any technician into an expert to streamline operations, maintain more assets, and reduce overall costs.
Thousands of companies manage their assets with MaintainX

'%3e%3cpath%20fill='url(%23b)'%20d='M66.008%2080.068c-5.084-.786-9.763-3.834-12.442-8.68a16.942%2016.942%200%200%201-1.87-5.18c1.096.19%202.203.476%203.298.87%206.525%202.333%2010.836%207.68%2011.014%2012.99ZM51.47%2061.576c.488-5.524%203.62-10.716%208.847-13.597a17.132%2017.132%200%200%201%2011.335-1.882c-.798%208.145-7.43%2014.848-16.038%2015.599-1.417.119-2.799.07-4.144-.12Zm28.564-11.478a17.513%2017.513%200%200%201%203.727%204.62c4.608%208.335%201.584%2018.813-6.75%2023.409a16.988%2016.988%200%200%201-4.359%201.679%2019.624%2019.624%200%200%201-3.977-12.776c.346-7.561%204.942-13.931%2011.36-16.932Z'/%3e%3cpath%20fill='%23110F0D'%20fill-rule='evenodd'%20d='M142.831%2048.324h4.977V77.03h-4.977V48.324Zm27.278%2013.002c.322%201.048.453%202.263.453%203.62v12.073h-4.787V66.208c0-.75-.047-1.572-.154-2.143-.453-2.382-1.822-3.572-4.215-3.572-2.31%200-3.882%201.274-4.43%203.476-.143.596-.226%201.405-.226%202.25v10.8h-4.787V56.623h4.477v2.989c1.536-2.5%203.906-3.43%206.371-3.43%203.488%200%206.263%201.68%207.298%205.144Zm24.636%207.323c0%203.882-2.358%206.525-5.763%207.727-1.298.453-2.632.643-4.62.643h-10.169V48.324h9.085c1.691%200%203.156.143%204.049.38%203.465.93%205.727%203.68%205.727%207.335%200%202.441-.81%204.156-2.762%205.644%202.905%201.417%204.453%203.727%204.453%206.966Zm-15.634-8.656h4.584c1.024%200%201.917-.143%202.536-.417%201.215-.548%201.905-1.608%201.905-3.167%200-1.548-.643-2.572-1.845-3.132-.691-.31-1.762-.452-2.763-.452h-4.417v7.168Zm10.716%208.465c0-1.536-.893-3.37-3.227-3.893-.428-.095-1.036-.143-1.571-.143h-5.918v8.085h5.501c.56%200%201.429-.048%201.953-.167%201.94-.453%203.262-1.846%203.262-3.882Zm47.747-11.847-8.097%2020.408h-4.429l-8.109-20.408h5.191l5.192%2014.574%205.108-14.574h5.144Zm-20.218%2010.002c0%20.69-.036%201.262-.155%201.94h-15.943c.631%202.87%202.714%204.728%205.882%204.728%202.131%200%203.607-.882%204.703-2.525h4.87c-1.762%204.144-5.204%206.692-9.657%206.692-6.084%200-10.537-4.858-10.537-10.49%200-6.108%204.524-10.776%2010.335-10.776%206.239%200%2010.442%204.954%2010.502%2010.43Zm-4.763-1.405c-.333-2.846-2.643-4.858-5.691-4.858-2.894%200-5.287%201.929-5.621%204.858h11.312Zm-72.667%203.44c0%204.787-3.287%208.371-9.419%208.371H119.363V64.66c-1.917.274-3.87.69-5.811%201.238l4.537%2011.121h-5.418l-3.596-9.585c-5.144%202.084-10.085%205.216-14.217%209.585h-4.786L101.8%2048.312h4.56l5.68%2013.883a44.112%2044.112%200%200%201%207.323-1.774V48.312h9.084c1.703%200%203.156.143%204.061.393%203.453.929%205.727%203.667%205.727%207.323%200%201.917-.738%204.179-2.81%205.691%203.06%201.56%204.501%204.025%204.501%206.93Zm-15.634-8.667a62.664%2062.664%200%200%201%202.06-.036c1.703.012%203.239.131%204.608.37%201.441-.549%202.357-1.727%202.357-3.537%200-1.941-.881-3.144-2.488-3.667-.548-.18-1.358-.286-2.322-.286h-4.215v7.156Zm-16.55%203.905-3.715-9.894-6.394%2016.502c2.833-2.595%206.263-4.858%2010.109-6.608Zm27.254%204.74c0-2.775-3.131-4.347-8.513-4.418-.715%200-1.441.011-2.191.047v8.252h5.918c2.548%200%204.786-1.37%204.786-3.882Z'%20clip-rule='evenodd'/%3e%3c/g%3e%3cdefs%3e%3clinearGradient%20id='b'%20x1='51.47'%20x2='85.916'%20y1='62.946'%20y2='62.946'%20gradientUnits='userSpaceOnUse'%3e%3cstop%20stop-color='%23CD9F28'/%3e%3cstop%20offset='1'%20stop-color='%23ECD80B'/%3e%3c/linearGradient%3e%3cclipPath%20id='a'%3e%3cpath%20fill='%23fff'%20d='M51.47%2045.728h186.104V80.14H51.47z'/%3e%3c/clipPath%3e%3c/defs%3e%3c/svg%3e)


More from Stryker


Explore Other Assets


© 2026 MaintainX. All rights reserved.