


Lincoln Electric Welding Inverter RANGER 225
Need answers fast?
Explore the manual using AI.
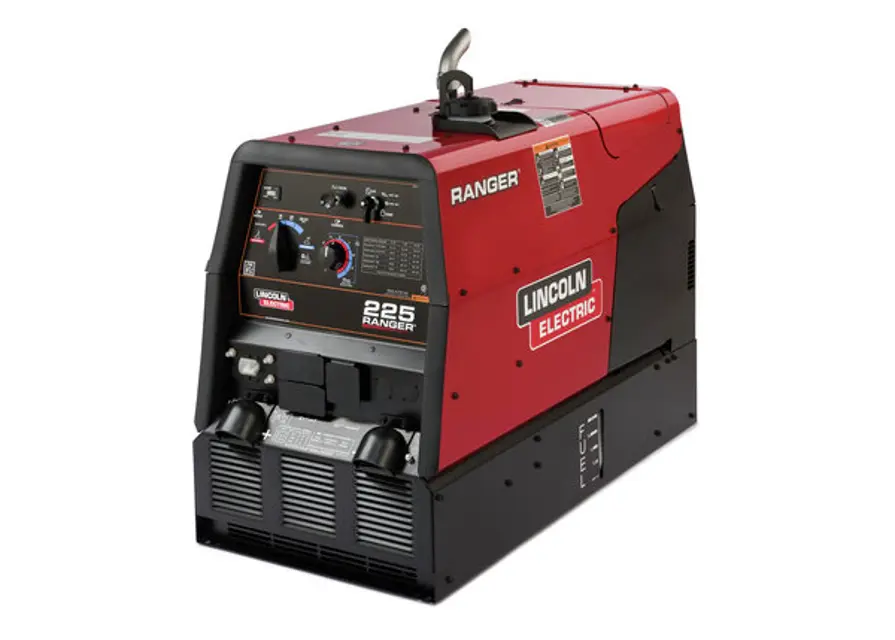
The Lincoln Electric Welding Inverter RANGER 225 is a versatile and portable welding machine designed for various applications. Known for its reliability and efficiency, this inverter model provides excellent performance in both industrial and construction environments. Perfect for professionals seeking high-quality welding solutions.
Turn manuals into instant answers
with your AI-powered assistantTurn manuals into instant answers
with your AI-powered assistant
Manual for Lincoln Electric Welding Inverter RANGER 225
Complete asset maintenance, one click away
Get instant access to all the maintenance information you need. Empower technicians to perform preventive maintenance with asset packages, ready to use right out of the box.

Documents & Manuals
Find all the essential guides in one place.
 Tensioning Guide
- Belt-diagram
- C-120 pulleys
+ 13 more

Work Order Templates
Pre-built workflows to keep your asset running smoothly.
- Daily Electrical System Inspection
- Replace Roller and Pulley
- Install Engine B-120
+ 29 more

Procedures
Integrate maintenance plans directly into your work orders.
- Motion Industries
- Applied Industrial Technologies
- Electrical Brothers
+ 5 more

Parts
Access the parts list for your equipment in MaintainX.
- Drive Motor
- B2 Rollers
- Tensioning System
+ 40 more
Lincoln Electric Welding Inverter RANGER 225
Create an account to install this asset package.
Maintenance Plans for Lincoln Electric Welding Inverter Model RANGER 225
Integrate maintenance plans directly into your work orders in MaintainX.
Oil Filter Change
- Drain the engine oil
- Remove the oil filter, and drain the oil into a suitable container. Discard the used oil filter
- Clean the filter mounting base, and coat the gasket of the new oil filter with clean engine oil
- Screw on the new oil filter by hand, until the gasket contacts the filter mounting base, then use an oil filter socket tool to tighten the filter an additional 1/2 to 7/8 turn
- Refill the crankcase with the specified amount of the recommended oil. Reinstall the oil filler cap
- Start the engine and check for oil filter leaks
- Stop the engine, and check the oil level. If necessary, add oil to the upper limit mark on the dipstick;

Foam Pre-filter Maintenance
- Clean and re-oil the foam pre-filter;
Engine Oil Change
- Remove the oil filler cap and dipstick. Remove the yellow cap from the oil drain valve and attach the flexible drain tube supplied with the machine. Push in and twist the drain valve counterclockwise. Pull the valve out and drain the oil into a suitable container
- Close the drain valve by pushing in and twisting clockwise
- Replace the yellow cap
- Refill to the upper limit mark on the dipstick with the recommended oil. Tighten the oil filler cap securely;
Battery Maintenace
- When replacing, jumping, or otherwise connecting the battery to the battery cables, the proper polarity must be observed. Failure to observe the proper polarity could result in damage to the charging cir- cuit. The positive (+) battery cable has a red terminal cover
- If the battery requires charging from an external charger, disconnect the negative battery cable first and then the positive battery cable before attaching the charger leads. Failure to do so can result in damage to the internal charger components. When reconnecting the cables, connect the positive cable first and the negative cable last;
Routine Maintenance
- At the end of each day’s use, refill the fuel tank to minimize moisture condensation in the tank. Running out of fuel tends to draw dirt into the fuel system. Also, check the crankcase oil level and add oil if indicated;
Parts for Lincoln Electric Welding Inverter RANGER 225
Access the parts list for your equipment in MaintainX.
Output Terminal Assembly
T14166-9
1/2-13 x .75 HHCS
CF000020
Lock Washer
E106A-15
Self Tapping Screw
S8025-91
#8-32 HN
CF000042
Output Terminal Assembly
T14166-9
1/2-13 x .75 HHCS
CF000020
Lock Washer
E106A-15
Self Tapping Screw
S8025-91
#8-32 HN
CF000042
Output Terminal Assembly
T14166-9
1/2-13 x .75 HHCS
CF000020
Lock Washer
E106A-15
Self Tapping Screw
S8025-91
#8-32 HN
CF000042
Unlock efficiency
with MaintainX CoPilot
MaintainX CoPilot is your expert colleague, on call 24/7, helping your team find the answers they need to keep equipment running.
Reduce Unplanned Downtime
Ensure your team follows consistent procedures to minimize equipment failures and costly delays.
Maximize Asset Availability
Keep your assets running longer and more reliably, with standardized maintenance workflows from OEM manuals.
Lower Maintenance Costs
Turn any technician into an expert to streamline operations, maintain more assets, and reduce overall costs.
Thousands of companies manage their assets with MaintainX

'%3e%3cpath%20fill='url(%23b)'%20d='M66.008%2080.068c-5.084-.786-9.763-3.834-12.442-8.68a16.942%2016.942%200%200%201-1.87-5.18c1.096.19%202.203.476%203.298.87%206.525%202.333%2010.836%207.68%2011.014%2012.99ZM51.47%2061.576c.488-5.524%203.62-10.716%208.847-13.597a17.132%2017.132%200%200%201%2011.335-1.882c-.798%208.145-7.43%2014.848-16.038%2015.599-1.417.119-2.799.07-4.144-.12Zm28.564-11.478a17.513%2017.513%200%200%201%203.727%204.62c4.608%208.335%201.584%2018.813-6.75%2023.409a16.988%2016.988%200%200%201-4.359%201.679%2019.624%2019.624%200%200%201-3.977-12.776c.346-7.561%204.942-13.931%2011.36-16.932Z'/%3e%3cpath%20fill='%23110F0D'%20fill-rule='evenodd'%20d='M142.831%2048.324h4.977V77.03h-4.977V48.324Zm27.278%2013.002c.322%201.048.453%202.263.453%203.62v12.073h-4.787V66.208c0-.75-.047-1.572-.154-2.143-.453-2.382-1.822-3.572-4.215-3.572-2.31%200-3.882%201.274-4.43%203.476-.143.596-.226%201.405-.226%202.25v10.8h-4.787V56.623h4.477v2.989c1.536-2.5%203.906-3.43%206.371-3.43%203.488%200%206.263%201.68%207.298%205.144Zm24.636%207.323c0%203.882-2.358%206.525-5.763%207.727-1.298.453-2.632.643-4.62.643h-10.169V48.324h9.085c1.691%200%203.156.143%204.049.38%203.465.93%205.727%203.68%205.727%207.335%200%202.441-.81%204.156-2.762%205.644%202.905%201.417%204.453%203.727%204.453%206.966Zm-15.634-8.656h4.584c1.024%200%201.917-.143%202.536-.417%201.215-.548%201.905-1.608%201.905-3.167%200-1.548-.643-2.572-1.845-3.132-.691-.31-1.762-.452-2.763-.452h-4.417v7.168Zm10.716%208.465c0-1.536-.893-3.37-3.227-3.893-.428-.095-1.036-.143-1.571-.143h-5.918v8.085h5.501c.56%200%201.429-.048%201.953-.167%201.94-.453%203.262-1.846%203.262-3.882Zm47.747-11.847-8.097%2020.408h-4.429l-8.109-20.408h5.191l5.192%2014.574%205.108-14.574h5.144Zm-20.218%2010.002c0%20.69-.036%201.262-.155%201.94h-15.943c.631%202.87%202.714%204.728%205.882%204.728%202.131%200%203.607-.882%204.703-2.525h4.87c-1.762%204.144-5.204%206.692-9.657%206.692-6.084%200-10.537-4.858-10.537-10.49%200-6.108%204.524-10.776%2010.335-10.776%206.239%200%2010.442%204.954%2010.502%2010.43Zm-4.763-1.405c-.333-2.846-2.643-4.858-5.691-4.858-2.894%200-5.287%201.929-5.621%204.858h11.312Zm-72.667%203.44c0%204.787-3.287%208.371-9.419%208.371H119.363V64.66c-1.917.274-3.87.69-5.811%201.238l4.537%2011.121h-5.418l-3.596-9.585c-5.144%202.084-10.085%205.216-14.217%209.585h-4.786L101.8%2048.312h4.56l5.68%2013.883a44.112%2044.112%200%200%201%207.323-1.774V48.312h9.084c1.703%200%203.156.143%204.061.393%203.453.929%205.727%203.667%205.727%207.323%200%201.917-.738%204.179-2.81%205.691%203.06%201.56%204.501%204.025%204.501%206.93Zm-15.634-8.667a62.664%2062.664%200%200%201%202.06-.036c1.703.012%203.239.131%204.608.37%201.441-.549%202.357-1.727%202.357-3.537%200-1.941-.881-3.144-2.488-3.667-.548-.18-1.358-.286-2.322-.286h-4.215v7.156Zm-16.55%203.905-3.715-9.894-6.394%2016.502c2.833-2.595%206.263-4.858%2010.109-6.608Zm27.254%204.74c0-2.775-3.131-4.347-8.513-4.418-.715%200-1.441.011-2.191.047v8.252h5.918c2.548%200%204.786-1.37%204.786-3.882Z'%20clip-rule='evenodd'/%3e%3c/g%3e%3cdefs%3e%3clinearGradient%20id='b'%20x1='51.47'%20x2='85.916'%20y1='62.946'%20y2='62.946'%20gradientUnits='userSpaceOnUse'%3e%3cstop%20stop-color='%23CD9F28'/%3e%3cstop%20offset='1'%20stop-color='%23ECD80B'/%3e%3c/linearGradient%3e%3cclipPath%20id='a'%3e%3cpath%20fill='%23fff'%20d='M51.47%2045.728h186.104V80.14H51.47z'/%3e%3c/clipPath%3e%3c/defs%3e%3c/svg%3e)


More from Lincoln Electric


Explore Other Assets


© 2026 MaintainX. All rights reserved.