


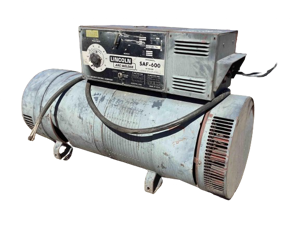
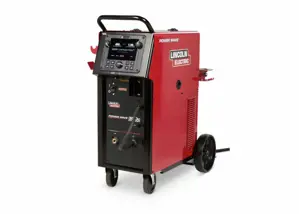
Lincoln Electric Welding Apparatus SP-100T
Need answers fast?
Explore the manual using AI.

The Lincoln Electric Welding Apparatus SP-100T is a versatile and reliable welding machine designed for both professional and DIY applications. Known for its durability and performance, this model offers efficient welding capabilities, making it an essential tool for metal fabrication and repair tasks.
Turn manuals into instant answers
with your AI-powered assistantTurn manuals into instant answers
with your AI-powered assistant
Manual for Lincoln Electric Welding Apparatus SP-100T
Complete asset maintenance, one click away
Get instant access to all the maintenance information you need. Empower technicians to perform preventive maintenance with asset packages, ready to use right out of the box.

Documents & Manuals
Find all the essential guides in one place.
 Tensioning Guide
- Belt-diagram
- C-120 pulleys
+ 13 more

Work Order Templates
Pre-built workflows to keep your asset running smoothly.
- Daily Electrical System Inspection
- Replace Roller and Pulley
- Install Engine B-120
+ 29 more

Procedures
Integrate maintenance plans directly into your work orders.
- Motion Industries
- Applied Industrial Technologies
- Electrical Brothers
+ 5 more

Parts
Access the parts list for your equipment in MaintainX.
- Drive Motor
- B2 Rollers
- Tensioning System
+ 40 more
Lincoln Electric Welding Apparatus SP-100T
Create an account to install this asset package.
Maintenance Plans for Lincoln Electric Welding Apparatus Model SP-100T
Integrate maintenance plans directly into your work orders in MaintainX.
Liner Replacement
- Remove the gas nozzle from the gun by unscrewing counter-clockwise
- Remove the existing contact tip from the gun by unscrewing counter-clockwise
- Remove the gas diffuser from the gun tube by unscrewing counter-clockwise
- Lay the gun and cable out straight on a flat surface. Loosen the set screw located in the brass connector at the wire feeder end of the cable. Pull the liner out of the cable
- Insert a new untrimmed liner into the connector end of the cable. Be sure the liner bushing is stenciled appropriately for the wire size being used
- Fully seat the liner bushing into the connector. Tighten the set screw on the brass cable connector. At this time, the gas diffuser should not be installed onto the end of the gun tube
- With the gas nozzle and diffuser removed from the gun tube, be sure the cable is straight, and then trim the liner to the length
- Remove any burrs from the end of the liner
- Screw the gas diffuser onto the end of the gun tube and securely tighten

Drive Roll Replacement
- Connect the machine to its rated input power per instructions in Installation section
- Release the spring-loaded pressure arm and lift the idle roll arm away from the drive roll
- Turn the power switch to ON
- Set the wire speed to minimum and jog the drive unit with the trigger switch until the drive roll set screw is facing up
- Turn the power switch to OFF
- Loosen the drive roll set screw with the 5/64" (2.0 mm) hex wrench supplied
- Remove the drive roll, flip over and reinstall with the .023 – .025" (0.6 mm) groove (the smaller groove) closest to the gearbox
- Push a length of straightened welding wire through the wire feeder guide tubes and adjust the position of the drive roll so that the groove is centered on the wire. Make certain the set screw is located on the flat portion of the shaft and tighten;
Gun Cable Cleaning
- Clean cable liner after using approximately 300 lbs (136 kg) of solid wire or 50 lbs (23 kg) of flux-cored wire
- Remove the cable from the wire feeder and lay it out straight on the floor
- Remove the contact tip from the gun; - Using low pressure air, gently blow out the cable liner from the gas diffuser end;
Contact Tip Replacement
- Remove the gas nozzle from the gun by unscrewing counter-clockwise
- Remove the existing contact tip from the gun by unscrewing counter-clockwise
- Insert and hand tighten desired contact tip
- Replace gas nozzle;
Parts for Lincoln Electric Welding Apparatus SP-100T
Access the parts list for your equipment in MaintainX.
Aluminum Feeding Kit
K664-2
Utility Cart
K520
Drive Roll
KP1884-1
Contact Tip-Tapered .035”
KP2052-3
Complete Gun and Cable Assembly
K530-5
Aluminum Feeding Kit
K664-2
Utility Cart
K520
Drive Roll
KP1884-1
Contact Tip-Tapered .035”
KP2052-3
Complete Gun and Cable Assembly
K530-5
Aluminum Feeding Kit
K664-2
Utility Cart
K520
Drive Roll
KP1884-1
Contact Tip-Tapered .035”
KP2052-3
Complete Gun and Cable Assembly
K530-5
Unlock efficiency
with MaintainX CoPilot
MaintainX CoPilot is your expert colleague, on call 24/7, helping your team find the answers they need to keep equipment running.
Reduce Unplanned Downtime
Ensure your team follows consistent procedures to minimize equipment failures and costly delays.
Maximize Asset Availability
Keep your assets running longer and more reliably, with standardized maintenance workflows from OEM manuals.
Lower Maintenance Costs
Turn any technician into an expert to streamline operations, maintain more assets, and reduce overall costs.
Thousands of companies manage their assets with MaintainX

'%3e%3cpath%20fill='url(%23b)'%20d='M66.008%2080.068c-5.084-.786-9.763-3.834-12.442-8.68a16.942%2016.942%200%200%201-1.87-5.18c1.096.19%202.203.476%203.298.87%206.525%202.333%2010.836%207.68%2011.014%2012.99ZM51.47%2061.576c.488-5.524%203.62-10.716%208.847-13.597a17.132%2017.132%200%200%201%2011.335-1.882c-.798%208.145-7.43%2014.848-16.038%2015.599-1.417.119-2.799.07-4.144-.12Zm28.564-11.478a17.513%2017.513%200%200%201%203.727%204.62c4.608%208.335%201.584%2018.813-6.75%2023.409a16.988%2016.988%200%200%201-4.359%201.679%2019.624%2019.624%200%200%201-3.977-12.776c.346-7.561%204.942-13.931%2011.36-16.932Z'/%3e%3cpath%20fill='%23110F0D'%20fill-rule='evenodd'%20d='M142.831%2048.324h4.977V77.03h-4.977V48.324Zm27.278%2013.002c.322%201.048.453%202.263.453%203.62v12.073h-4.787V66.208c0-.75-.047-1.572-.154-2.143-.453-2.382-1.822-3.572-4.215-3.572-2.31%200-3.882%201.274-4.43%203.476-.143.596-.226%201.405-.226%202.25v10.8h-4.787V56.623h4.477v2.989c1.536-2.5%203.906-3.43%206.371-3.43%203.488%200%206.263%201.68%207.298%205.144Zm24.636%207.323c0%203.882-2.358%206.525-5.763%207.727-1.298.453-2.632.643-4.62.643h-10.169V48.324h9.085c1.691%200%203.156.143%204.049.38%203.465.93%205.727%203.68%205.727%207.335%200%202.441-.81%204.156-2.762%205.644%202.905%201.417%204.453%203.727%204.453%206.966Zm-15.634-8.656h4.584c1.024%200%201.917-.143%202.536-.417%201.215-.548%201.905-1.608%201.905-3.167%200-1.548-.643-2.572-1.845-3.132-.691-.31-1.762-.452-2.763-.452h-4.417v7.168Zm10.716%208.465c0-1.536-.893-3.37-3.227-3.893-.428-.095-1.036-.143-1.571-.143h-5.918v8.085h5.501c.56%200%201.429-.048%201.953-.167%201.94-.453%203.262-1.846%203.262-3.882Zm47.747-11.847-8.097%2020.408h-4.429l-8.109-20.408h5.191l5.192%2014.574%205.108-14.574h5.144Zm-20.218%2010.002c0%20.69-.036%201.262-.155%201.94h-15.943c.631%202.87%202.714%204.728%205.882%204.728%202.131%200%203.607-.882%204.703-2.525h4.87c-1.762%204.144-5.204%206.692-9.657%206.692-6.084%200-10.537-4.858-10.537-10.49%200-6.108%204.524-10.776%2010.335-10.776%206.239%200%2010.442%204.954%2010.502%2010.43Zm-4.763-1.405c-.333-2.846-2.643-4.858-5.691-4.858-2.894%200-5.287%201.929-5.621%204.858h11.312Zm-72.667%203.44c0%204.787-3.287%208.371-9.419%208.371H119.363V64.66c-1.917.274-3.87.69-5.811%201.238l4.537%2011.121h-5.418l-3.596-9.585c-5.144%202.084-10.085%205.216-14.217%209.585h-4.786L101.8%2048.312h4.56l5.68%2013.883a44.112%2044.112%200%200%201%207.323-1.774V48.312h9.084c1.703%200%203.156.143%204.061.393%203.453.929%205.727%203.667%205.727%207.323%200%201.917-.738%204.179-2.81%205.691%203.06%201.56%204.501%204.025%204.501%206.93Zm-15.634-8.667a62.664%2062.664%200%200%201%202.06-.036c1.703.012%203.239.131%204.608.37%201.441-.549%202.357-1.727%202.357-3.537%200-1.941-.881-3.144-2.488-3.667-.548-.18-1.358-.286-2.322-.286h-4.215v7.156Zm-16.55%203.905-3.715-9.894-6.394%2016.502c2.833-2.595%206.263-4.858%2010.109-6.608Zm27.254%204.74c0-2.775-3.131-4.347-8.513-4.418-.715%200-1.441.011-2.191.047v8.252h5.918c2.548%200%204.786-1.37%204.786-3.882Z'%20clip-rule='evenodd'/%3e%3c/g%3e%3cdefs%3e%3clinearGradient%20id='b'%20x1='51.47'%20x2='85.916'%20y1='62.946'%20y2='62.946'%20gradientUnits='userSpaceOnUse'%3e%3cstop%20stop-color='%23CD9F28'/%3e%3cstop%20offset='1'%20stop-color='%23ECD80B'/%3e%3c/linearGradient%3e%3cclipPath%20id='a'%3e%3cpath%20fill='%23fff'%20d='M51.47%2045.728h186.104V80.14H51.47z'/%3e%3c/clipPath%3e%3c/defs%3e%3c/svg%3e)


More from Lincoln Electric


Explore Other Assets


© 2026 MaintainX. All rights reserved.