


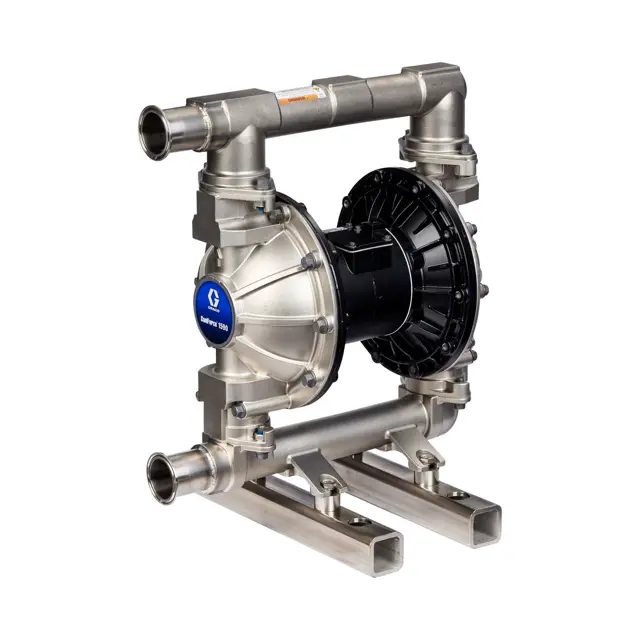
Graco Diaphragm Pump 1590HSPSP3ASSASSPTPSEP21
Need answers fast?
Explore the manual using AI.
Turn manuals into instant answers
with your AI-powered assistantTurn manuals into instant answers
with your AI-powered assistant
Manual for Graco Diaphragm Pump 1590HSPSP3ASSASSPTPSEP21
Complete asset maintenance, one click away
Get instant access to all the maintenance information you need. Empower technicians to perform preventive maintenance with asset packages, ready to use right out of the box.

Documents & Manuals
Find all the essential guides in one place.
 Tensioning Guide
- Belt-diagram
- C-120 pulleys
+ 13 more

Work Order Templates
Pre-built workflows to keep your asset running smoothly.
- Daily Electrical System Inspection
- Replace Roller and Pulley
- Install Engine B-120
+ 29 more

Procedures
Integrate maintenance plans directly into your work orders.
- Motion Industries
- Applied Industrial Technologies
- Electrical Brothers
+ 5 more

Parts
Access the parts list for your equipment in MaintainX.
- Drive Motor
- B2 Rollers
- Tensioning System
+ 40 more
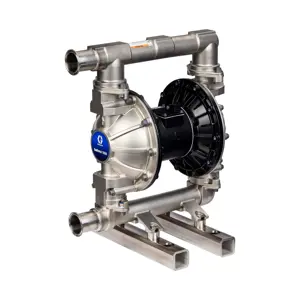
Graco Diaphragm Pump 1590HSPSP3ASSASSPTPSEP21
Create an account to install this asset package.
Maintenance Plans for Graco Diaphragm Pump Model 1590HSPSP3ASSASSPTPSEP21
Integrate maintenance plans directly into your work orders in MaintainX.
Overmolded Diaphragm Repair
Tools Required: Torque wrench, 19 mm open end wrench, O-ring pick, Lithium base grease
Disassemble the Overmolded Diaphragms
Followed the Pressure Relief Procedure
Removed the manifolds and disassembled the check valves
Removed the clamps from the fluid covers
Removed the fluid covers off of the pump
Loosened and removed one diaphragm assembly
Removed the opposite diaphragm assembly and shaft out of the center housing
Inspected the diaphragm shaft for wear or scratches

Standard Diaphragm Repair
Standard Diaphragm Repair
This applies to FK, PS, and SP diaphragms.
NOTE: Overmolded diaphragms are covered in Overmolded Diaphragm Repair, page 16.
Tools Required
• Torque wrench
• 5/8 in. wrench
• 19 mm open end wrench
• O-ring pick
• Lithium base grease
Air Valve Repair
Tools Required
• Torque wrench
• Torx (T20) screwdriver or 7 mm (9/32 in.) socket wrench
• Needle-nose pliers
• O-ring pick
• Lithium base grease
Air valve repair kit 255122 is available. Use all parts in the kit for best results.
Disassemble Air Valve
1. Follow the Pressure Relief Procedure, page 9.
Leak Detector Replacement
Leak Detector Removal
Followed the Pressure Relief Procedure
Noted the connection locations of the leak detector wires
Disconnected the leak detector wires
Removed the leak detector from the bushing in the air side diaphragm cover
Do you want to remove the other leak detector from the other air side diaphragm cover?
Leak Detector Installation
Installed the leak detector in the bushing
NOTE: If using the ATEX leak detector, install the o-ring onto the leak detector before installation into the bushing.
Check Valve Repair
Check Valve Repair
NOTE: Kits are available for new check valve flappers, or check valve balls in a range of materials. Gasket kits also are available.
Disassemble Ball Check Valves
1. Follow the Pressure Relief Procedure, page 9 . Disconnect all hoses.
2. To drain the pump, pull the frame quick-release pins (207) and rotate the pump.
NOTE: After draining, rotate the pump to positions which will aid disassembly.
3. Remove the clamps (23) on the outlet manifold (17) and remove the manifold.
NOTE: Use care while removing manifolds to safely remove check valve components.
4. Remove remaining clamps, manifolds, gaskets and check valves.
Parts for Graco Diaphragm Pump 1590HSPSP3ASSASSPTPSEP21
Access the parts list for your equipment in MaintainX.
Air Valve Repair Kit
255122
Diaphragm Install Tool Kit
24V543
Kit, Standard, Non-ATEX, 2 Sensors, 2 Bushings; Provided with 3-A Pumps
17Z666
Kit, ATEX, 2 Sensors, 2 Bushings, 2 O-Rings
17Z667
Kit, Leak Detection Control Box; Not Approved For Use in an ATEX Environment
25P303
Air Valve Repair Kit
255122
Diaphragm Install Tool Kit
24V543
Kit, Standard, Non-ATEX, 2 Sensors, 2 Bushings; Provided with 3-A Pumps
17Z666
Kit, ATEX, 2 Sensors, 2 Bushings, 2 O-Rings
17Z667
Kit, Leak Detection Control Box; Not Approved For Use in an ATEX Environment
25P303
Air Valve Repair Kit
255122
Diaphragm Install Tool Kit
24V543
Kit, Standard, Non-ATEX, 2 Sensors, 2 Bushings; Provided with 3-A Pumps
17Z666
Kit, ATEX, 2 Sensors, 2 Bushings, 2 O-Rings
17Z667
Kit, Leak Detection Control Box; Not Approved For Use in an ATEX Environment
25P303
Unlock efficiency
with MaintainX CoPilot
MaintainX CoPilot is your expert colleague, on call 24/7, helping your team find the answers they need to keep equipment running.
Reduce Unplanned Downtime
Ensure your team follows consistent procedures to minimize equipment failures and costly delays.
Maximize Asset Availability
Keep your assets running longer and more reliably, with standardized maintenance workflows from OEM manuals.
Lower Maintenance Costs
Turn any technician into an expert to streamline operations, maintain more assets, and reduce overall costs.
Thousands of companies manage their assets with MaintainX

'%3e%3cpath%20fill='url(%23b)'%20d='M66.008%2080.068c-5.084-.786-9.763-3.834-12.442-8.68a16.942%2016.942%200%200%201-1.87-5.18c1.096.19%202.203.476%203.298.87%206.525%202.333%2010.836%207.68%2011.014%2012.99ZM51.47%2061.576c.488-5.524%203.62-10.716%208.847-13.597a17.132%2017.132%200%200%201%2011.335-1.882c-.798%208.145-7.43%2014.848-16.038%2015.599-1.417.119-2.799.07-4.144-.12Zm28.564-11.478a17.513%2017.513%200%200%201%203.727%204.62c4.608%208.335%201.584%2018.813-6.75%2023.409a16.988%2016.988%200%200%201-4.359%201.679%2019.624%2019.624%200%200%201-3.977-12.776c.346-7.561%204.942-13.931%2011.36-16.932Z'/%3e%3cpath%20fill='%23110F0D'%20fill-rule='evenodd'%20d='M142.831%2048.324h4.977V77.03h-4.977V48.324Zm27.278%2013.002c.322%201.048.453%202.263.453%203.62v12.073h-4.787V66.208c0-.75-.047-1.572-.154-2.143-.453-2.382-1.822-3.572-4.215-3.572-2.31%200-3.882%201.274-4.43%203.476-.143.596-.226%201.405-.226%202.25v10.8h-4.787V56.623h4.477v2.989c1.536-2.5%203.906-3.43%206.371-3.43%203.488%200%206.263%201.68%207.298%205.144Zm24.636%207.323c0%203.882-2.358%206.525-5.763%207.727-1.298.453-2.632.643-4.62.643h-10.169V48.324h9.085c1.691%200%203.156.143%204.049.38%203.465.93%205.727%203.68%205.727%207.335%200%202.441-.81%204.156-2.762%205.644%202.905%201.417%204.453%203.727%204.453%206.966Zm-15.634-8.656h4.584c1.024%200%201.917-.143%202.536-.417%201.215-.548%201.905-1.608%201.905-3.167%200-1.548-.643-2.572-1.845-3.132-.691-.31-1.762-.452-2.763-.452h-4.417v7.168Zm10.716%208.465c0-1.536-.893-3.37-3.227-3.893-.428-.095-1.036-.143-1.571-.143h-5.918v8.085h5.501c.56%200%201.429-.048%201.953-.167%201.94-.453%203.262-1.846%203.262-3.882Zm47.747-11.847-8.097%2020.408h-4.429l-8.109-20.408h5.191l5.192%2014.574%205.108-14.574h5.144Zm-20.218%2010.002c0%20.69-.036%201.262-.155%201.94h-15.943c.631%202.87%202.714%204.728%205.882%204.728%202.131%200%203.607-.882%204.703-2.525h4.87c-1.762%204.144-5.204%206.692-9.657%206.692-6.084%200-10.537-4.858-10.537-10.49%200-6.108%204.524-10.776%2010.335-10.776%206.239%200%2010.442%204.954%2010.502%2010.43Zm-4.763-1.405c-.333-2.846-2.643-4.858-5.691-4.858-2.894%200-5.287%201.929-5.621%204.858h11.312Zm-72.667%203.44c0%204.787-3.287%208.371-9.419%208.371H119.363V64.66c-1.917.274-3.87.69-5.811%201.238l4.537%2011.121h-5.418l-3.596-9.585c-5.144%202.084-10.085%205.216-14.217%209.585h-4.786L101.8%2048.312h4.56l5.68%2013.883a44.112%2044.112%200%200%201%207.323-1.774V48.312h9.084c1.703%200%203.156.143%204.061.393%203.453.929%205.727%203.667%205.727%207.323%200%201.917-.738%204.179-2.81%205.691%203.06%201.56%204.501%204.025%204.501%206.93Zm-15.634-8.667a62.664%2062.664%200%200%201%202.06-.036c1.703.012%203.239.131%204.608.37%201.441-.549%202.357-1.727%202.357-3.537%200-1.941-.881-3.144-2.488-3.667-.548-.18-1.358-.286-2.322-.286h-4.215v7.156Zm-16.55%203.905-3.715-9.894-6.394%2016.502c2.833-2.595%206.263-4.858%2010.109-6.608Zm27.254%204.74c0-2.775-3.131-4.347-8.513-4.418-.715%200-1.441.011-2.191.047v8.252h5.918c2.548%200%204.786-1.37%204.786-3.882Z'%20clip-rule='evenodd'/%3e%3c/g%3e%3cdefs%3e%3clinearGradient%20id='b'%20x1='51.47'%20x2='85.916'%20y1='62.946'%20y2='62.946'%20gradientUnits='userSpaceOnUse'%3e%3cstop%20stop-color='%23CD9F28'/%3e%3cstop%20offset='1'%20stop-color='%23ECD80B'/%3e%3c/linearGradient%3e%3cclipPath%20id='a'%3e%3cpath%20fill='%23fff'%20d='M51.47%2045.728h186.104V80.14H51.47z'/%3e%3c/clipPath%3e%3c/defs%3e%3c/svg%3e)


More from Graco


Explore Other Assets


© 2026 MaintainX. All rights reserved.