


Crown Crown Battery 12-85-13 12-85-13
Need answers fast?
Explore the manual using AI.

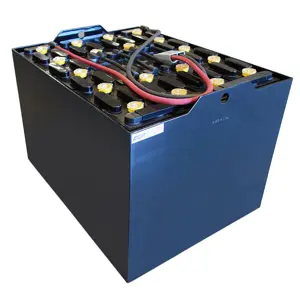
The Crown Battery 12-85-13 is a high-performance lead-acid battery designed for industrial applications. Known for its reliability and durability, this model provides excellent power output and longevity, making it a preferred choice for various heavy-duty operations. Optimize your equipment's performance with Crown's trusted battery technology.
Turn manuals into instant answers
with your AI-powered assistantTurn manuals into instant answers
with your AI-powered assistant
Manual for Crown Crown Battery 12-85-13 12-85-13
Complete asset maintenance, one click away
Get instant access to all the maintenance information you need. Empower technicians to perform preventive maintenance with asset packages, ready to use right out of the box.

Documents & Manuals
Find all the essential guides in one place.
 Tensioning Guide
- Belt-diagram
- C-120 pulleys
+ 13 more

Work Order Templates
Pre-built workflows to keep your asset running smoothly.
- Daily Electrical System Inspection
- Replace Roller and Pulley
- Install Engine B-120
+ 29 more

Procedures
Integrate maintenance plans directly into your work orders.
- Motion Industries
- Applied Industrial Technologies
- Electrical Brothers
+ 5 more

Parts
Access the parts list for your equipment in MaintainX.
- Drive Motor
- B2 Rollers
- Tensioning System
+ 40 more
Crown Crown Battery 12-85-13 12-85-13
Create an account to install this asset package.
Maintenance Plans for Crown Crown Battery 12-85-13 Model 12-85-13
Integrate maintenance plans directly into your work orders in MaintainX.
1 Daily Battery Water Replacement
Warning: This procedure requires trained personnel with PPE!
Tray Corrosion
Check for any breaks in the coating of the steel tray
Check for any accumulation of dampness or acid on the battery
Watering Schedule
Check the electrolyte level of two or three cells each time the battery is changed
Add water to all of the batteries assigned to each charging area on a regular time schedule
Spot check the electrolyte levels periodically to determine if the proper levels are being maintained
Frequency of charge

Battery Repair
CAUTION: ONLY EXPERIENCED PERSONNEL SHOULD ATTEMPT BATTERY REPAIRS!
BEFORE PERFORMING ANY REPAIRS, REMOVE THE BATTERY FROM THE LIFT TRUCK. ALWAYS WEAR SAFETY GLASSES AND A FACE SHIELD WHEN WORKING ON OR NEAR BATTERIES
Battery age in years
Battery cycle life
Battery service history
Estimate repair costs
Estimate replacement costs
Decision
Upload a photo of the battery
Sulfated Batteries Maintenance
- Lead Acid Motive Power Batteries can become unbalanced or sulfated if they are not recharged or equalize charged on a regular basis
Likewise over-discharging or unbalanced discharge can cause low uneven cell voltages. The treatment for restoring the battery to its full potential involves charging and discharging the battery in a very tightly controlled manor
This is a last resort remedy in order to salvage a battery that's been allowed to get into this condition. This may or may not be successful, as sulfate is extremely hard to remove from the cell plates and if let in this condition, may not be reversible
Step 1.
A. Charge the battery as normal to a fully charged condition.
B. Record all individual cell voltages and specific gravities. These readings will be used later to measure how successtul the treatment was.
C. Starting with a cool (less than 80°F) fully charged battery, charge the battery at 2.5 amps per 100 amps of battery capacity. A 24-85FC-21 has a capacity of 850 A.H. Therefore the charge rate would be 21 amps. Charge the battery for at least 24 hours. Stop the charge, if the battery temperature goes to 120°F or higher.
Step 2.
A. Let the battery cool back down to about 80°F
Battery Capacity Test
- A capacity test enables you to determine the capacity a battery actually delivers as compared to its rated capacity. This test can help determine if a battery should be repaired or replaced. When a battery delivers less than 80% of its rated capacity, the remaining capacity will decrease with each additional cycle
- It should be replaced before its cells fail and cause low-voltage operation of the vehicle, which can cause damage to the trucks electrical system
- A capacity test is performed by discharging a fully charged battery at a fixed rate (see chart on page 30) while monitoring specific test conditions, methods and procedures
- The six-hour rated discharge time is based on an electrolyte temperature of 77°F (25°C). Any deviation to that temperature, a correction to the six-hour rated time must be made
PROCEDURES FOR CAPACITY DISCHARGING:
1) Battery must be fully charged.
2) Specific gravities must be at manufacturers specifications, otherwise they must be adjusted accordingly.
3) Battery should be allowed to cool down prior to testing. Ideally, the temperature should be 75°F to 85°F. Otherwise the voltages will be affected by the temperature and the capacity must be temperature corrected.
4) Battery should be discharged within 24 hours of completion of charging and acid adjustment.
3 Monthly Battery Cleaning
- To prevent corrosion and the resultant problems, batteries must be cleaned and dries routinely
Sometimes minor spills or overflows of electrolyte occur due to overfilling. Instead of giving the battery a general cleaning at this time, the moisture can be removed with rags or paper towels. (This should be immediately disposed of.)
The frequency of a general cleaning depends upon two factors:
1. How quickly dust, dirt, oil, and other foreign matter accumulates on the top of the battery, and 2. How quick the electrolyte spillage accumulates
When the top of a battery is "dirty" or looks damp, it is ready for a general cleaning. It could be as often as every two weeks or as infrequent as every six months, depending on the battery's environment and the care it receives. The average battery needs general cleaning every three months
To give a battery a general cleaning, use Powerhouse Cleaner's 3 Step Process (Corrosion Remover, Battery Cleaner, Rinse)
Powerhouse's Corrosion Remover was developed specifically for the removal of heavy corrosion and acid neutralization. For use, spray onto the corroded areas (will turn a rust looking color) and let sit for at least 10 minutes
Powerhouse's Battery Cleaner is a mixture of 2 parts cleaning detergent to 1 part acid neutralizer. Battery Cleaner is OSHA compliant and environmentally safe. For use, spray across the entire battery and let sit for at least 10 minutes
After the Corrosion Remover and Battery Cleaner have both sat for at least 10 minutes the battery can now be rinsed. The corrosion and acid should be neutralized and can be washed down the drain (note if lead pieces from the top of the battery are in the water they should be disposed of properly.)
Unlock efficiency
with MaintainX CoPilot
MaintainX CoPilot is your expert colleague, on call 24/7, helping your team find the answers they need to keep equipment running.
Reduce Unplanned Downtime
Ensure your team follows consistent procedures to minimize equipment failures and costly delays.
Maximize Asset Availability
Keep your assets running longer and more reliably, with standardized maintenance workflows from OEM manuals.
Lower Maintenance Costs
Turn any technician into an expert to streamline operations, maintain more assets, and reduce overall costs.
Thousands of companies manage their assets with MaintainX

'%3e%3cpath%20fill='url(%23b)'%20d='M66.008%2080.068c-5.084-.786-9.763-3.834-12.442-8.68a16.942%2016.942%200%200%201-1.87-5.18c1.096.19%202.203.476%203.298.87%206.525%202.333%2010.836%207.68%2011.014%2012.99ZM51.47%2061.576c.488-5.524%203.62-10.716%208.847-13.597a17.132%2017.132%200%200%201%2011.335-1.882c-.798%208.145-7.43%2014.848-16.038%2015.599-1.417.119-2.799.07-4.144-.12Zm28.564-11.478a17.513%2017.513%200%200%201%203.727%204.62c4.608%208.335%201.584%2018.813-6.75%2023.409a16.988%2016.988%200%200%201-4.359%201.679%2019.624%2019.624%200%200%201-3.977-12.776c.346-7.561%204.942-13.931%2011.36-16.932Z'/%3e%3cpath%20fill='%23110F0D'%20fill-rule='evenodd'%20d='M142.831%2048.324h4.977V77.03h-4.977V48.324Zm27.278%2013.002c.322%201.048.453%202.263.453%203.62v12.073h-4.787V66.208c0-.75-.047-1.572-.154-2.143-.453-2.382-1.822-3.572-4.215-3.572-2.31%200-3.882%201.274-4.43%203.476-.143.596-.226%201.405-.226%202.25v10.8h-4.787V56.623h4.477v2.989c1.536-2.5%203.906-3.43%206.371-3.43%203.488%200%206.263%201.68%207.298%205.144Zm24.636%207.323c0%203.882-2.358%206.525-5.763%207.727-1.298.453-2.632.643-4.62.643h-10.169V48.324h9.085c1.691%200%203.156.143%204.049.38%203.465.93%205.727%203.68%205.727%207.335%200%202.441-.81%204.156-2.762%205.644%202.905%201.417%204.453%203.727%204.453%206.966Zm-15.634-8.656h4.584c1.024%200%201.917-.143%202.536-.417%201.215-.548%201.905-1.608%201.905-3.167%200-1.548-.643-2.572-1.845-3.132-.691-.31-1.762-.452-2.763-.452h-4.417v7.168Zm10.716%208.465c0-1.536-.893-3.37-3.227-3.893-.428-.095-1.036-.143-1.571-.143h-5.918v8.085h5.501c.56%200%201.429-.048%201.953-.167%201.94-.453%203.262-1.846%203.262-3.882Zm47.747-11.847-8.097%2020.408h-4.429l-8.109-20.408h5.191l5.192%2014.574%205.108-14.574h5.144Zm-20.218%2010.002c0%20.69-.036%201.262-.155%201.94h-15.943c.631%202.87%202.714%204.728%205.882%204.728%202.131%200%203.607-.882%204.703-2.525h4.87c-1.762%204.144-5.204%206.692-9.657%206.692-6.084%200-10.537-4.858-10.537-10.49%200-6.108%204.524-10.776%2010.335-10.776%206.239%200%2010.442%204.954%2010.502%2010.43Zm-4.763-1.405c-.333-2.846-2.643-4.858-5.691-4.858-2.894%200-5.287%201.929-5.621%204.858h11.312Zm-72.667%203.44c0%204.787-3.287%208.371-9.419%208.371H119.363V64.66c-1.917.274-3.87.69-5.811%201.238l4.537%2011.121h-5.418l-3.596-9.585c-5.144%202.084-10.085%205.216-14.217%209.585h-4.786L101.8%2048.312h4.56l5.68%2013.883a44.112%2044.112%200%200%201%207.323-1.774V48.312h9.084c1.703%200%203.156.143%204.061.393%203.453.929%205.727%203.667%205.727%207.323%200%201.917-.738%204.179-2.81%205.691%203.06%201.56%204.501%204.025%204.501%206.93Zm-15.634-8.667a62.664%2062.664%200%200%201%202.06-.036c1.703.012%203.239.131%204.608.37%201.441-.549%202.357-1.727%202.357-3.537%200-1.941-.881-3.144-2.488-3.667-.548-.18-1.358-.286-2.322-.286h-4.215v7.156Zm-16.55%203.905-3.715-9.894-6.394%2016.502c2.833-2.595%206.263-4.858%2010.109-6.608Zm27.254%204.74c0-2.775-3.131-4.347-8.513-4.418-.715%200-1.441.011-2.191.047v8.252h5.918c2.548%200%204.786-1.37%204.786-3.882Z'%20clip-rule='evenodd'/%3e%3c/g%3e%3cdefs%3e%3clinearGradient%20id='b'%20x1='51.47'%20x2='85.916'%20y1='62.946'%20y2='62.946'%20gradientUnits='userSpaceOnUse'%3e%3cstop%20stop-color='%23CD9F28'/%3e%3cstop%20offset='1'%20stop-color='%23ECD80B'/%3e%3c/linearGradient%3e%3cclipPath%20id='a'%3e%3cpath%20fill='%23fff'%20d='M51.47%2045.728h186.104V80.14H51.47z'/%3e%3c/clipPath%3e%3c/defs%3e%3c/svg%3e)


More from Crown


Explore Other Assets


© 2025 MaintainX. All rights reserved.