


Case Tractor 210
Need answers fast?
Explore the manual using AI.
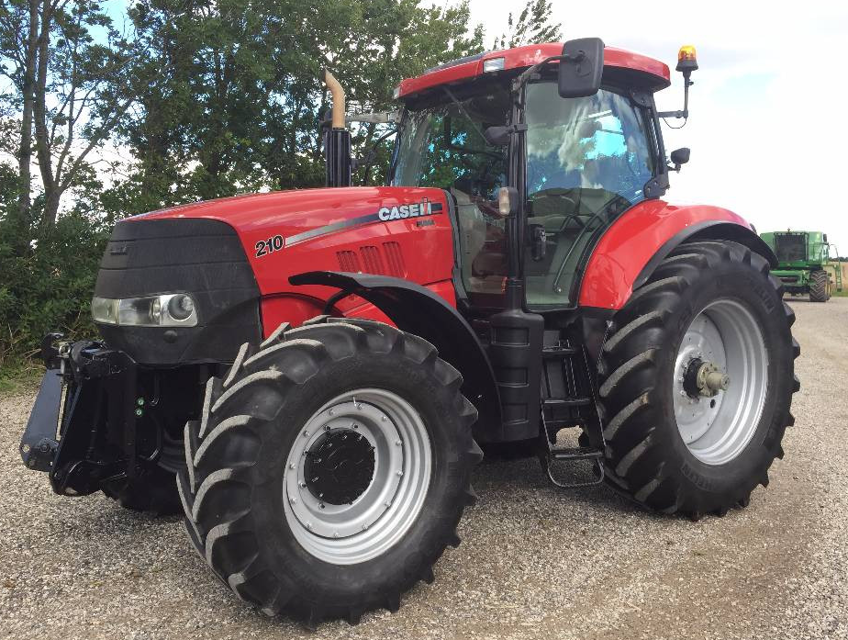
The Case Tractor 210 is a robust agricultural asset designed for efficient farming operations. Known for its reliability and power, this model offers exceptional performance in various tasks, making it a preferred choice among farmers and contractors alike. Regular maintenance ensures optimal functionality and longevity of the Case Tractor 210.
Turn manuals into instant answers
with your AI-powered assistantTurn manuals into instant answers
with your AI-powered assistant
Manual for Case Tractor 210
Complete asset maintenance, one click away
Get instant access to all the maintenance information you need. Empower technicians to perform preventive maintenance with asset packages, ready to use right out of the box.

Documents & Manuals
Find all the essential guides in one place.
 Tensioning Guide
- Belt-diagram
- C-120 pulleys
+ 13 more

Work Order Templates
Pre-built workflows to keep your asset running smoothly.
- Daily Electrical System Inspection
- Replace Roller and Pulley
- Install Engine B-120
+ 29 more

Procedures
Integrate maintenance plans directly into your work orders.
- Motion Industries
- Applied Industrial Technologies
- Electrical Brothers
+ 5 more

Parts
Access the parts list for your equipment in MaintainX.
- Drive Motor
- B2 Rollers
- Tensioning System
+ 40 more
Case Tractor 210
Create an account to install this asset package.
Maintenance Plans for Case Tractor Model 210
Integrate maintenance plans directly into your work orders in MaintainX.
Carburator High Speed Maintenance
HIGH SPEED ADJUSTMENT
Turn the adjusting screw for high speed to the fully closed position (in)
Open this adjusting screw approximately 2 turns (counterclockwise)
Start the engine and put the throttle lever in the 'FAST' position
Turn the adjusting screw clockwise (in) until the engine runs bad
Turn the adjusting screw counterclockwise (out) until the engine runs smoothly. (Approximately 2 turns.)
Apply a work load to the tractor. If the engine does not run smoothly turn the, adjustment screw counterclockwise 1/8 of a turn. Repeat this procedure until the engine runs good while a work load is applied.
LOW IDLE SPEED and MIXTURE ADJUSTMENT
Turn the adjusting screw for low idle speed to the fully closed position (in)

100 Hourly Spark Plug Cleaning
Warning: Do not use a machine that cleans the spark plugs with grit.
Use a small knife or wire brush to clean the tip and threads.
Wash with a solvent to remove loose carbon and oil.
Dry with a clean cloth.
Set the gap. You will feel a small amount of pressure on the feeler gauge when the gap is correct.
IMPORTANT: Do not bend the center tip.
Sign off on the spark plug cleaning
25 Hourly / 1 Weekly Tractor Maintenance
Drain Engine Oil
Change Engine Oil
Check Air Leaks
Grease Front Axle Pivot Pin
Oil Implement Lever, Brake Linkage
Check Battery
1. Add distilled water, as required, to keep the water level above the cell separators. Check at 25 hour intervals of operation or every week. Normal water consumption is 1 ounce (30 ml) every 25 hours of operation. More than normal water consumption indicates:
a. a battery with a leak
b. a regulator rectifier that is charging too much
Seat Maintenance
1. Clean the seat regularly. Use a special vinyl cleaner. Do not use a solvents as this will damage the seat.
2. Severe heat or cold can damage the seat. Protection from these conditions is important. Put a cover on the seat for protection against weather conditions and water. It is best to put the tractor in a building when not in use.
3. During operation in severe weather conditons, ysu can easily damage the seat. Be careful not to damage the seat while you get on and off of the tractor.
4. If your seat gets a small tear, apply a vibyl pair tape over the damaged area. Black vinyl repair tape can be purchased locally;
Toe-In Adjustment
Put the tractor on a hard and level surface like a concrete floor.
Front tires have equal air pressure.
Find the centerline of the front tires.
If you can not find the centerline: raise the front wheels off the ground, spin each wheel and put a mark at the centerline with chalk.
Measure the distance between each centerline or chalk mark.
Measurement 'A' must be 1/8 to 3/8' (3.2 mm to 9.5 mm) less than measurement 'B'. Both measurements, front and rear, must be taken at spindle height above the floor.
Loosen both lock nuts on the tie rod. NOTE: Do not remove the ball joints from the king pins. Turn the tie rod to change the toe-in.
Turn the ball joints off of the tie rod to decrease the toe-in.
Turn the ball joints onto the tie rod to increase the toe-in.
Unlock efficiency
with MaintainX CoPilot
MaintainX CoPilot is your expert colleague, on call 24/7, helping your team find the answers they need to keep equipment running.
Reduce Unplanned Downtime
Ensure your team follows consistent procedures to minimize equipment failures and costly delays.
Maximize Asset Availability
Keep your assets running longer and more reliably, with standardized maintenance workflows from OEM manuals.
Lower Maintenance Costs
Turn any technician into an expert to streamline operations, maintain more assets, and reduce overall costs.
Thousands of companies manage their assets with MaintainX

'%3e%3cpath%20fill='url(%23b)'%20d='M66.008%2080.068c-5.084-.786-9.763-3.834-12.442-8.68a16.942%2016.942%200%200%201-1.87-5.18c1.096.19%202.203.476%203.298.87%206.525%202.333%2010.836%207.68%2011.014%2012.99ZM51.47%2061.576c.488-5.524%203.62-10.716%208.847-13.597a17.132%2017.132%200%200%201%2011.335-1.882c-.798%208.145-7.43%2014.848-16.038%2015.599-1.417.119-2.799.07-4.144-.12Zm28.564-11.478a17.513%2017.513%200%200%201%203.727%204.62c4.608%208.335%201.584%2018.813-6.75%2023.409a16.988%2016.988%200%200%201-4.359%201.679%2019.624%2019.624%200%200%201-3.977-12.776c.346-7.561%204.942-13.931%2011.36-16.932Z'/%3e%3cpath%20fill='%23110F0D'%20fill-rule='evenodd'%20d='M142.831%2048.324h4.977V77.03h-4.977V48.324Zm27.278%2013.002c.322%201.048.453%202.263.453%203.62v12.073h-4.787V66.208c0-.75-.047-1.572-.154-2.143-.453-2.382-1.822-3.572-4.215-3.572-2.31%200-3.882%201.274-4.43%203.476-.143.596-.226%201.405-.226%202.25v10.8h-4.787V56.623h4.477v2.989c1.536-2.5%203.906-3.43%206.371-3.43%203.488%200%206.263%201.68%207.298%205.144Zm24.636%207.323c0%203.882-2.358%206.525-5.763%207.727-1.298.453-2.632.643-4.62.643h-10.169V48.324h9.085c1.691%200%203.156.143%204.049.38%203.465.93%205.727%203.68%205.727%207.335%200%202.441-.81%204.156-2.762%205.644%202.905%201.417%204.453%203.727%204.453%206.966Zm-15.634-8.656h4.584c1.024%200%201.917-.143%202.536-.417%201.215-.548%201.905-1.608%201.905-3.167%200-1.548-.643-2.572-1.845-3.132-.691-.31-1.762-.452-2.763-.452h-4.417v7.168Zm10.716%208.465c0-1.536-.893-3.37-3.227-3.893-.428-.095-1.036-.143-1.571-.143h-5.918v8.085h5.501c.56%200%201.429-.048%201.953-.167%201.94-.453%203.262-1.846%203.262-3.882Zm47.747-11.847-8.097%2020.408h-4.429l-8.109-20.408h5.191l5.192%2014.574%205.108-14.574h5.144Zm-20.218%2010.002c0%20.69-.036%201.262-.155%201.94h-15.943c.631%202.87%202.714%204.728%205.882%204.728%202.131%200%203.607-.882%204.703-2.525h4.87c-1.762%204.144-5.204%206.692-9.657%206.692-6.084%200-10.537-4.858-10.537-10.49%200-6.108%204.524-10.776%2010.335-10.776%206.239%200%2010.442%204.954%2010.502%2010.43Zm-4.763-1.405c-.333-2.846-2.643-4.858-5.691-4.858-2.894%200-5.287%201.929-5.621%204.858h11.312Zm-72.667%203.44c0%204.787-3.287%208.371-9.419%208.371H119.363V64.66c-1.917.274-3.87.69-5.811%201.238l4.537%2011.121h-5.418l-3.596-9.585c-5.144%202.084-10.085%205.216-14.217%209.585h-4.786L101.8%2048.312h4.56l5.68%2013.883a44.112%2044.112%200%200%201%207.323-1.774V48.312h9.084c1.703%200%203.156.143%204.061.393%203.453.929%205.727%203.667%205.727%207.323%200%201.917-.738%204.179-2.81%205.691%203.06%201.56%204.501%204.025%204.501%206.93Zm-15.634-8.667a62.664%2062.664%200%200%201%202.06-.036c1.703.012%203.239.131%204.608.37%201.441-.549%202.357-1.727%202.357-3.537%200-1.941-.881-3.144-2.488-3.667-.548-.18-1.358-.286-2.322-.286h-4.215v7.156Zm-16.55%203.905-3.715-9.894-6.394%2016.502c2.833-2.595%206.263-4.858%2010.109-6.608Zm27.254%204.74c0-2.775-3.131-4.347-8.513-4.418-.715%200-1.441.011-2.191.047v8.252h5.918c2.548%200%204.786-1.37%204.786-3.882Z'%20clip-rule='evenodd'/%3e%3c/g%3e%3cdefs%3e%3clinearGradient%20id='b'%20x1='51.47'%20x2='85.916'%20y1='62.946'%20y2='62.946'%20gradientUnits='userSpaceOnUse'%3e%3cstop%20stop-color='%23CD9F28'/%3e%3cstop%20offset='1'%20stop-color='%23ECD80B'/%3e%3c/linearGradient%3e%3cclipPath%20id='a'%3e%3cpath%20fill='%23fff'%20d='M51.47%2045.728h186.104V80.14H51.47z'/%3e%3c/clipPath%3e%3c/defs%3e%3c/svg%3e)


More from Case


Explore Other Assets


© 2026 MaintainX. All rights reserved.