


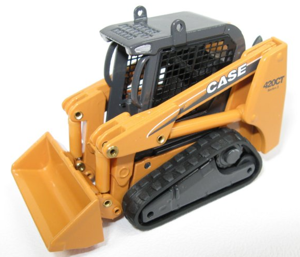
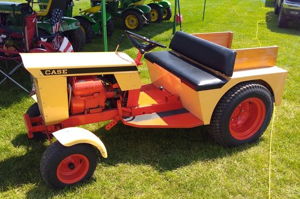
Case Loader Backhoe 580BCK
Need answers fast?
Explore the manual using AI.

The Case Loader Backhoe 580BCK is a versatile and powerful piece of industrial equipment designed for construction and excavation tasks. Known for its reliability and efficiency, this backhoe loader is ideal for various applications, ensuring optimal performance and productivity on the job site.
Turn manuals into instant answers
with your AI-powered assistantTurn manuals into instant answers
with your AI-powered assistant
Manual for Case Loader Backhoe 580BCK
Complete asset maintenance, one click away
Get instant access to all the maintenance information you need. Empower technicians to perform preventive maintenance with asset packages, ready to use right out of the box.

Documents & Manuals
Find all the essential guides in one place.
 Tensioning Guide
- Belt-diagram
- C-120 pulleys
+ 13 more

Work Order Templates
Pre-built workflows to keep your asset running smoothly.
- Daily Electrical System Inspection
- Replace Roller and Pulley
- Install Engine B-120
+ 29 more

Procedures
Integrate maintenance plans directly into your work orders.
- Motion Industries
- Applied Industrial Technologies
- Electrical Brothers
+ 5 more

Parts
Access the parts list for your equipment in MaintainX.
- Drive Motor
- B2 Rollers
- Tensioning System
+ 40 more
Case Loader Backhoe 580BCK
Create an account to install this asset package.
Maintenance Plans for Case Loader Backhoe Model 580BCK
Integrate maintenance plans directly into your work orders in MaintainX.
Initial 20 Hours Hydraulic Oil Change
Park the machine on a level surface.
Have the backhoe in the transport position, if so equipped, and the loader bucket rolled back at ground level.
Remove the drain plug from the elbow at the bottom of each subframe. Approximately 5-1/2 U.S. gallons will drain from each subframe.
Remove the reservoir breathers and clean as instructed.
Replace the hydraulic oil filter as instructed.
Reinstall the drain plugs.
Remove the vent plug from the front of the subframe.
Fill the reservoir through the large breather opening until oil appears at the vent plug opening, then reinstall the plug.
Remove the oil level plug and continue filling until oil is level with the plug opening.

Filter Replacement
Unscrew filter housing from filter head
Remove filter element and discard
Remove the O-ring from the filter housing and discard
Clean the filter housing and head with a lint free cloth
Place filter element on filter head and install a new O-ring on the filter housing
Lubricate filter housing threads and O-ring with hydraulic oil
Screw the housing into the filter head and tighten. Do not exceed 90 foot-pounds torque
Sign off on the filter replacement
Pump Drive Shafts Removal
Remove the radiator grille
Thoroughly clean dirt and debris from the immediate area of the pump and its pressure and suction lines
Drain the hydraulic reservoir(s) low enough so that the oil level is below the level of the suction line
Disconnect the pump pressure and suction lines. See Figure 62A
Remove the pump mounting bolts and lockwashers and remove the pump
Remove shaft coupling from pump drive shaft and stub drive shaft
Remove snap ring from inside of shaft coupling
Thoroughly remove all dirt, debris, rust and excessive oil from the splines on the shafts and coupling. Brush off any loose rust. Clean splines with solvent and dry
Upload a photo of the cleaned and dried splines
10 Hourly Three-Point Hitch Lubrication
Warning: Ensure the hitch is not in use and is in a safe state before starting the procedure
Lift cylinder lubricated
Lift arm lubricated
Tilt cylinder rod eye lubricated
Sign off on the lubrication procedure
50 Hourly Oil Level Check
The loader subframes serve as the reservoir for the hydraulic system. The oil level plug is located on the left hand subframe upright, Figure 64. Check the oil level after every 50 hours of operation.
NOTE: On three-point hitch only models, the right hand subframe serves as the reservoir.
Is the machine parked on a level surface?
Is the oil at operating temperature? If not, start the engine and completely dump the loader bucket. Hold the control lever in the dump position until the reservoir is warm.
Is the loader bucket rolled back against the bucket stops and lowered to the ground?
Is the backhoe in the transport position, if so equipped?
Is the oil level plug removed? The oil should be even with the bottom of the hole.
Is oil added as required? Remove the breather from the left hand upright to add oil.
Sign off on the oil level check
Unlock efficiency
with MaintainX CoPilot
MaintainX CoPilot is your expert colleague, on call 24/7, helping your team find the answers they need to keep equipment running.
Reduce Unplanned Downtime
Ensure your team follows consistent procedures to minimize equipment failures and costly delays.
Maximize Asset Availability
Keep your assets running longer and more reliably, with standardized maintenance workflows from OEM manuals.
Lower Maintenance Costs
Turn any technician into an expert to streamline operations, maintain more assets, and reduce overall costs.
Thousands of companies manage their assets with MaintainX

'%3e%3cpath%20fill='url(%23b)'%20d='M66.008%2080.068c-5.084-.786-9.763-3.834-12.442-8.68a16.942%2016.942%200%200%201-1.87-5.18c1.096.19%202.203.476%203.298.87%206.525%202.333%2010.836%207.68%2011.014%2012.99ZM51.47%2061.576c.488-5.524%203.62-10.716%208.847-13.597a17.132%2017.132%200%200%201%2011.335-1.882c-.798%208.145-7.43%2014.848-16.038%2015.599-1.417.119-2.799.07-4.144-.12Zm28.564-11.478a17.513%2017.513%200%200%201%203.727%204.62c4.608%208.335%201.584%2018.813-6.75%2023.409a16.988%2016.988%200%200%201-4.359%201.679%2019.624%2019.624%200%200%201-3.977-12.776c.346-7.561%204.942-13.931%2011.36-16.932Z'/%3e%3cpath%20fill='%23110F0D'%20fill-rule='evenodd'%20d='M142.831%2048.324h4.977V77.03h-4.977V48.324Zm27.278%2013.002c.322%201.048.453%202.263.453%203.62v12.073h-4.787V66.208c0-.75-.047-1.572-.154-2.143-.453-2.382-1.822-3.572-4.215-3.572-2.31%200-3.882%201.274-4.43%203.476-.143.596-.226%201.405-.226%202.25v10.8h-4.787V56.623h4.477v2.989c1.536-2.5%203.906-3.43%206.371-3.43%203.488%200%206.263%201.68%207.298%205.144Zm24.636%207.323c0%203.882-2.358%206.525-5.763%207.727-1.298.453-2.632.643-4.62.643h-10.169V48.324h9.085c1.691%200%203.156.143%204.049.38%203.465.93%205.727%203.68%205.727%207.335%200%202.441-.81%204.156-2.762%205.644%202.905%201.417%204.453%203.727%204.453%206.966Zm-15.634-8.656h4.584c1.024%200%201.917-.143%202.536-.417%201.215-.548%201.905-1.608%201.905-3.167%200-1.548-.643-2.572-1.845-3.132-.691-.31-1.762-.452-2.763-.452h-4.417v7.168Zm10.716%208.465c0-1.536-.893-3.37-3.227-3.893-.428-.095-1.036-.143-1.571-.143h-5.918v8.085h5.501c.56%200%201.429-.048%201.953-.167%201.94-.453%203.262-1.846%203.262-3.882Zm47.747-11.847-8.097%2020.408h-4.429l-8.109-20.408h5.191l5.192%2014.574%205.108-14.574h5.144Zm-20.218%2010.002c0%20.69-.036%201.262-.155%201.94h-15.943c.631%202.87%202.714%204.728%205.882%204.728%202.131%200%203.607-.882%204.703-2.525h4.87c-1.762%204.144-5.204%206.692-9.657%206.692-6.084%200-10.537-4.858-10.537-10.49%200-6.108%204.524-10.776%2010.335-10.776%206.239%200%2010.442%204.954%2010.502%2010.43Zm-4.763-1.405c-.333-2.846-2.643-4.858-5.691-4.858-2.894%200-5.287%201.929-5.621%204.858h11.312Zm-72.667%203.44c0%204.787-3.287%208.371-9.419%208.371H119.363V64.66c-1.917.274-3.87.69-5.811%201.238l4.537%2011.121h-5.418l-3.596-9.585c-5.144%202.084-10.085%205.216-14.217%209.585h-4.786L101.8%2048.312h4.56l5.68%2013.883a44.112%2044.112%200%200%201%207.323-1.774V48.312h9.084c1.703%200%203.156.143%204.061.393%203.453.929%205.727%203.667%205.727%207.323%200%201.917-.738%204.179-2.81%205.691%203.06%201.56%204.501%204.025%204.501%206.93Zm-15.634-8.667a62.664%2062.664%200%200%201%202.06-.036c1.703.012%203.239.131%204.608.37%201.441-.549%202.357-1.727%202.357-3.537%200-1.941-.881-3.144-2.488-3.667-.548-.18-1.358-.286-2.322-.286h-4.215v7.156Zm-16.55%203.905-3.715-9.894-6.394%2016.502c2.833-2.595%206.263-4.858%2010.109-6.608Zm27.254%204.74c0-2.775-3.131-4.347-8.513-4.418-.715%200-1.441.011-2.191.047v8.252h5.918c2.548%200%204.786-1.37%204.786-3.882Z'%20clip-rule='evenodd'/%3e%3c/g%3e%3cdefs%3e%3clinearGradient%20id='b'%20x1='51.47'%20x2='85.916'%20y1='62.946'%20y2='62.946'%20gradientUnits='userSpaceOnUse'%3e%3cstop%20stop-color='%23CD9F28'/%3e%3cstop%20offset='1'%20stop-color='%23ECD80B'/%3e%3c/linearGradient%3e%3cclipPath%20id='a'%3e%3cpath%20fill='%23fff'%20d='M51.47%2045.728h186.104V80.14H51.47z'/%3e%3c/clipPath%3e%3c/defs%3e%3c/svg%3e)


More from Case


Explore Other Assets


© 2026 MaintainX. All rights reserved.