


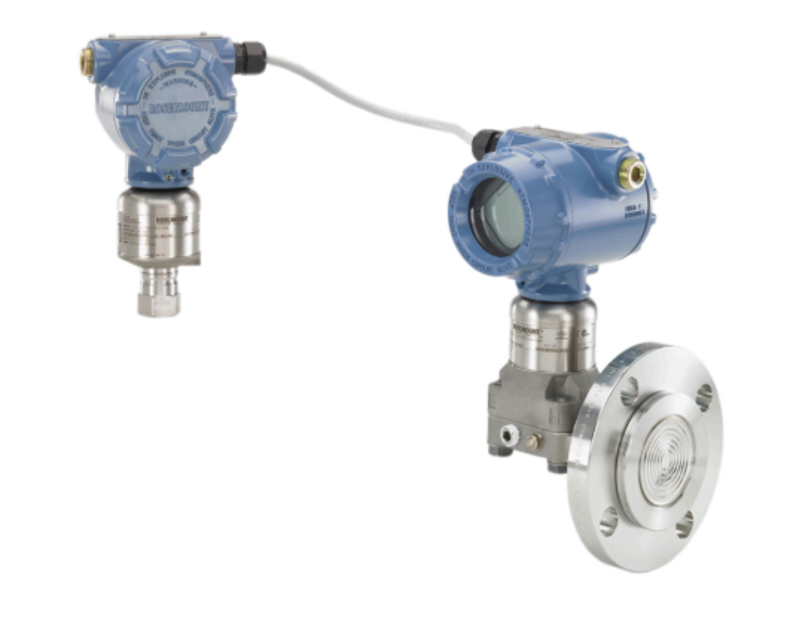
Rosemount Electronic Remote Sensor 3051S2
Need answers fast?
Explore the manual using AI.
Turn manuals into instant answers
with your AI-powered assistantTurn manuals into instant answers
with your AI-powered assistant
Complete asset maintenance, one click away
Get instant access to all the maintenance information you need. Empower technicians to perform preventive maintenance with asset packages, ready to use right out of the box.

Documents & Manuals
Find all the essential guides in one place.
 Tensioning Guide
- Belt-diagram
- C-120 pulleys
+ 13 more

Work Order Templates
Pre-built workflows to keep your asset running smoothly.
- Daily Electrical System Inspection
- Replace Roller and Pulley
- Install Engine B-120
+ 29 more

Procedures
Integrate maintenance plans directly into your work orders.
- Motion Industries
- Applied Industrial Technologies
- Electrical Brothers
+ 5 more

Parts
Access the parts list for your equipment in MaintainX.
- Drive Motor
- B2 Rollers
- Tensioning System
+ 40 more
Rosemount Electronic Remote Sensor 3051S2
Create an account to install this asset package.
Maintenance Plans for Rosemount Electronic Remote Sensor Model 3051S2
Integrate maintenance plans directly into your work orders in MaintainX.
Zero Trim Adjustment
Warning: This procedure requires trained personnel!
Is the pressure sensor within three percent of the true zero?
If not, perform a lower sensor trim instead of a zero trim.
Vent the PHI/PLO sensor to atmosphere.
Wait for the PHI/PLO pressure measurement to stabilize.
Using AMS Device Manager or a communication device, perform the zero trim function on the PHI/PLO sensor.
Sign off on the zero trim adjustment

Sensor Trims Adjustment
Sensor trim is a two-point sensor calibration where lower and upper end-point pressures are applied and all readings are linearized between the two points.
Always perform a lower sensor trim first to establish the correct offset. The upper sensor trim provides a slope correction to the sensor characterization curve based on the lower sensor trim value.
Note: Use a pressure reference source that is at least three times more accurate than the actual transmitter sensor and allow the input pressure to stabilize for a minimum of 10 seconds prior to entering any values.
To perform a two-point sensor trim on the PHI or PLO sensor:
Procedure
1. Launch the Lower Sensor Trim function using AMS Device Manager or a communication device.
2. Physically apply the desired low pressure value to the PHI/PLO sensor using a reference pressure device such as a high-accuracy dead-weight tester.
3. Wait for the PHI/PLO pressure measurement to stabilize.
4. When prompted by AMS Device Manager or the communication device, define the amount of pressure that was applied to the PHI/PLO sensor.
Electronic Remote Sensor Calibration
This section contains information on commissioning and operating a 3051S Electronic Remote Sensor (ERS) System.
Instructions for performing operation and maintenance functions are given for a communication device. For convenience, communication device Fast Key sequences are labeled “Fast Keys” for each software function below the appropriate headings.
Calibrating a Rosemount ERS System involves the following tasks:
Procedure
1. Configure process variables.
See Basic setup for additional details on configuring the following:
• Units of measure
• Damping
• Variable mapping
SuperModule Removal
NOTICE: To prevent damage to the SuperModule cable, remove the feature board or terminal block assembly with the connector before separating the SuperModule from the housing assembly.
Loosen the housing rotation set screw by one full turn with a 3/32-in. hex wrench.
Unscrew the housing from the SuperModule.
Sign off on the SuperModule removal
Terminal Block Removal
Warning: Ensure the power is off before starting the procedure
Location of the terminal block
Rosemount 3051S ERS primary screws loosened
Rosemount 3051S ERS primary terminal block removed
3051S ERS secondary screws loosened
3051S ERS secondary terminal block removed
SuperModule connector exposed
Sign off on the terminal block removal
Parts for Rosemount Electronic Remote Sensor 3051S2
Access the parts list for your equipment in MaintainX.
Rosemount O-Rings
03151-9040-0001
Rosemount O-Rings
03151-9040-0001
Rosemount O-Rings
03151-9040-0001
Unlock efficiency
with MaintainX CoPilot
MaintainX CoPilot is your expert colleague, on call 24/7, helping your team find the answers they need to keep equipment running.
Reduce Unplanned Downtime
Ensure your team follows consistent procedures to minimize equipment failures and costly delays.
Maximize Asset Availability
Keep your assets running longer and more reliably, with standardized maintenance workflows from OEM manuals.
Lower Maintenance Costs
Turn any technician into an expert to streamline operations, maintain more assets, and reduce overall costs.
Thousands of companies manage their assets with MaintainX

'%3e%3cpath%20fill='url(%23b)'%20d='M66.008%2080.068c-5.084-.786-9.763-3.834-12.442-8.68a16.942%2016.942%200%200%201-1.87-5.18c1.096.19%202.203.476%203.298.87%206.525%202.333%2010.836%207.68%2011.014%2012.99ZM51.47%2061.576c.488-5.524%203.62-10.716%208.847-13.597a17.132%2017.132%200%200%201%2011.335-1.882c-.798%208.145-7.43%2014.848-16.038%2015.599-1.417.119-2.799.07-4.144-.12Zm28.564-11.478a17.513%2017.513%200%200%201%203.727%204.62c4.608%208.335%201.584%2018.813-6.75%2023.409a16.988%2016.988%200%200%201-4.359%201.679%2019.624%2019.624%200%200%201-3.977-12.776c.346-7.561%204.942-13.931%2011.36-16.932Z'/%3e%3cpath%20fill='%23110F0D'%20fill-rule='evenodd'%20d='M142.831%2048.324h4.977V77.03h-4.977V48.324Zm27.278%2013.002c.322%201.048.453%202.263.453%203.62v12.073h-4.787V66.208c0-.75-.047-1.572-.154-2.143-.453-2.382-1.822-3.572-4.215-3.572-2.31%200-3.882%201.274-4.43%203.476-.143.596-.226%201.405-.226%202.25v10.8h-4.787V56.623h4.477v2.989c1.536-2.5%203.906-3.43%206.371-3.43%203.488%200%206.263%201.68%207.298%205.144Zm24.636%207.323c0%203.882-2.358%206.525-5.763%207.727-1.298.453-2.632.643-4.62.643h-10.169V48.324h9.085c1.691%200%203.156.143%204.049.38%203.465.93%205.727%203.68%205.727%207.335%200%202.441-.81%204.156-2.762%205.644%202.905%201.417%204.453%203.727%204.453%206.966Zm-15.634-8.656h4.584c1.024%200%201.917-.143%202.536-.417%201.215-.548%201.905-1.608%201.905-3.167%200-1.548-.643-2.572-1.845-3.132-.691-.31-1.762-.452-2.763-.452h-4.417v7.168Zm10.716%208.465c0-1.536-.893-3.37-3.227-3.893-.428-.095-1.036-.143-1.571-.143h-5.918v8.085h5.501c.56%200%201.429-.048%201.953-.167%201.94-.453%203.262-1.846%203.262-3.882Zm47.747-11.847-8.097%2020.408h-4.429l-8.109-20.408h5.191l5.192%2014.574%205.108-14.574h5.144Zm-20.218%2010.002c0%20.69-.036%201.262-.155%201.94h-15.943c.631%202.87%202.714%204.728%205.882%204.728%202.131%200%203.607-.882%204.703-2.525h4.87c-1.762%204.144-5.204%206.692-9.657%206.692-6.084%200-10.537-4.858-10.537-10.49%200-6.108%204.524-10.776%2010.335-10.776%206.239%200%2010.442%204.954%2010.502%2010.43Zm-4.763-1.405c-.333-2.846-2.643-4.858-5.691-4.858-2.894%200-5.287%201.929-5.621%204.858h11.312Zm-72.667%203.44c0%204.787-3.287%208.371-9.419%208.371H119.363V64.66c-1.917.274-3.87.69-5.811%201.238l4.537%2011.121h-5.418l-3.596-9.585c-5.144%202.084-10.085%205.216-14.217%209.585h-4.786L101.8%2048.312h4.56l5.68%2013.883a44.112%2044.112%200%200%201%207.323-1.774V48.312h9.084c1.703%200%203.156.143%204.061.393%203.453.929%205.727%203.667%205.727%207.323%200%201.917-.738%204.179-2.81%205.691%203.06%201.56%204.501%204.025%204.501%206.93Zm-15.634-8.667a62.664%2062.664%200%200%201%202.06-.036c1.703.012%203.239.131%204.608.37%201.441-.549%202.357-1.727%202.357-3.537%200-1.941-.881-3.144-2.488-3.667-.548-.18-1.358-.286-2.322-.286h-4.215v7.156Zm-16.55%203.905-3.715-9.894-6.394%2016.502c2.833-2.595%206.263-4.858%2010.109-6.608Zm27.254%204.74c0-2.775-3.131-4.347-8.513-4.418-.715%200-1.441.011-2.191.047v8.252h5.918c2.548%200%204.786-1.37%204.786-3.882Z'%20clip-rule='evenodd'/%3e%3c/g%3e%3cdefs%3e%3clinearGradient%20id='b'%20x1='51.47'%20x2='85.916'%20y1='62.946'%20y2='62.946'%20gradientUnits='userSpaceOnUse'%3e%3cstop%20stop-color='%23CD9F28'/%3e%3cstop%20offset='1'%20stop-color='%23ECD80B'/%3e%3c/linearGradient%3e%3cclipPath%20id='a'%3e%3cpath%20fill='%23fff'%20d='M51.47%2045.728h186.104V80.14H51.47z'/%3e%3c/clipPath%3e%3c/defs%3e%3c/svg%3e)


More from Rosemount
Explore Other Assets


© 2026 MaintainX. All rights reserved.