


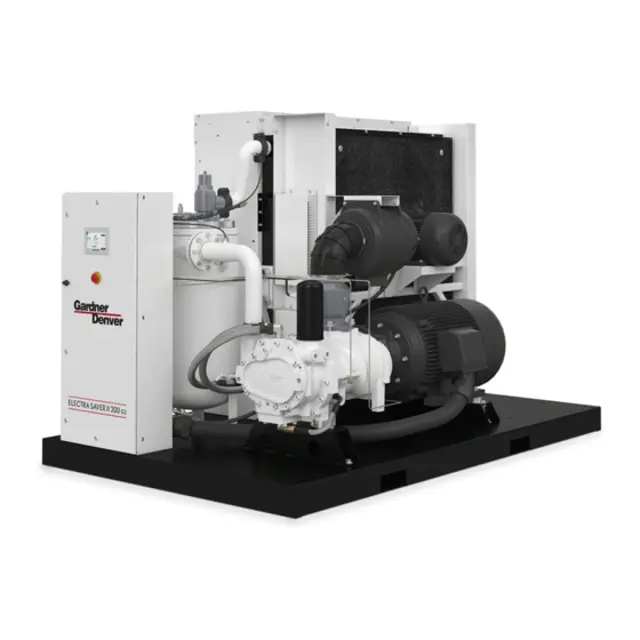
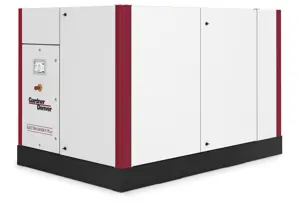
Gardner Denver Screw Air Compressor EBE_EH
Need answers fast?
Explore the manual using AI.
Turn manuals into instant answers
with your AI-powered assistantTurn manuals into instant answers
with your AI-powered assistant
Manual for Gardner Denver Screw Air Compressor EBE_EH
Complete asset maintenance, one click away
Get instant access to all the maintenance information you need. Empower technicians to perform preventive maintenance with asset packages, ready to use right out of the box.

Documents & Manuals
Find all the essential guides in one place.
 Tensioning Guide
- Belt-diagram
- C-120 pulleys
+ 13 more

Work Order Templates
Pre-built workflows to keep your asset running smoothly.
- Daily Electrical System Inspection
- Replace Roller and Pulley
- Install Engine B-120
+ 29 more

Procedures
Integrate maintenance plans directly into your work orders.
- Motion Industries
- Applied Industrial Technologies
- Electrical Brothers
+ 5 more

Parts
Access the parts list for your equipment in MaintainX.
- Drive Motor
- B2 Rollers
- Tensioning System
+ 40 more
Gardner Denver Screw Air Compressor EBE_EH
Create an account to install this asset package.
Maintenance Plans for Gardner Denver Screw Air Compressor Model EBE_EH
Integrate maintenance plans directly into your work orders in MaintainX.
Filter Element Life Maintenance
Warning: This maintenance check requires trained personnel with PPE!
Visual inspection indicates a rupture, crack or pin hole in the pleated media
Upload a photo of the filter element
Pressure drop through a filter with a freshly cleaned element
Pressure drop below three (3) inches (76 mm) of water with the compressor running at full load
Sign off on the filter element life maintenance

Standard Filter Element Life Maintenance
Warning: Do not oil this element. Do not wash in other cleaning fluids. Never operate unit without element. Never use elements that are damaged or ruptured. Never use elements that won’t seal. Keep spare elements on hand to reduce downtime.
Visual inspection indicates a rupture, crack or pin hole in the pleated media
Number of cleanings performed on the element
Is the element stored in a protected area free from damage, dirt and moisture?
Handle filter parts with care
Sign off on the filter element life maintenance
Oil Separator Maintenance
Warning: Ensure the unit is completely off and no air pressure is in the oil reservoir before starting the procedure
Is the 'CHANGE SEPARATOR' message displayed?
If the 'CHANGE SEPARATOR' message is displayed, the oil separator element requires changing
Disconnect, tag and lockout power supply to the starter
Power supply to the starter disconnected, tagged and locked out?
Remove screws holding the top plate to the separator housing. Lift the top plate from the separator housing
Top plate removed from the separator housing?
Lift the separator from the separator housing
Separator lifted from the separator housing?
Motor Lubrication
WARNING: Rotating machinery can cause injury or death. Open main disconnect, tag and lockout power supply to the starter before working on the electric motor.
Stop the unit
Disconnect, tag and lockout the unit from the power supply
Remove the relief plug and free hole of hardened grease
Wipe lubrication fitting clean and add grease with a hand–operated grease gun
Leave the relief plug temporarily off. Reconnect unit and run for about 20 minutes to expel the excess grease
Stop the unit. Replace the relief plug
Restart the unit
Sign off on the motor lubrication
100 Hourly Filter Element Service
Filter Element – The element should be serviced when inspection indicates an accumulation of dirt on the outside of the element. Clean every 100 to 500 operating hours depending on dust conditions. Inspect every few days until experience determines the proper time interval for servicing.
To Service:
1. Remove the element from the filter housing.
2. Blow off excess dirt with air nozzle. Direct air blast parallel to element pleats at a slight upward angle. Do not point air blast directly at the element.
3. Elements contaminated with dry dirt only:
(a) Mix a sufficient amount of warm water and household detergent to allow the element to be fully submerged.
(b) Place the element into the cleaning solution and allow to soak for five minutes. Agitate in solution for two more minutes. Elements contaminated with oil or greasy dirt deposits:
(a) Mix a sufficient amount of the following cleaning solution to allow the element to be fully submerged. To one gallon of lukewarm water add four tablespoons of mild house hold detergent and one–half teaspoon of trisodium phosphate. Mix well.
(b) Place element into cleaning solution and allow to soak for five minutes. Agitate in solution and allow to soak for five minutes. Agitate in solution for two minutes and remove.
Unlock efficiency
with MaintainX CoPilot
MaintainX CoPilot is your expert colleague, on call 24/7, helping your team find the answers they need to keep equipment running.
Reduce Unplanned Downtime
Ensure your team follows consistent procedures to minimize equipment failures and costly delays.
Maximize Asset Availability
Keep your assets running longer and more reliably, with standardized maintenance workflows from OEM manuals.
Lower Maintenance Costs
Turn any technician into an expert to streamline operations, maintain more assets, and reduce overall costs.
Thousands of companies manage their assets with MaintainX

'%3e%3cpath%20fill='url(%23b)'%20d='M66.008%2080.068c-5.084-.786-9.763-3.834-12.442-8.68a16.942%2016.942%200%200%201-1.87-5.18c1.096.19%202.203.476%203.298.87%206.525%202.333%2010.836%207.68%2011.014%2012.99ZM51.47%2061.576c.488-5.524%203.62-10.716%208.847-13.597a17.132%2017.132%200%200%201%2011.335-1.882c-.798%208.145-7.43%2014.848-16.038%2015.599-1.417.119-2.799.07-4.144-.12Zm28.564-11.478a17.513%2017.513%200%200%201%203.727%204.62c4.608%208.335%201.584%2018.813-6.75%2023.409a16.988%2016.988%200%200%201-4.359%201.679%2019.624%2019.624%200%200%201-3.977-12.776c.346-7.561%204.942-13.931%2011.36-16.932Z'/%3e%3cpath%20fill='%23110F0D'%20fill-rule='evenodd'%20d='M142.831%2048.324h4.977V77.03h-4.977V48.324Zm27.278%2013.002c.322%201.048.453%202.263.453%203.62v12.073h-4.787V66.208c0-.75-.047-1.572-.154-2.143-.453-2.382-1.822-3.572-4.215-3.572-2.31%200-3.882%201.274-4.43%203.476-.143.596-.226%201.405-.226%202.25v10.8h-4.787V56.623h4.477v2.989c1.536-2.5%203.906-3.43%206.371-3.43%203.488%200%206.263%201.68%207.298%205.144Zm24.636%207.323c0%203.882-2.358%206.525-5.763%207.727-1.298.453-2.632.643-4.62.643h-10.169V48.324h9.085c1.691%200%203.156.143%204.049.38%203.465.93%205.727%203.68%205.727%207.335%200%202.441-.81%204.156-2.762%205.644%202.905%201.417%204.453%203.727%204.453%206.966Zm-15.634-8.656h4.584c1.024%200%201.917-.143%202.536-.417%201.215-.548%201.905-1.608%201.905-3.167%200-1.548-.643-2.572-1.845-3.132-.691-.31-1.762-.452-2.763-.452h-4.417v7.168Zm10.716%208.465c0-1.536-.893-3.37-3.227-3.893-.428-.095-1.036-.143-1.571-.143h-5.918v8.085h5.501c.56%200%201.429-.048%201.953-.167%201.94-.453%203.262-1.846%203.262-3.882Zm47.747-11.847-8.097%2020.408h-4.429l-8.109-20.408h5.191l5.192%2014.574%205.108-14.574h5.144Zm-20.218%2010.002c0%20.69-.036%201.262-.155%201.94h-15.943c.631%202.87%202.714%204.728%205.882%204.728%202.131%200%203.607-.882%204.703-2.525h4.87c-1.762%204.144-5.204%206.692-9.657%206.692-6.084%200-10.537-4.858-10.537-10.49%200-6.108%204.524-10.776%2010.335-10.776%206.239%200%2010.442%204.954%2010.502%2010.43Zm-4.763-1.405c-.333-2.846-2.643-4.858-5.691-4.858-2.894%200-5.287%201.929-5.621%204.858h11.312Zm-72.667%203.44c0%204.787-3.287%208.371-9.419%208.371H119.363V64.66c-1.917.274-3.87.69-5.811%201.238l4.537%2011.121h-5.418l-3.596-9.585c-5.144%202.084-10.085%205.216-14.217%209.585h-4.786L101.8%2048.312h4.56l5.68%2013.883a44.112%2044.112%200%200%201%207.323-1.774V48.312h9.084c1.703%200%203.156.143%204.061.393%203.453.929%205.727%203.667%205.727%207.323%200%201.917-.738%204.179-2.81%205.691%203.06%201.56%204.501%204.025%204.501%206.93Zm-15.634-8.667a62.664%2062.664%200%200%201%202.06-.036c1.703.012%203.239.131%204.608.37%201.441-.549%202.357-1.727%202.357-3.537%200-1.941-.881-3.144-2.488-3.667-.548-.18-1.358-.286-2.322-.286h-4.215v7.156Zm-16.55%203.905-3.715-9.894-6.394%2016.502c2.833-2.595%206.263-4.858%2010.109-6.608Zm27.254%204.74c0-2.775-3.131-4.347-8.513-4.418-.715%200-1.441.011-2.191.047v8.252h5.918c2.548%200%204.786-1.37%204.786-3.882Z'%20clip-rule='evenodd'/%3e%3c/g%3e%3cdefs%3e%3clinearGradient%20id='b'%20x1='51.47'%20x2='85.916'%20y1='62.946'%20y2='62.946'%20gradientUnits='userSpaceOnUse'%3e%3cstop%20stop-color='%23CD9F28'/%3e%3cstop%20offset='1'%20stop-color='%23ECD80B'/%3e%3c/linearGradient%3e%3cclipPath%20id='a'%3e%3cpath%20fill='%23fff'%20d='M51.47%2045.728h186.104V80.14H51.47z'/%3e%3c/clipPath%3e%3c/defs%3e%3c/svg%3e)


More from Gardner Denver


Explore Other Assets


© 2026 MaintainX. All rights reserved.